# TPStreams Docs > Guides, API references, SDKs, and examples > to help you integrate TPStreams faster. This file contains all documentation content in a single document following the llmstxt.org standard. ## TPStreams AI Skill Equip your AI coding assistants (Codex, Cursor, Claude Code, etc.) with TPStreams domain knowledge and integration guides. ### Install Skill Run the following command in your terminal: npx skills@latest add https://github.com/testpress/streams-docs.git ### Works with Compatible with popular AI coding agents and tools. Claude Code Cursor Codex GitHub Copilot and more ### How to use Mention `/tpstreams-integration` in your prompts: 1 "Use /tpstreams-integration integrate to play videos in Flutter with offline downloads." 2 "Use /tpstreams-integration add webhook to handle video transcoding webhook events." 3 "Use /tpstreams-integration add logic for generating access tokens for video playback." ### LLM Endpoints Direct access to TPStreams documentation for LLMs. Resource URL Index llms.txt https://developer.tpstreams.com/llms.txt Full Documentation llms-full.txt https://developer.tpstreams.com/llms-full.txt The skill is automatically kept up to date with our latest documentation. No manual updates required — your agent always has the latest information. --- ## DRM Policies This guide explains Digital Rights Management (DRM) policies ### Default DRM Policies This table helps you choose the right security level for Digital Rights Management (DRM) on your videos. | Security Level | Widevine minimum security level | FairPlay minimum security level | Digital output | |--------------------------------|--------------------------------|---------------------------------|--------------------------------| | Highest | L1 (HW_SECURE_ALL) | N/A | Requires HDCP v2 or later | | High | L1 (HW_SECURE_ALL) | N/A | Requires HDCP v1 or later | | Medium | L3 (SW_SECURE_CRYPTO) | N/A | Requires HDCP v1 or later | | Low | L3 (SW_SECURE_CRYPTO) | N/A | Does not require HDCP | ### Supported browsers This table helps you understand which combinations of web browsers and security levels are supported for DRM. It covers both desktop and mobile browsers. #### Desktop | Desktop HTML5 Browsers | Highest | High | Medium | Low | |------------------------------|----------------------------------|----------------------------------|----------------------------------|----------------------------------| | Chrome | -- | -- | -- | ✅ | | Edge | -- | -- | -- | ✅ | | Firefox | -- | -- | -- | ✅ | | Safari | ✅ | ✅ | ✅ | ✅ | #### Mobile | Mobile | Highest | High | Medium | Low | |------------------------------|----------------------------------|----------------------------------|----------------------------------|----------------------------------| | Android sdk | ✅ | ✅ | ✅ | ✅ | | Chrome (Android) | -- | -- | -- | ✅ | | iOS (native) | ✅ | ✅ | ✅ | ✅ | | Safari | ✅ | ✅ | ✅ | ✅ | ### Screen Record blocking This guide explains how DRM (Digital Rights Management) prevents recording videos on different devices. DRM's effectiveness in blocking video recording isn't guaranteed, as it relies on your browser's Content Decryption Module (CDM), which can change with different versions #### Desktop Browsers | Desktop HTML5 Browsers | Highest | High | Medium | Low | |------------------------------|----------------------------------|----------------------------------|----------------------------------|----------------------------------| | Chrome | N/A | N/A | N/A | N/A | | Edge (MacOS) | N/A | N/A | --- | --- | | Edge (Windows) | N/A | N/A | N/A | -- | | Firefox | N/A | N/A | --- | --- | | Safari | ✓ | ✓ | ✓ | ✓ | #### Mobile Apps | Mobile Native | Highest | High | Medium | Low | |------------------------------|----------------------------------|----------------------------------|----------------------------------|----------------------------------| | Android | ✓ | ✓ | ✓ | ✓ | | iOS | ✓ | ✓ | ✓ | ✓ | #### Mobile Browsers | Browser | Highest | High | Medium | Low | |------------------------------|----------------------------------|----------------------------------|----------------------------------|----------------------------------| | Chrome (iOS) | ✓ | ✓ | ✓ | ✓ | | Chrome (Android) | N/A | N/A | N/A | --- | | Edge (Android) | N/A | N/A | N/A | --- | | Edge (iOS) | ✓ | ✓ | ✓ | ✓ | | Firefox (Android) | N/A | N/A | N/A | --- | | Firefox (iOS) | ✓ | ✓ | ✓ | ✓ | | Safari (iOS) | ✓ | ✓ | ✓ | ✓ | ### Preventing Screen Capture: #### 1. In Apps: - **Android Apps:** - We can prevent the screen capture in andriod app using our [Andriod SDK](../category/android-native-sdk) - **iOS Apps and Safari:** - Screen capture can be prevented in Native Flutter or Native App with our [IOS SDK](../category/ios-native-sdk) #### 2. Browsers: - **Mac Desktop/Laptop/Iphone:** - Screen capture prevention in Safari possible with Fairplay DRM. - **Windows, Linux, Mobiles:** - There's no way to completely block screen recording on desktop browsers like Chrome or Firefox because they only support Level 3 (L3) of Widevine DRM. to know more about you can find [here](./widevine-specs.md) ### Extra Protection: - **Adding Watermarks:** - We offer watermarks to mark your content as protected. you can find more information about [here](../video-embedding/watermarking.md) --- ## DRM Encryption (CBCS) DRM Encryption (CBCS) allows you to use a single set of encryption keys for both FairPlay and Widevine DRM. By this we can create a single set of encrypted media files and use them for both Widevine and FairPlay. ### Shaka Packager Command To encrypt your content using Shaka Packager, use the `cbcs` protection scheme and include both protection systems. To obtain the DRM Encryption Key, IV, and URI, please check [Obtaining DRM Encryption Keys (CBCS)](#obtaining-drm-encryption-keys-cbcs). ```bash packager \ in=input.mp4,stream=video,output=video.mp4 \ in=input.mp4,stream=audio,output=audio.mp4 \ --enable_raw_key_encryption \ --keys "label=:key_id=:key=:iv=" \ --protection_scheme cbcs \ --protection_systems Widevine,FairPlay \ --hls_key_uri \ --clear_lead 0 \ --hls_master_playlist_output video.m3u8 \ --mpd_output video.mpd ``` #### Field Definitions | Name | Type | Description | Required | | :--- | :--- | :--- | :--- | | **content_id** | string | A unique identifier for the content (must be a valid UUID). | Yes | | **key** | string | The 16-byte hex encryption key used for both DRM systems. | Yes | | **iv** | string | The 16-byte hex initialization vector. | Yes | | **HLS_URI** | string | The URI used for HLS/FairPlay (e.g., `skd://...`). | Yes | --- ### Obtaining DRM Encryption Keys (CBCS) This API returns encryption metadata compatible with both FairPlay and Widevine. #### Endpoint ```bash POST https://app.tpstreams.com/api/v1/{{org_code}}/drm_encryption_keys/ ``` #### Request Payload The request body must contain a base64 encoded JSON string and a security signature. | Name | Type | Description | Required | | :--- | :--- | :--- | :--- | | **org_code** | string | Your unique organization code. | Yes | | **request** | string | Base64 encoded JSON containing the `content_id`. | Yes | | **signature** | string | AES-CBC encrypted SHA1 hash of the request data. | Yes | ##### Sample Request Body ```json { "request": "eyJjb250ZW50X2lkIjogImNmNmMzMGRkNTBjMTQ5MmU4MjM0NGVhM2UxMzlZGExZCJ9", "signature": "JzwEMcwgf4Tp1b6o5x0HbM08o7PuXA6XnwTmWeHF0g4=" } ``` #### Response ```json { "content_id": "cf6c30dd50c1492e82344ea3e139da1d", "key": "3ab60de900d64edf9cb25a76f81794e6", "iv": "f70bce4094fd4612abac60d9809c5b0c", "uri": "skd://e5573f8bb8ac47ea839a65beae73263d" } ``` --- ### Generating the Request Payload (Python) Use the following Python script to generate the required `request` and `signature` fields. You will need your organization's **AES Signing Key** and **IV** (provided in your dashboard). ```python import base64 import binascii import hashlib import json from Cryptodome.Cipher import AES from Cryptodome.Util.Padding import pad def generate_signature(data, key, iv): hash = hashlib.sha1(data.encode()).digest() cipher = AES.new( binascii.unhexlify(key), AES.MODE_CBC, binascii.unhexlify(iv), ) padded_hash = pad(hash, AES.block_size, style="pkcs7") signature = cipher.encrypt(padded_hash) return base64.b64encode(signature).decode() key = "xxxx" # AES Signing key iv = "yyy" # AES Signing iv data = { "content_id": "cf6c30dd50c1492e82344ea3e139da1d" } data = json.dumps(data, separators=(',', ':')) signature = generate_signature(data, key, iv) result = base64.urlsafe_b64encode(data.encode()).decode() post_data = { "request": result, "signature": signature } ``` --- ## Fairplay Encryption This section provides an introduction to Fairplay Encryption, explaining its purpose as a DRM (Digital Rights Management) technology used to secure content delivery on Apple platforms. ### Shaka Packager Command : To encrypt your content, you can utilize Shaka Packager by running the following command : To obtain the FairPlay Encryption Key, IV, and URI, please check this [Fairplay Encrption Keys](#obtain-fairplay-encryption-keys) ```bash packager \ in=https://static.testpress.in/BigBuckBunny.mp4,stream=audio,output=audio.mp4 \ in=https://static.testpress.in/BigBuckBunny.mp4,stream=video,output=h264_360p.mp4 \ --enable_raw_key_encryption \ --keys "label=:key_id=:key=:iv=" \ --protection_scheme cbcs \ --protection_systems Fairplay \ --hls_key_uri \ --clear_lead 0 \ --hls_master_playlist_output video.m3u8 ``` **Fields** | Name | Type | Description | Required | | --------------- | ------------ | -------------------------------------------------------- | --------- | | content_id | string | The unique identifier for the content (Should be a random UUID generated you. This UUID will be used for getting licenses for that video.) | Yes | | key | string | The key used for Fairplay encryption . Check [Fairplay Encrption Keys](#obtain-fairplay-encryption-keys) for how to obtain this key. | Yes | | IV | string | The initialization vector (IV) for Fairplay encryption . Check [Fairplay Encrption Keys](#obtain-fairplay-encryption-keys) for how to obtain this IV. | Yes | | HLS_URI | Link | HLS_URI for encrypted content using FairPlay on Apple devicesendpoint Check [Fairplay Encrption Keys](#obtain-fairplay-encryption-keys) for how to obtain this HLS_URI. | Yes | ### Obtain FairPlay Encryption Keys: This API allows users to obtain a FairPlay encryption key. It provides the necessary functionality to acquire the encryption key for ensuring secure content delivery on Apple's platforms. ```bash POST: https://app.tpstreams.com/api/v1/{{org_code}}/fairplay_key/ ``` **Fields** | Name | Type | Description | Required | | --------------- | ------------ | -------------------------------------------------------- | --------- | | org_code | string | The organization code for API endpoint | Yes | | request body | string | You need to include the request body, which contains both request and signature data. You can refer below for instructions on how to generate it | Yes | To obtain the request body please check this [Generating Request Body](#generating-request-body) sample request body: ``` { "request": "eyJjb250ZW50X2lkIjoiY2Y2YzMwZGQ1MGMxNDkyZTgyMzQ0ZWEzZTEzOWRhMWQifQ==", "signature": "NsBcxxchrA7tFw/O86SCM5hwiM6Np/+JnZgjlV0vRyo=" } ``` Response ```json { "iv": "f70bce4094fd4612abac60d9809c5b0c", "key": "3ab60de900d64edf9cb25a76f81794e6", "uri": "skd://e5573f8bb8ac47ea839a65beae73263d", } ``` ### Generating Request Body: This step requires your secret key and initialization vector (IV) . you can obtain the signature field by performing the following steps in Python ```python import base64 import binascii import hashlib import json from Cryptodome.Cipher import AES from Cryptodome.Util.Padding import pad def generate_signature(data, key, iv): hash = hashlib.sha1(data.encode()).digest() cipher = AES.new( binascii.unhexlify(key), AES.MODE_CBC, binascii.unhexlify(iv), ) padded_hash = pad(hash, AES.block_size, style="pkcs7") signature = cipher.encrypt(padded_hash) return base64.b64encode(signature).decode() key = "xxxx" # AES Signing key iv = "yyy" # AES Signing iv data = { "content_id": "cf6c30dd50c1492e82344ea3e139da1d" } data = json.dumps(data, separators=(',', ':')) signature = generate_signature(data, key, iv) result = base64.urlsafe_b64encode(data.encode()) post_data = { "request": result, "signature": signature } ``` Response ```bash { 'request': 'eyJjb250ZW50X2lkIjoiY2Y2YzMwZGQ1MGMxNDkyZTgyMzQ0ZWEzZTEzOWRhMWQifQ==', 'signature': 'JzwEMcwgf4Tp1b6o5x0HbM08o7PuXA6XnwTmWeHF0g4=' } ``` Check out this repository for encrypting a video with a FairPlay license [DRM Video Processing](https://github.com/testpress/drm-video-processing/) --- ## Widevine Encryption Shaka Packager is used for encrypting content and offers seamless integration with Widevine, making it a popular choice for ensuring secure delivery through the Widevine DRM technology. [Shaka Packager](https://github.com/shaka-project/shaka-packager) ### Shaka Packager Command : To encrypt your content, you can utilize Shaka Packager by running the following command : ```bash packager \ in=https://static.testpress.in/BigBuckBunny.mp4,stream=audio,output=audio.mp4 \ in=https://static.testpress.in/BigBuckBunny.mp4,stream=video,output=h264_360p.mp4 \ --enable_widevine_encryption \ --key_server_url https://app.tpstreams.com/api/v1//widevine_key/ \ --content_id \ --signer testpress \ --aes_signing_key \ --aes_signing_iv \ --mpd_output video.mpd ``` **Fields** | Name | Type | Description | Required | | --------------- | ------------ | -------------------------------------------------------- | --------- | | org_code | string | The organization code for API endpoint | Yes | | content_id | string | The unique identifier for the content (Should be a random UUID generated you. This UUID will be used for getting licenses for that video.) | Yes | | WIDEVINE_AES_KEY | string | The AES key used for Widevine encryption | Yes | | WIDEVINE_IV | string | The initialization vector (IV) for Widevine encryption | Yes | :::important WIDEWINE_AES_KEY , WIDEWINE_IV and org_code will be provided by us. ::: You can retrieve the organization code and DRM keys by making a GET request to the API. [Organization](https://developer.tpstreams.com/docs/server-api/organizations) Check out this repository for encrypting a video with a Widevine license [DRM Video Processing](https://github.com/testpress/drm-video-processing/) --- ## FairPlay Configuration Through FairPlay Configuration, you can specify the desired FairPlay license specification within the license request. This API requires [encoded_data](#generate-encoded-data) in the query param for authentication. ```bash POST: https://app.tpstreams.com/api/v1//drm_license/?data=/ ``` **Fields** | Name | Type | Description | Required | | ---------- | ------ | ---------------------------------------------------------- | -------- | | spc | string | Server Playback Context (SPC) — the key message from the player, typically base64-encoded. | Yes | | fairplay | json | See the FairPlay table below for available fields. | No | **FairPlay** +---------------------------------------------------+------------------------------------------------------+ | **Name** | **Description** | +---------------------------------------------------+------------------------------------------------------+ | lease_duration_seconds (optional) | How long a streaming (online) license is valid (seconds). Default: 5 hours. | +---------------------------------------------------+------------------------------------------------------+ | rental_duration_seconds (optional) | How long offline licenses remain valid (seconds). Default: 30 days. | +---------------------------------------------------+------------------------------------------------------+ **Sample Payload:** ```json { "spc": "base64EncodedSPCFromPlayer", "fairplay": { "lease_duration_seconds": 1800, "rental_duration_seconds": 86400 } } ``` You can obtain the encoded data by performing the following steps in Python: #### Generate Encoded Data ```python import base64 import binascii import hashlib import json from Cryptodome.Cipher import AES from Cryptodome.Util.Padding import pad encoded_content_data = generate_content_data() signature = generate_signature(encoded_content_data) data = {"content_data": encoded_content_data, "signature": signature} data = json.dumps(data, separators=(',', ':')) encoded_data = base64.urlsafe_b64encode(data).decode() ``` To generate encoded data you need content data [Generating Content Data](#generating-content-data) and [Generate Signature](#generating-signature). #### Generating Content Data You can obtain the content data by performing the following steps in Python: ```python import json import base64 def generate_content_data(content_id, download=False, drm_type="fairplay"): data = { "content_id": content_id, "download": download, "drm_type": drm_type, } data_str = json.dumps(data, separators=(',', ':')) return base64.urlsafe_b64encode(data_str.encode()).decode() ``` #### Generating Signature You can obtain the signature field by performing the following steps in Python: ```python import base64 import binascii import hashlib import json from Cryptodome.Cipher import AES from Cryptodome.Util.Padding import pad def generate_signature(data, key, iv): hash = hashlib.sha1(data.encode()).digest() cipher = AES.new( binascii.unhexlify(key), AES.MODE_CBC, binascii.unhexlify(iv), ) padded_hash = pad(hash, AES.block_size, style="pkcs7") signature = cipher.encrypt(padded_hash) return base64.b64encode(signature).decode() key = "xxxx" # AES Signing key iv = "yyy" # AES Signing iv encoded_content_data = generate_content_data("cf6c30dd50c1492e82344ea3e139da1d") signature = generate_signature(encoded_content_data, key, iv) ``` **Parameters** | Name | Type | Description | Required | | ----------------- | ------ | --------------------------------------------------------------------------- | -------- | | org_code | string | The organization code for API endpoint | Yes | | content_id | string | The unique identifier for the content (UUID used when encrypting the video). | Yes | | AES_SIGNING_KEY | string | The AES key used for signing the content data | Yes | | AES_SIGNING_IV | string | The initialization vector (IV) for signing | Yes | :::important AES_SIGNING_KEY, AES_SIGNING_IV and org_code will be provided by us. You can retrieve the organization code and DRM keys by making a GET request to the API. [Organization](../server-api/organizations.md) ::: **Security Considerations:** The recommendation is to invoke the DRM license endpoint on the server, rather than on the client. This precaution is taken because passing the license configuration and calling it from the client could expose configurations to users. --- ## DRM Service DRM (Digital Rights Management) is a technology that enables content creators and distributors to safeguard their media content on the TP Streams system, ensuring that only authorized users have access during processing and delivery. It prevents unauthorized copying and distribution, maintaining content security and protecting ownership rights. Currently, there are two major DRM providers: - Widevine by Google: This DRM solution is used for Windows, Linux, and Android devices, ensuring content protection and security on these platforms. - FairPlay by Apple: FairPlay is Apple's DRM technology specifically designed for Mac and iOS devices, safeguarding media content and maintaining copyright protection for users of these devices. DRM Service consists of two parts - Encrypting the content - Getting license to playback the content (Widevine and FairPlay) --- ## Widevine Configuration Through Widevine Configuration , we can specify the desired Widevine license specification within the license request. This API requires [encoded_data](#generate-encoded-data) in query param for authentication. ```bash POST: https://app.tpstreams.com/api/v1//drm_license/?data=/ ``` **Fields** | Name | Type | Description | Required | | -------------- | ------ | ------------------------------------------------------ | -------- | | player_payload | string | Player license key message encoded into base64 String. | Yes | | widevine | json | See the Widevine table below for available fields. | No | To learn more about [Widevine parameter](/docs/drm-service/widevine-specs) **Widevine** +---------------------------------------------------+------------------------------------------------------+ | **Name** | **Description** | +---------------------------------------------------+------------------------------------------------------+ | content_key_specs.track_type | A track type definition, Options are | | | - AUDIO - audio tracks | | | - SD - 576p or less | | | - HD - 720p, 1080p | | | - UHD1 - 4K | | | - UHD2 - 8K | +---------------------------------------------------+------------------------------------------------------+ | content_key_specs.security_level | Security level for content key specs, Default = 1. | | | | | | - 1 - Software-based whitebox crypto is | | | required. (SW_SECURE_CRYPTO). | | | - 2 - Software crypto and an obfuscated | | | decoder is required. (SW_SECURE_DECODE). | | | - 3 - Key material and crypto operations | | | must be performed within a hardware- | | | backed trusted execution environment. | | | (HW_SECURE_CRYPTO). | | | - 4 - Crypto and decoding of content | | | must be performed within a hardware- | | | backed trusted execution environment. | | | (HW_SECURE_DECODE). | | | - 5 - Crypto, decoding, and all handling | | | of media (compressed and uncompressed) | | | must be handled within a hardware- | | | backed trusted execution environment. | | | (HW_SECURE_ALL) | +---------------------------------------------------+------------------------------------------------------+ | content_key_specs.required_output_protection.hdcp | Output protection options for HDCP | | | Options: | | | - HDCP_NONE | | | - HDCP_V1 | | | - HDCP_V2 | | | - HDCP_V2_1 | | | - HDCP_V2_2 | | | - HDCP_V2_3 | | | - HDCP_NO_DIGITAL_OUTPUT | +---------------------------------------------------+------------------------------------------------------+ | license_duration_seconds (optional) | How long the license is valid (seconds). | | | Default: 15 days (1,296,000 seconds). | +---------------------------------------------------+------------------------------------------------------+ | rental_duration_seconds (optional) | Rental/offline window (seconds). | | | Default: 15 days (1,296,000 seconds). | +---------------------------------------------------+------------------------------------------------------+ **Sample Payload:** ```json { "player_payload": keyMessageInbase64, "widevine": { "license_duration_seconds": 3600, "rental_duration_seconds": 86400, "content_key_specs": [ {'track_type': 'SD', 'security_level': 1, 'required_output_protection': {'hdcp': 'HDCP_V1'}}, {'track_type': 'HD', 'security_level': 1, 'required_output_protection': {'hdcp': 'HDCP_V1'}}, {'track_type': 'UHD1', 'security_level': 1, 'required_output_protection': {'hdcp': 'HDCP_V1'}}, {'track_type': 'UHD2', 'security_level': 1, 'required_output_protection': {'hdcp': 'HDCP_V1'}}, {'track_type': 'AUDIO', 'security_level': 1, 'required_output_protection': {'hdcp': 'HDCP_V1'}} ] } } ``` You can obtain the Encoded data by performing the following steps in Python: #### Generate Encoded Data ```python import base64 import binascii import hashlib import json from Cryptodome.Cipher import AES from Cryptodome.Util.Padding import pad encoded_content_data = generate_content_data() signature = generate_signature(encoded_content_data) data = {"content_data": encoded_content_data, "signature": signature} data = json.dumps(data, separators=(',', ':')) encoded_data = base64.urlsafe_b64encode(data) ``` To generate encoded data you need to fetch content data [Generating Content Data](#generating-content-data) and signature [Generate Signature](#generating-signature) #### Generating Content Data: You can obtain the request field by performing the following steps in Python: ```python import json import base64 def generate_content_data(content_id): data = { "content_id": content_id, "download": true/false, "drm_type": "widevine/fairplay" } data = json.dumps(data, separators=(',', ':')) return base64.urlsafe_b64encode(data.encode()) # The result will be eyJjb250ZW50X2lkIjoiY2Y2YzMwZGQ1MGMxNDkyZTgyMzQ0ZWEzZTEzOWRhMWQifQ== ``` #### Generating Signature: You can obtain the signature field by performing the following steps in Python: ```python import base64 import binascii import hashlib import json from Cryptodome.Cipher import AES from Cryptodome.Util.Padding import pad def generate_signature(data, key, iv): hash = hashlib.sha1(data.encode()).digest() cipher = AES.new( binascii.unhexlify(key), AES.MODE_CBC, binascii.unhexlify(iv), ) padded_hash = pad(hash, AES.block_size, style="pkcs7") signature = cipher.encrypt(padded_hash) return base64.b64encode(signature).decode() key = "xxxx" # AES Signing key iv = "yyy" # AES Signing iv data = { "content_id": "cf6c30dd50c1492e82344ea3e139da1d" } data = json.dumps(data, separators=(',', ':')) signature = generate_signature(data, key, iv) ``` **Fields** | Name | Type | Description | Required | | --------------- | ------------ | -------------------------------------------------------- | --------- | | org_code | string | The organization code for API endpoint | Yes | | content_id | string | The unique identifier for the content (Should be a random UUID generated you. This UUID will be used for getting licenses for that video.) | Yes | | AES_SIGNING_KEY | string | The AES key used for Widevine encryption | Yes | | AES_SIGNING_IV | string | The initialization vector (IV) for Widevine encryption | Yes | :::important AES_SIGNING_KEY , AES_SIGNING_IV and org_code will be provided by us. You can retrieve the organization code and DRM keys by making a GET request to the API. [Organization](../server-api/organizations.md) **Security Considerations:** The recommendation is to invoke the DRM license endpoint on the server, rather than on the client. This precaution is taken because passing the License configuration and calling it from the client could expose configurations to users. --- ## Widevine Specs Google's Widevine DRM system defines three different security levels. | Widevine Security Level | Description | Device Type | |-------------------------|-------------|-------------| | L1 | Video Decryption & Processing is performed in Trusted Execution Environment (TEE) | Most Modern Android Devices | | L2 | Video Decryption occurs in TEE, but video processing occurs outside TEE | - | | L3 | Does not have a TEE, may include hardware cryptographic engine | Old and budget Android devices | ### Client security level (`content_key_specs.security_level`) The table below illustrates the general mapping between the EME security level(content_key_specs.security_level) definitions and Widevine device robustness levels. | Definition | EME Level(content_key_specs.security_level) | Widevine Device Security Level | |----------------------|-----------|--------------------------------| | SW_SECURE_CRYPTO | 1 | L3 | | SW_SECURE_DECODE | 2 | L3 | | HW_SECURE_CRYPTO | 3 | L2 | | HW_SECURE_DECODE | 4 | L1 | | HW_SECURE_ALL | 5 | L1 | :::important **Note**: Desktop browsers support only L3, So you will need to specify security_level=1 . ::: ### Track type (`content_key_specs.track_type`) | Track Type | Definition | |------------|------------------| | AUDIO | Audio tracks | | SD | 576p or less | | HD | 720p, 1080p | | UHD1 | 4K | | UHD2 | 8K | ### HDCP Parameter Table (`content_key_specs.required_output_protection.hdcp`) HDCP stands for High-bandwidth Digital Content Protection. Its primary purpose is to safeguard digital copyrighted content as it moves from one device to your TV, typically using HDMI, DVI, or DisplayPort connections | HDCP Parameter | WV Security Level (applies to) | Description | |-----------------------|--------------------------------|------------------------------------------------| | HDCP_NONE | L3 | HDCP not specified | | HDCP_V1 | L1 | Enforce HDCP 1.x Playback not allowed if Client does not report HDCP 1.x or better. | | HDCP_V2 | L1 | Enforce HDCP 2.0 Playback not allowed if Client does not report HDCP 2.0 or better. | | HDCP_V2_1 | L1 | Enforce HDCP 2.1 Playback not allowed if Client does not report HDCP 2.1 or better. | | HDCP_V2_2 | L1 | Enforce HDCP 2.2 Playback not allowed if Client does not report HDCP 2.2 or better. | | HDCP_V2_3 | L1 | Enforce HDCP 2.3 Playback not allowed if Client does not report HDCP 2.3 or better. | | HDCP_NO_DIGITAL_OUTPUT| L1 | No digital output allowed, including HDCP. Internal display only. | --- ## Language Codes | language name | language_code | |-------------------------------------------------|-------| | Abkhazian | ab | | Afar | aa | | Afrikaans | af | | Akan | ak | | Albanian | sq | | Amharic | am | | Arabic | ar | | Aragonese | an | | Armenian | hy | | Assamese | as | | Avaric | av | | Avestan | ae | | Aymara | ay | | Azerbaijani | az | | Bambara | bm | | Bashkir | ba | | Basque | eu | | Belarusian | be | | Bengali | bn | | Bislama | bi | | Bosnian | bs | | Breton | br | | Bulgarian | bg | | Burmese | my | | Catalan, Valencian | ca | | Chamorro | ch | | Chechen | ce | | Chichewa, Chewa, Nyanja | ny | | Chinese | zh | | Church Slavonic, Old Slavonic, Old Church Slavonic | cu | | Chuvash | cv | | Cornish | kw | | Corsican | co | | Cree | cr | | Croatian | hr | | Czech | cs | | Danish | da | | Divehi, Dhivehi, Maldivian | dv | | Dutch, Flemish | nl | | Dzongkha | dz | | English | en | | Esperanto | eo | | Estonian | et | | Ewe | ee | | Faroese | fo | | Fijian | fj | | Finnish | fi | | French | fr | | Western Frisian | fy | | Fulah | ff | | Gaelic, Scottish Gaelic | gd | | Galician | gl | | Ganda | lg | | Georgian | ka | | German | de | | Greek, Modern (1453–) | el | | Kalaallisut, Greenlandic | kl | | Guarani | gn | | Gujarati | gu | | Haitian, Haitian Creole | ht | | Hausa | ha | | Hebrew | he | | Herero | hz | | Hindi | hi | | Hiri Motu | ho | | Hungarian | hu | | Icelandic | is | | Ido | io | | Igbo | ig | | Indonesian | id | | Interlingua (International Auxiliary Language Association) | ia | | Interlingue, Occidental | ie | | Inuktitut | iu | | Inupiaq | ik | | Irish | ga | | Italian | it | | Japanese | ja | | Javanese | jv | | Kannada | kn | | Kanuri | kr | | Kashmiri | ks | | Kazakh | kk | | Central Khmer | km | | Kikuyu, Gikuyu | ki | | Kinyarwanda | rw | | Kirghiz, Kyrgyz | ky | | Komi | kv | | Kongo | kg | | Korean | ko | | Kuanyama, Kwanyama | kj | | Kurdish | ku | | Lao | lo | | Latin | la | | Latvian | lv | | Limburgan, Limburger, Limburgish | li | | Lingala | ln | | Lithuanian | lt | | Luba-Katanga | lu | | Luxembourgish, Letzeburgesch | lb | | Macedonian | mk | | Malagasy | mg | | Malay | ms | | Malayalam | ml | | Maltese | mt | | Manx | gv | | Maori | mi | | Marathi | mr | | Marshallese | mh | | Mongolian | mn | | Nauru | na | | Navajo, Navaho | nv | | North Ndebele | nd | | South Ndebele | nr | | Ndonga | ng | | Nepali | ne | | Norwegian | no | | Norwegian Bokmål | nb | | Norwegian Nynorsk | nn | | Sichuan Yi, Nuosu | ii | | Occitan | oc | | Ojibwa | oj | | Oriya | or | | Oromo | om | | Ossetian, Ossetic | os | | Pali | pi | | Pashto, Pushto | ps | | Persian | fa | | Polish | pl | | Portuguese | pt | | Punjabi, Panjabi | pa | | Quechua | qu | | Romanian, Moldavian, Moldovan | ro | | Romansh | rm | | Rundi | rn | | Russian | ru | | Northern Sami | se | | Samoan | sm | | Sango | sg | | Sanskrit | sa | | Sardinian | sc | | Serbian | sr | | Shona | sn | | Sindhi | sd | | Sinhala, Sinhalese | si | | Slovak | sk | | Slovenian | sl | | Somali | so | | Southern Sotho | st | | Spanish, Castilian | es | | Sundanese | su | | Swahili | sw | | Swati | ss | | Swedish | sv | | Tagalog | tl | | Tahitian | ty | | Tajik | tg | | Tamil | ta | | Tatar | tt | | Telugu | te | | Thai | th | | Tibetan | bo | | Tigrinya | ti | | Tonga (Tonga Islands) | to | | Tsonga | ts | | Tswana | tn | | Turkish | tr | | Twi | tw | | Uighur, Uyghur | ug | | Ukrainian | uk | | Urdu | ur | | Uzbek | uz | | Venda | ve | | Vietnamese | vi | | Volapük | vo | | Walloon | wa | | Welsh | cy | | Wolof | wo | | Xhosa | xh | | Yiddish | yi | | Yoruba | yo | | Zhuang, Chuang | za | | Zulu | zu | --- ## Changelog import GitHubDoc from '@site/src/components/GitHubDoc'; --- ## Getting Started TPStreams Android SDK provides an easy way to integrate video playback and offline downloads into your Android application. It supports DRM-protected content, adaptive bitrate streaming, and customizable player UI. ### Installation Add the JitPack repository to your `settings.gradle` file: ```kotlin dependencyResolutionManagement { repositoriesMode.set(RepositoriesMode.FAIL_ON_PROJECT_REPOS) repositories { google() mavenCentral() maven { url = uri("https://jitpack.io") } } } ``` Add the TPStreams SDK dependency to your app level `build.gradle.kts` file: ```kotlin dependencies { implementation("com.github.testpress:TPStreamsAndroidPlayer:1.1.11-beta.1") } ``` ### Basic Setup #### Initialize the SDK Initialize the SDK in your `Application` class or the `onCreate` method of your main activity: ##### Option 1: In Application Class (Recommended) ```kotlin import android.app.Application import com.tpstreams.player.TPStreamsSDK class MyApp : Application() { override fun onCreate() { super.onCreate() TPStreamsSDK.init("YOUR_ORG_ID") } } ``` ##### Option 2: In Activity Class ```kotlin import android.os.Bundle import androidx.appcompat.app.AppCompatActivity import com.tpstreams.player.TPStreamsSDK class PlayerActivity : AppCompatActivity() { override fun onCreate(savedInstanceState: Bundle?) { super.onCreate(savedInstanceState) setContentView(R.layout.activity_player) TPStreamsSDK.init("YOUR_ORG_ID") } } ``` #### Add Player View to Layout Add the `TPStreamsPlayerView` to your activity or fragment layout XML: ```xml ``` #### Initialize the Player In your Activity or Fragment, create a `TPStreamsPlayer` instance and attach it to the view: ```kotlin import com.tpstreams.player.TPStreamsPlayer // Create player instance val player = TPStreamsPlayer.create( context = this, // Use requireContext() if in a Fragment assetId = "YOUR_ASSET_ID", accessToken = "YOUR_ACCESS_TOKEN", shouldAutoPlay = true, // Default is true enableDownload = true, // Set to true to enable download feature in UI downloadMetadata = mapOf("key" to "value") // Custom metadata for downloads ) // Attach to view binding.tpPlayerView.player = player ``` ### Watermarks Display one or more text or image watermarks over the video content by passing `BaseWatermarkConfig` entries (`TextWatermarkConfig` and `ImageWatermarkConfig`) to `TPStreamsPlayerView.setWatermarks()`. For the full reference (configuration properties, defaults, and behavior), see [Watermarks](./watermarks). --- ## Offline Downloads TPStreams SDK provides a `DownloadClient` to manage offline video downloads. #### 1. Initialize Download Manager ```kotlin val downloadClient = DownloadClient.getInstance(context) ``` #### 2. Start a Download You can start a download using the `startDownload` method. If no resolution is provided, it will show a resolution selection bottom sheet (only if the context is a `FragmentActivity`). ```kotlin downloadClient.startDownload( context = this, // resolution = null shows selection UI only if context is FragmentActivity assetId = "YOUR_ASSET_ID", accessToken = "YOUR_ACCESS_TOKEN", resolution = "720p", // For non-activity contexts, pass a resolution explicitly ("480p", "720p", etc.) metadata = mapOf("category" to "math", "teacher" to "John Doe") // Optional custom metadata ) ``` #### 3. Custom Metadata for Downloads Custom metadata passed during `startDownload` (or `TPStreamsPlayer.create`) is persisted and can be retrieved later from the `DownloadItem`. This is useful for storing extra context like categories, IDs, or any other strings related to the video. ```kotlin val allDownloads = downloadClient.getAllDownloadItems() allDownloads.forEach { item -> val category = item.metadata["category"] println("Category for ${item.title}: $category") } ``` #### 4. Manage Downloads (Quick Reference) | Method | Description | | :--- | :--- | | `pauseDownload(assetId)` | Pauses an active download. | | `resumeDownload(assetId)` | Resumes a paused download. | | `removeDownload(assetId)` | Deletes a downloaded video or cancels a pending download. | | `isDownloaded(assetId)` | Checks if the video is fully downloaded. | #### 5. Handle Download State and Progress To build a custom download UI, you can use the `DownloadItem` provided by the `DownloadClient`. ```kotlin // Get all current downloads val downloadItems = downloadClient.getAllDownloadItems() // DownloadItem Properties: // - assetId: String - Unique identifier for the video // - title: String - Title of the video // - thumbnailUrl: String? - URL to the thumbnail (optional) // - totalBytes: Long - Total size of the video in bytes // - downloadedBytes: Long - Number of bytes downloaded so far // - progressPercentage: Float - Progress as a percentage (0.0 - 100.0) // - state: Int - Current state (e.g., STATE_DOWNLOADING, STATE_COMPLETED) ``` #### 6. Handling Download Events Implement `DownloadClient.Listener` to receive updates about download progress and state changes. **Note:** Define the `listener` as a class-level property so it can be accessed in `onDestroy()` for proper cleanup. ```kotlin private lateinit var listener: DownloadClient.Listener // Inside your Activity or Fragment onCreate: listener = object : DownloadClient.Listener { override fun onDownloadStateChanged(downloadItem: DownloadItem, error: Exception?) { // Called when state changes (DOWNLOADING, COMPLETED, FAILED, etc.) println("Download state: ${downloadItem.state}") } override fun onDownloadsChanged() { // Called periodically (every 1 sec) while any download is active. // Use this to update progress bars or refresh your download list UI. val activeDownloads = downloadClient.getAllDownloadItems() } override fun onDownloadStarted(downloadItem: DownloadItem) { println("Download started: ${downloadItem.title}") } override fun onDownloadResumed(downloadItem: DownloadItem) { println("Download resumed: ${downloadItem.title}") } override fun onDownloadCompleted(downloadItem: DownloadItem) { println("Download complete: ${downloadItem.title}") } override fun onDownloadFailed(downloadItem: DownloadItem, error: Exception) { println("Download failed: ${error.message}") } override fun onDownloadDeleted(assetId: String) { println("Download removed for asset: $assetId") } } downloadClient.addListener(listener) ``` #### 7. Remove Listener To prevent leaking listeners and keep the app production-safe, ensure you remove the listener in `onDestroy()`: ```kotlin override fun onDestroy() { super.onDestroy() downloadClient.removeListener(listener) } ``` --- ## Player Methods & Events The `TPStreamsPlayer` provides several public methods and properties to control playback and query state. #### Player Methods | Method | Description | | :--- | :--- | | `play()` | Starts or resumes playback. | | `pause()` | Pauses playback. | | `seekTo(positionMs: Long)` | Seeks to a specific position in milliseconds. | | `getCurrentPosition()` | Returns the current playback position in milliseconds. | | `getDuration()` | Returns the total duration of the media in milliseconds. | | `getPlaybackState()` | Returns the current state of the player (`IDLE`, `BUFFERING`, `READY`, `ENDED`). | | `getPlaybackSpeed()` | Returns the current playback speed factor (e.g., `1.5f`). | | `setPlaybackSpeed(speed: Float)` | Sets the playback speed factor (`1.0f` is normal). | | `isPlaying()` | Returns true if the player is currently playing. | #### Player Events You can listen to player events using `TPStreamsPlayer.Listener`. ```kotlin player.listener = object : TPStreamsPlayer.Listener { override fun onAccessTokenExpired(videoId: String, callback: (String) -> Unit) { // Called when the access token has expired. // Fetch a new token and pass it back to the player. val newToken = fetchNewTokenFromServer(videoId) callback(newToken) } override fun onError(error: PlaybackError, message: String) { // Called when a playback error occurs println("Error: $message") } override fun onSubtitleStateChanged(enabled: Boolean, language: String?) { // Called when subtitle state changes (enabled/disabled or language changed) println("Subtitles enabled: $enabled, language: $language") } } ``` #### Watermark Methods (`TPStreamsPlayerView`) Watermarks are configured on the `TPStreamsPlayerView` instance. For detailed parameters, configuration properties, and animation options, see [Watermarks](./watermarks). | Method | Description | | :--- | :--- | | `setWatermarks(configs: List)` | Applies a list of text (`TextWatermarkConfig`) and image (`ImageWatermarkConfig`) watermark overlays with configurable positioning, opacity, and animations (`PING_PONG`, `RANDOM`). | | `clearWatermarks()` | Removes all active watermark overlays and stops running animations. | --- ## Troubleshooting import GitHubDoc from '@site/src/components/GitHubDoc'; --- ## Watermarks Display one or more text and image watermarks over video playback by passing `BaseWatermarkConfig` entries (`TextWatermarkConfig` and `ImageWatermarkConfig`) to `TPStreamsPlayerView.setWatermarks()`. Watermarks render above the video content and adjust automatically on screen resize, orientation changes, and fullscreen toggles. Pass an empty list or call `clearWatermarks()` to remove all watermarks. :::caution Migration Notice `WatermarkConfig` is currently retained as a `typealias` for backward compatibility. Please update your code to use `TextWatermarkConfig`, as `WatermarkConfig` will be deprecated in upcoming releases. ::: ### Usage ```kotlin import com.tpstreams.player.TextWatermarkConfig import com.tpstreams.player.ImageWatermarkConfig import com.tpstreams.player.WatermarkAnimation import com.tpstreams.player.WatermarkAnimationType val watermarks = listOf( // Text watermark with ping-pong animation TextWatermarkConfig( text = "user@example.com", x = 0, y = 50, color = 0xFFFFFFFF.toInt(), textSize = 16f, opacity = 0.5f, animation = WatermarkAnimation( type = WatermarkAnimationType.PING_PONG, duration = 10000L ) ), // Static text watermark TextWatermarkConfig( text = "CONFIDENTIAL", x = 50, y = 10, color = 0xFFFF0000.toInt(), textSize = 14f, opacity = 0.3f ), // Image watermark (e.g., instructor avatar or brand logo) ImageWatermarkConfig( imageUrl = "https://example.com/branding/logo.png", width = 48, height = 48, x = 92, y = 88, opacity = 1.0f ) ) // Apply watermarks binding.tpPlayerView.setWatermarks(watermarks) // Remove all watermarks binding.tpPlayerView.clearWatermarks() ``` --- ### Configuration Types Both text and image watermark configurations implement `BaseWatermarkConfig`. #### TextWatermarkConfig Properties Use `TextWatermarkConfig` to overlay text strings (e.g., user email, username, or timestamp) for piracy protection. | Property | Type | Default | Description | | :--- | :--- | :--- | :--- | | `text` | `String` | — | Watermark text (required, cannot be blank) | | `x` | `Int` | `0` | Horizontal position as a percentage of the player view width (`0`–`100`) | | `y` | `Int` | `0` | Vertical position as a percentage of the player view height (`0`–`100`) | | `color` | `Int` | `0xFFFFFFFF.toInt()` | Watermark text color as an ARGB integer (default: white) | | `textSize` | `Float` | `14f` | Text size in SP | | `opacity` | `Float` | `0.3f` | Opacity from `0.0` (transparent) to `1.0` (opaque) | | `animation` | `WatermarkAnimation?` | `null` | Optional animation configuration; `null` renders a static watermark | #### ImageWatermarkConfig Properties Use `ImageWatermarkConfig` to display remote image overlays such as instructor avatars or brand logos. | Property | Type | Default | Description | | :--- | :--- | :--- | :--- | | `imageUrl` | `String` | — | HTTPS URL of the image to display (required, PNG recommended for transparency) | | `width` | `Int` | `48` | Width in `dp` (must be greater than 0) | | `height` | `Int` | `48` | Height in `dp` (must be greater than 0) | | `x` | `Int` | `92` | Horizontal position percentage (`0`–`100`, default places towards bottom-right) | | `y` | `Int` | `88` | Vertical position percentage (`0`–`100`, default places towards bottom-right) | | `opacity` | `Float` | `1.0f` | Opacity from `0.0` (transparent) to `1.0` (opaque) | --- ### WatermarkAnimation / WatermarkAnimationType `WatermarkAnimation` is supported on `TextWatermarkConfig` and accepts a `type` (`WatermarkAnimationType`) and `duration` in milliseconds (default `10000L`, minimum `100L`). Supported animation types: - **`PING_PONG`** (`WatermarkAnimationType.PING_PONG`): Moves the watermark horizontally from the left edge to the right edge and back, taking the configured duration per leg. The `y` position is preserved, while the initial `x` coordinate is animated. - **`RANDOM`** (`WatermarkAnimationType.RANDOM`): Repositions the watermark to random coordinates across the player view every `duration` milliseconds. Both `x` and `y` initial coordinates are randomized. --- ### Behavior & Features - **Asynchronous Image Loading:** Images configured in `ImageWatermarkConfig` are fetched asynchronously in the background and downsampled efficiently to minimize memory footprint. - **Controls Auto-Hide:** Image watermark overlays automatically and smoothly fade out when player controls are visible and fade back in when controls hide, avoiding visual clutter over playback buttons. - **Responsive Layout:** Watermarks remain fully visible within the active video area and automatically reposition during screen rotation, fullscreen toggles, and view resizing. - **Playback Sync:** Animated watermarks automatically pause during buffering or when video playback is paused, and resume when playback continues. - **Lifecycle Cleanup:** Calling `clearWatermarks()` stops all active animations and removes all watermark overlays from the player view. --- ## Changelog(Flutter-sdk) import GitHubDoc from '@site/src/components/GitHubDoc'; --- ## Downloads The Flutter TPStreams SDK provides comprehensive download functionality for offline video playback. This includes initiating downloads, managing ongoing tasks, and tracking progress through streams. ### Enabling Download Support You can enable download support directly in the player UI by setting the `showDownloadOption` parameter. When enabled, the player will display a download button. ```dart import 'package:tpstreams_player_sdk/tpstreams_player_sdk.dart'; TPStreamPlayer( assetId: 'YOUR_ASSET_ID', accessToken: 'YOUR_ACCESS_TOKEN', showDownloadOption: true, // Displays the download button in the player offlineLicenseExpireDays: 15, // Optional: Duration in days for which the offline license is valid. Defaults to 15 days. ) ``` ### Initiating a Download Use the `startDownload` method from `TPStreamsDownloadManager` to initiate a video download for offline playback. #### `startDownload` ```dart final downloadManager = TPStreamsDownloadManager(); await downloadManager.startDownload( assetId, // String: Required accessToken, // String: Required metadata, // Map | null: Optional custom metadata resolution, // String | null: Optional preferred resolution (e.g., "480p", "720p", "1080p") ); ``` | Parameter | Type | Description | | :--- | :--- | :--- | | `assetId` | `String` | Unique identifier for the video asset. | | `accessToken` | `String` | Valid access token for the video. | | `metadata` | `Map` | (Optional) Any custom key-value pairs you want to attach to the download. | | `resolution` | `String` | (Optional) Preferred video quality. Supported values: `360p`, `480p`, `720p`, `1080p`. When specified, the quality picker dialog is skipped and the selected resolution is downloaded. ### Managing Downloads #### Basic Operations Use the `TPStreamsDownloadManager` to control active and completed downloads. - **pauseDownload(DownloadAsset asset)**: Pauses an ongoing download. (**Note**: Currently supported on Android only. Throws `UnsupportedError` on iOS). - **resumeDownload(DownloadAsset asset)**: Resumes a paused or failed download. (**Note**: Currently supported on Android only. Throws `UnsupportedError` on iOS). - **cancelDownload(DownloadAsset asset)**: Cancels an ongoing download. - **deleteDownload(DownloadAsset asset)**: Removes a downloaded video from local storage. - **deleteAllDownloads()**: Removes all downloaded videos from the device. - **getAllDownloads()**: Returns a `Future>` containing all tracked downloads. ### Download Events The SDK uses a `Stream` to provide real-time updates on all download activities. This is the recommended way to keep your UI in sync with download states. #### `downloadsStream` Triggered periodically with the status of all current downloads. ```dart final downloadManager = TPStreamsDownloadManager(); downloadManager.downloadsStream.listen((List downloads) { for (var asset in downloads) { print("Video: ${asset.title}"); print("Status: ${asset.state}"); print("Progress: ${asset.progress}%"); } }); ``` ### Playing Downloaded Media To play a video that has been downloaded, use the `TPStreamPlayer.offline` constructor. This ensures the player uses the local file instead of streaming from the network. ```dart TPStreamPlayer.offline( assetId: 'YOUR_DOWNLOADED_ASSET_ID', ) ``` ### Data Structures #### `DownloadAsset` The object returned in the `downloadsStream` and by `getAllDownloads()`. | Property | Type | Description | | :--- | :--- | :--- | | `assetId` | `String` | Unique identifier for the video. | | `title` | `String?` | Title of the video. | | `state` | `DownloadState` | The current state of the download. | | `progress` | `double` | Percentage of the download completed (0 to 100). | | `totalSize` | `int` | Total size of the downloaded media in bytes. | | `downloadedSize` | `int` | Number of bytes downloaded so far. Use with `totalSize` to calculate download progress. | | `thumbnailUrl` | `String?` | URL of the video thumbnail for displaying in the UI. | | `metadata` | `Map?` | Custom metadata attached to the download. | #### `DownloadState` An enum representing the lifecycle of a download: - `notDownloaded`: The asset is not present locally. - `downloading`: The asset is currently being downloaded. - `paused`: The download has been paused (Android only). - `completed`: The asset is fully downloaded and ready for offline play. - `failed`: The download encountered an error. ### Usage Example ```dart import 'package:flutter/material.dart'; import 'package:tpstreams_player_sdk/tpstreams_player_sdk.dart'; class MyDownloadPage extends StatefulWidget { @override _MyDownloadPageState createState() => _MyDownloadPageState(); } class _MyDownloadPageState extends State { final _downloadManager = TPStreamsDownloadManager(); List _downloads = []; @override void initState() { super.initState(); // 1. Listen for updates _downloadManager.downloadsStream.listen((downloads) { setState(() { _downloads = downloads; }); }); } @override Widget build(BuildContext context) { return ListView.builder( itemCount: _downloads.length, itemBuilder: (context, index) { final asset = _downloads[index]; return ListTile( title: Text(asset.title ?? 'Untitled'), subtitle: Text("${asset.state.name} - ${asset.progress.toStringAsFixed(1)}%"), trailing: IconButton( icon: Icon(Icons.delete), onPressed: () => _downloadManager.deleteDownload(asset), ), ); }, ); } @override void dispose() { _downloadManager.dispose(); super.dispose(); } } ``` --- ## Getting Started(Flutter-sdk) To use our Flutter player SDK, add [`tpstreams_player_sdk`](https://pub.dev/packages/tpstreams_player_sdk) as a dependency in your [pubspec.yaml](https://flutter.dev/docs/development/platform-integration/platform-channels) file. #### Initializing TPStreamsSDK First, imported our package: ```dart import 'package:tpstreams_player_sdk/tpstreams_player_sdk.dart'; ``` Next, you can initialize the TPStreamsSDK with your organization code. ```dart TPStreamsSDK.initialize(orgCode: "YOUR_ORG_CODE"); ``` Make sure to replace "YOUR_ORG_CODE" with your actual organization code. This code snippet should be placed at the entry point of your application (usually in the main function) to ensure proper initialization of the TPStreamsSDK. #### Android Setup In the Android directory, extend the FlutterFragmentActivity class in your MainActivity file. To do this, make the change in the following directory: android/app/src/main/kotlin/com/project_name/MainActivity.kt ``` kotlin import io.flutter.embedding.android.FlutterFragmentActivity class MainActivity: FlutterFragmentActivity(){ } ``` #### Play a Video To play a video using the TPStreams Player SDK, use the `TPStreamPlayer` widget: ```dart TPStreamPlayer(assetId: 'ASSET_ID', accessToken: 'ACCESS_TOKEN') ``` Replace `ASSET_ID` and `ACCESS_TOKEN` with the actual assetId and accessToken of the video you wish to play. After executing your Flutter application, the TPStreams player will display the video specified by the provided assetId and accessToken. #### `TPStreamPlayer` Configuration The `TPStreamPlayer` widget accepts the following parameters: | Parameter | Type | Default | Description | | :--- | :--- | :--- | :--- | | `assetId` | `String` | — | Unique identifier of the video asset (required). | | `accessToken` | `String?` | `null` | Access token for the video. | | `aspectRatio` | `double` | `16 / 9` | Aspect ratio of the player view. | | `onPlayerCreated` | `Function(TPStreamsPlayerController)?` | `null` | Callback invoked when the player is created. Provides the controller for controlling playback. | | `showDownloadOption` | `bool?` | `false` | Shows the download button in the player UI. | | `startInFullscreen` | `bool?` | `false` | Launches the player directly in fullscreen mode. | | `offlineLicenseExpireDays` | `int?` | `15` | Duration in days for which the offline license is valid. | | `metadata` | `Map?` | `null` | Custom key-value pairs to attach to the player. | | `autoPlay` | `bool` | `true` | Whether playback starts automatically once the video is loaded. | | `resolution` | `int?` | `null` | Initial playback quality as the maximum video height in pixels (e.g., `720` for 720p). | | `userId` | `String?` | `null` | Identifier of the signed-in viewer. When provided, playback resumes from the last watched position. | | `preferences` | `TPStreamsPlayerPreferences?` | defaults | Configures which player UI elements are shown (see below). | ##### `TPStreamsPlayerPreferences` Use `TPStreamsPlayerPreferences` to control which UI elements are available in the player. ```dart TPStreamPlayer( assetId: 'ASSET_ID', accessToken: 'ACCESS_TOKEN', preferences: TPStreamsPlayerPreferences( enableFullscreen: true, // Show the fullscreen button enablePlaybackSpeed: true, // Show playback speed options enableCaptions: true, // Show captions/CC options showResolutionOptions: true, // Show video quality options enableSeekButtons: true, // Show forward/backward seek buttons seekBarColor: Colors.blue.value, // Optional: tint the seek bar ), ) ``` | Parameter | Type | Default | Description | | :--- | :--- | :--- | :--- | | `enableFullscreen` | `bool` | `true` | Enables the fullscreen button. | | `enablePlaybackSpeed` | `bool` | `true` | Enables playback speed controls. | | `enableCaptions` | `bool` | `true` | Enables caption/subtitle controls. | | `showResolutionOptions` | `bool` | `true` | Enables video quality selection. | | `enableSeekButtons` | `bool` | `true` | Enables forward/backward seek buttons. | | `seekBarColor` | `int?` | `null` | (Optional) Color of the seek bar as an ARGB integer (e.g., `Colors.blue.value`). | #### Control Video Playback To control the video playback (e.g., play, pause, seek), you need to get a reference to the TPStreamsPlayerController. This controller is passed via the onPlayerCreated callback when the player widget is initialized. ```dart TPStreamPlayer( assetId: 'ASSET_ID', accessToken: 'ACCESS_TOKEN', onPlayerCreated: _onPlayerCreated, ) void _onPlayerCreated(TPStreamsPlayerController controller) { // Store the controller for later use this.controller = controller; } ``` - To control playback or fetch video details, refer to the [Player Methods documentation](./player-methods). - To listen to player state changes and events, refer to the [Player Events documentation](./player-events). - To configure dynamic text and image watermarks, refer to the [Watermarks documentation](./watermarks). For a practical implementation and usage of tpstreams_player_sdk, refer to our [Sample Flutter App](https://github.com/testpress/sample_flutter_app). --- ## Player Events You can listen to various events related to the player's state through the TPStreamsPlayerController. By adding a listener, you can track changes in the player's properties such as whether the video is playing, the current position, buffering state, and more. #### Adding a Listener To track player events, add a listener to the TPStreamsPlayerController like this: ```dart _controller?.addListener(() { setState(() { // Access the current player state through _controller!.value bool isPlaying = _controller!.value.isPlaying; bool isFullScreen = _controller!.value.isFullScreen; Duration position = _controller!.value.position; Duration duration = _controller!.value.duration; }); }); ``` #### Available Properties to Track The listener will trigger updates to the following properties of the TPStreamsPlayerValue: - **isLoading:** true if the video is still being loaded into the player. - **isPlaying:** true if the video is playing, false if paused. - **position:** The current playback position. - **duration:** The total duration of the video. - **isBuffering:** Indicates if the player is currently buffering. - **isFullScreen:** true if the video is in fullscreen mode. - **isEnded:** true if the video has played to the end. - **error:** Provides error information if an error occurs during playback. Simply use controller.value.property to access the current state values in the listener. #### Fullscreen Callbacks You can also listen to fullscreen-related callbacks: ```dart _controller?.onBeforeFullScreenEnter = () { // Called before entering fullscreen }; _controller?.onBeforeFullScreenExit = () { // Called before exiting fullscreen }; ``` #### Replay Callback Set `onReplay` to be notified when the replay button is clicked after playback ends: ```dart _controller?.onReplay = () { // Called when the replay button is clicked }; ``` #### Access Token Expiration Callback Set `onAccessTokenExpired` to refresh the access token seamlessly when it expires during playback: ```dart _controller?.onAccessTokenExpired = (String videoId) async { // Fetch a fresh token for the given video and return it String newToken = await fetchNewTokenFromServer(videoId); return newToken; }; ``` --- ## Player Methods The TPStreamsPlayerController provides several methods to control video playback and manage player states. Below is the detailed explanation of each method: #### Play ```dart Future play() ``` Starts video playback. Call this method when you want the video to start playing or resume after being paused. **Example Usage:** ```dart controller.play(); ``` #### Pause ```dart Future pause() ``` Pauses video playback. This stops the video while allowing it to be resumed later from the same position. **Example Usage:** ```dart controller.pause(); ``` #### Seek ```dart Future seek(Duration target) ``` Seeks to a specific time in the video. The target parameter specifies the timestamp you want to jump to. **Parameters:** target: The Duration object representing the time position in the video. **Example Usage:** ```dart controller.seek(Duration(seconds: 60)); // Jump to the 1-minute mark ``` #### Set Playback Speed ```dart Future setPlaybackSpeed(double speed) ``` Sets the playback speed of the video. **Parameters:** speed: A double value where 1.0 is normal speed, 0.5 is half-speed, and 2.0 is double-speed. **Example Usage:** ```dart controller.setPlaybackSpeed(1.5); // Play at 1.5x speed ``` #### Set Video Resolution ```dart Future setVideoResolution(int resolution) ``` Sets the playback resolution to the matching quality (e.g., `720` switches to the 720p track). **Parameters:** resolution: The desired video height in pixels (e.g., 720 for 720p). **Example Usage:** ```dart await controller.setVideoResolution(720); // Play at 720p ``` #### Get Video Duration ```dart Future getDuration() ``` Retrieves the total duration of the currently loaded video. **Example Usage:** ```dart Duration videoDuration = await controller.getDuration(); ``` #### Get Video Current Position ```dart Future getCurrentTime() ``` Fetches the current playback position of the video. **Example Usage:** ```dart Duration currentTime = await controller.getCurrentTime(); ``` #### Enter Fullscreen ```dart Future enterFullScreen() ``` Enters fullscreen mode programmatically, providing a fully immersive viewing experience. **Example Usage:** ```dart await controller.enterFullScreen(); ``` #### Exit Fullscreen ```dart Future exitFullScreen() ``` Exits fullscreen mode and returns to the normal view. **Example Usage:** ```dart await controller.exitFullScreen(); ``` #### Set Watermarks ```dart Future setWatermarks(List configs) ``` Applies text (`TextWatermarkConfig`) and/or image (`ImageWatermarkConfig`) watermark overlays on the video player. Each config creates an independent watermark overlay. Pass an empty list to clear all watermarks. For comprehensive documentation, see [Watermarks](./watermarks). :::caution Migration Notice `WatermarkConfig` is retained as a `typedef` for backward compatibility. Please update your code to use `TextWatermarkConfig`, as `WatermarkConfig` will be deprecated in upcoming releases. ::: **`TextWatermarkConfig` fields:** | Parameter | Type | Default | Description | | :--- | :--- | :--- | :--- | | `text` | `String` | — | Watermark text (required). | | `x` | `int` | `0` | Horizontal position as 0–100 percent. | | `y` | `int` | `0` | Vertical position as 0–100 percent. | | `color` | `int` | `0xFFFFFFFF` | Text color as an ARGB integer (default is white). | | `textSize` | `double` | `14.0` | Text size in SP. | | `opacity` | `double` | `0.3` | Opacity from 0.0 (invisible) to 1.0 (fully opaque). | | `animation` | `WatermarkAnimation?` | `null` | (Optional) Animation applied to the watermark. | **`ImageWatermarkConfig` fields:** | Parameter | Type | Default | Description | | :--- | :--- | :--- | :--- | | `imageUrl` | `String` | — | HTTPS URL of the watermark image (required). | | `width` | `int` | `48` | Width in logical pixels / dp. | | `height` | `int` | `48` | Height in logical pixels / dp. | | `x` | `int` | `92` | Horizontal position as 0–100 percent. | | `y` | `int` | `88` | Vertical position as 0–100 percent. | | `opacity` | `double` | `1.0` | Opacity from 0.0 (invisible) to 1.0 (fully opaque). | **`WatermarkAnimation` fields:** | Parameter | Type | Default | Description | | :--- | :--- | :--- | :--- | | `type` | `WatermarkAnimationType` | — | The animation type: `WatermarkAnimationType.pingPong` (moves horizontally back and forth) or `WatermarkAnimationType.random` (repositions to random coordinates at each interval). | | `duration` | `int` | `10000` | Animation duration in milliseconds. Minimum 100ms. | **Example Usage:** ```dart await controller.setWatermarks([ // Animated text watermark TextWatermarkConfig( text: '© testpress', x: 100, y: 50, opacity: 0.9, animation: WatermarkAnimation( type: WatermarkAnimationType.pingPong, duration: 10000, ), ), // Static text watermark TextWatermarkConfig( text: '© TPStreams', x: 0, y: 50, opacity: 0.3, ), // Image watermark (e.g., logo or avatar) ImageWatermarkConfig( imageUrl: 'https://example.com/branding/logo.png', width: 48, height: 48, x: 92, y: 88, opacity: 1.0, ), ]); ``` #### Clear Watermarks ```dart Future clearWatermarks() ``` Removes all watermarks and frees resources. **Example Usage:** ```dart await controller.clearWatermarks(); ``` #### Dispose ```dart Future dispose() ``` Disposes of the player instance and releases resources. This should be called when the player is no longer needed. **Example Usage:** ```dart controller.dispose(); ``` --- ## Watermarks(Flutter-sdk) Display one or more text and image watermarks over video playback by passing `BaseWatermarkConfig` entries (`TextWatermarkConfig` and `ImageWatermarkConfig`) to `TPStreamsPlayerController.setWatermarks()`. Watermarks render above the video content and adjust automatically on screen resize, orientation changes, and fullscreen mode. Pass an empty list or call `clearWatermarks()` to remove all watermarks. :::caution Migration Notice `WatermarkConfig` is currently retained as a `typedef` for backward compatibility. Please update your code to use `TextWatermarkConfig`, as `WatermarkConfig` will be deprecated in upcoming releases. ::: ### Usage ```dart import 'package:tpstreams_player_sdk/tpstreams_player_sdk.dart'; // Apply text and image watermarks await controller.setWatermarks([ // Animated text watermark TextWatermarkConfig( text: 'user@example.com', x: 0, y: 50, color: 0xFFFFFFFF, textSize: 16.0, opacity: 0.5, animation: WatermarkAnimation( type: WatermarkAnimationType.pingPong, duration: 10000, ), ), // Static text watermark TextWatermarkConfig( text: 'CONFIDENTIAL', x: 50, y: 10, color: 0xFFFF0000, textSize: 14.0, opacity: 0.3, ), // Image watermark (e.g., instructor avatar or brand logo) ImageWatermarkConfig( imageUrl: 'https://example.com/branding/logo.png', width: 48, height: 48, x: 92, y: 88, opacity: 1.0, ), ]); // Remove all watermarks await controller.clearWatermarks(); ``` --- ### Configuration Types Both text and image watermark configurations extend `BaseWatermarkConfig`. #### TextWatermarkConfig Properties Use `TextWatermarkConfig` to display text overlays such as user IDs or emails for content security. | Parameter | Type | Default | Description | | :--- | :--- | :--- | :--- | | `text` | `String` | — | Watermark text (required) | | `x` | `int` | `0` | Horizontal position as a percentage of the player view width (`0`–`100`) | | `y` | `int` | `0` | Vertical position as a percentage of the player view height (`0`–`100`) | | `color` | `int` | `0xFFFFFFFF` | Text color as an ARGB integer value (default: white) | | `textSize` | `double` | `14.0` | Text size in SP | | `opacity` | `double` | `0.3` | Opacity from `0.0` (transparent) to `1.0` (opaque) | | `animation` | `WatermarkAnimation?` | `null` | Optional animation configuration; `null` renders a static watermark | #### ImageWatermarkConfig Properties Use `ImageWatermarkConfig` to display remote image overlays such as instructor avatars or brand logos. | Parameter | Type | Default | Description | | :--- | :--- | :--- | :--- | | `imageUrl` | `String` | — | HTTPS URL of the watermark image (required, PNG recommended) | | `width` | `int` | `48` | Width in logical pixels / dp | | `height` | `int` | `48` | Height in logical pixels / dp | | `x` | `int` | `92` | Horizontal position percentage (`0`–`100`, default places towards bottom-right) | | `y` | `int` | `88` | Vertical position percentage (`0`–`100`, default places towards bottom-right) | | `opacity` | `double` | `1.0` | Opacity from `0.0` (transparent) to `1.0` (opaque) | --- ### WatermarkAnimation / WatermarkAnimationType `WatermarkAnimation` is supported on `TextWatermarkConfig` and accepts `type` (`WatermarkAnimationType`) and `duration` in milliseconds (default `10000`, minimum `100`). Supported animation types: - **`WatermarkAnimationType.pingPong`**: Moves the watermark horizontally back and forth between screen edges. The `y` position is preserved while the horizontal position is driven by the animation. - **`WatermarkAnimationType.random`**: Relocates the watermark to random coordinates across the player view every `duration` milliseconds. Both `x` and `y` coordinates are randomized. --- ### Behavior & Features - **Asynchronous Image Loading:** Images are loaded asynchronously in the background. - **Controls Auto-Hide:** Image watermarks smoothly fade out when player controls are visible and reappear when controls hide. - **Responsive Layout:** Watermarks remain visible within the video display area and automatically adjust during orientation changes, resizing, and fullscreen transitions. - **Playback Sync:** Animations automatically pause during video buffering/pause and resume on playback. - **Lifecycle Cleanup:** Calling `clearWatermarks()` or disposing the controller stops all running animations and clears all overlays. --- ## Changelog(Ios-native-sdk) import GitHubDoc from '@site/src/components/GitHubDoc'; --- ## Getting Started(Ios-native-sdk) TPStreamsSDK is a versatile iOS native SDK with support for both DRM (FairPlay) and non-DRM content. #### Requirements Before integrating TPStreamsSDK into your iOS application, ensure that your project meets the following requirement: - Minimum Deployment Version: iOS 11.4 or later - Swift: Version 5.5 or later #### Integration using Swift Package Manager (SPM) To add TPStreamsSDK to your Xcode project using Swift Package Manager, follow these steps: - Select File > Add Packages in Xcode. - In the search bar, enter the following URL: `https://github.com/testpress/iOSPlayerSDK`. - Select 'iOSPlayerSDK' from the search results. Click Add package button. Once the package is added, you can start using TPStreamsSDK in your iOS application. #### Initializing TPStreamsSDK In the `application(_:didFinishLaunchingWithOptions:)` method in your AppDelegate, call `TPStreamsSDK.initialize(withOrgCode:)` to initialize the SDK with your organization code. ``` swift class AppDelegate: UIResponder, UIApplicationDelegate { func application(_ application: UIApplication, didFinishLaunchingWithOptions launchOptions: [UIApplication.LaunchOptionsKey: Any]?) -> Bool { TPStreamsSDK.initialize(withOrgCode: "YOUR_ORGANIZATION_CODE") return true } } ``` Please note that the above code assumes you are using SwiftUI for your application. If you are using a different app architecture, you may need to adapt the integration steps accordingly. #### Playing a Video with TPStreamsSDK ##### SwiftUI Integration 1. Instantiate a TPAVPlayer by providing the appropriate assetID and accessToken. 2. Embed the TPStreamPlayerView in your SwiftUI view. ``` swift struct ContentView: View { let player = TPAVPlayer(assetID: "YOUR_ASSET_ID", accessToken: "YOUR_ACCESS_TOKEN") var body: some View { VStack { TPStreamPlayerView(player: player) .frame(height: 240) Spacer() } } } ``` ##### UIKit Integration 1. Instantiate a TPAVPlayer with the relevant assetID and accessToken. 2. Create an TPStreamPlayerViewController and assign the previously created TPAVPlayer to the player attribute. 3. Add the TPStreamPlayerViewController.view to the view hierarchy. This will display the video player within the specified playerContainer view. ``` swift class ViewController: UIViewController { @IBOutlet weak var playerContainer: UIView! var playerViewController: TPStreamPlayerViewController? var player: TPAVPlayer? override func viewDidLoad() { super.viewDidLoad() self.setupPlayerView() player?.play() } func setupPlayerView(){ player = TPAVPlayer(assetID: "YOUR_ASSET_ID", accessToken: "YOUR_ACCESS_TOKEN") playerViewController = TPStreamPlayerViewController() playerViewController?.player = player playerViewController?.delegate = self addChild(playerViewController!) playerContainer.addSubview(playerViewController!.view) playerViewController!.view.frame = playerContainer.bounds } } ``` :::info TPAVPlayer is a wrapper class of AVPlayer that provides built-in support for playing our videos without requiring additional effort. It also supports FairPlay streaming for DRM-protected content. Since TPAVPlayer is a wrapper class of AVPlayer, you can also use the TPAVPlayer with native iOS player to play Streams Videos. ::: #### Player Delegate Events Implement `TPStreamPlayerViewControllerDelegate` to handle player events such as subtitle state changes: ```swift extension ViewController: TPStreamPlayerViewControllerDelegate { func onSubtitleStateChanged(enabled: Bool, language: String?) { print("Subtitles enabled: \(enabled), language: \(language ?? "N/A")") } } ``` ### Watermarks Display one or more text or image watermarks over the video content by passing `BaseWatermarkConfig` entries (`TextWatermarkConfig` and `ImageWatermarkConfig`) to `setWatermarks(_:)`. For the full reference (configuration properties, defaults, and behavior), see [Watermarks](./watermarks). For a practical implementation and usage of TPStreamsSDK, refer to our [Sample iOS App](https://github.com/testpress/sample-iOS-app). --- ## Offline Downloads(Ios-native-sdk) We'll explore the workflow in this document. The [Sample iOS App](https://github.com/testpress/sample-iOS-app) on GitHub provides code examples for a typical use case. ### Enable Download Support Use the `showDownloadOption()` configuration to display the download button in the player UI: ```swift let config = TPStreamPlayerConfigurationBuilder() .showDownloadOption() .build() playerViewController?.config = config ``` ### Creating a TPStreamsDownloadManager The following code snippet demonstrates how to set up a download delegate to receive download state updates: ```swift TPStreamsDownloadManager.shared.setTPStreamsDownloadDelegate(tpStreamsDownloadDelegate: self) ``` Using `TPStreamsDownloadManager.shared` you can get a list of downloaded media and perform operations to delete and cancel downloads. ##### Get List of Downloaded Media ```swift let downloads: [OfflineAsset] = TPStreamsDownloadManager.shared.getAllOfflineAssets() ``` ##### Check if Asset is Downloaded ```swift let isDownloaded = TPStreamsDownloadManager.shared.isAssetDownloaded(assetID: assetId) ``` ##### Delete ```swift TPStreamsDownloadManager.shared.deleteDownload(assetId) ``` ##### Cancel ```swift TPStreamsDownloadManager.shared.cancelDownload(assetId) ``` ### TPStreamsDownloadDelegate Implement the `TPStreamsDownloadDelegate` protocol to handle download lifecycle events: ```swift extension YourClass: TPStreamsDownloadDelegate { func onStart(offlineAsset: OfflineAsset) { } func onComplete(offlineAsset: OfflineAsset) { } func onPause(offlineAsset: OfflineAsset) { } func onResume(offlineAsset: OfflineAsset) { } func onCanceled(assetId: String) { } func onDelete(assetId: String) { } func onStateChange(status: Status, offlineAsset: OfflineAsset) { } func onProgressChange(assetId: String, percentage: Double) { } } ``` ### Playing Downloaded Media Use `TPAVPlayer` with the offline asset ID to play downloaded content: ```swift if TPStreamsDownloadManager.shared.isAssetDownloaded(assetID: assetId) { player = TPAVPlayer(offlineAssetId: assetId) { error in if let error = error { print("Playback error: \(error.localizedDescription)") return } print("Playback started successfully") } } ``` --- ## Watermarks(Ios-native-sdk) Display one or more text and image watermarks over video playback by passing `BaseWatermarkConfig` entries (`TextWatermarkConfig` and `ImageWatermarkConfig`) to `setWatermarks(_:)`. Watermarks render above the video and subtitles but below the player controls on both SwiftUI and UIKit paths. Pass an empty list to remove all watermarks. :::caution Migration Notice `WatermarkConfig` is currently retained as a `typealias` for backward compatibility. Please update your code to use `TextWatermarkConfig`, as `WatermarkConfig` will be deprecated in upcoming releases. ::: ### Usage ```swift import TPStreamsSDK let config = TPStreamPlayerConfigurationBuilder() .setWatermarks([ // Animated text watermark TextWatermarkConfig( text: "user@example.com", x: 0, y: 50, color: 0xFFFFFFFF, textSize: 16, opacity: 0.5, animation: WatermarkAnimation(type: .pingPong, duration: 10000) ), // Static text watermark TextWatermarkConfig( text: "CONFIDENTIAL", x: 50, y: 10, color: 0xFFFF0000, textSize: 14, opacity: 0.3 ), // Image watermark (e.g., instructor avatar or brand logo) ImageWatermarkConfig( imageUrl: "https://example.com/branding/logo.png", width: 48, height: 48, x: 92, y: 88, opacity: 1.0 ) ]) .build() ``` On iOS, watermarks are defined via configuration. On the UIKit path, you can mutate `TPStreamPlayerViewController.config.watermarks` at runtime to update or re-apply them without recreating the player. --- ### Configuration Types Both text and image watermark configurations conform to `BaseWatermarkConfig`. #### TextWatermarkConfig Properties Use `TextWatermarkConfig` to overlay text strings (e.g., user email, ID, or notice) for content protection. | Property | Type | Default | Description | | :--- | :--- | :--- | :--- | | `text` | `String` | — | Watermark text (required) | | `x` | `Int64` | `0` | Horizontal position as a percentage of the player view width (`0`–`100`) | | `y` | `Int64` | `0` | Vertical position as a percentage of the player view height (`0`–`100`) | | `color` | `Int64` | `0xFFFFFFFF` | Watermark text color as an ARGB integer value (default: white) | | `textSize` | `Double` | `14` | Text size in points | | `opacity` | `Double` | `0.3` | Opacity from `0.0` (transparent) to `1.0` (opaque) | | `animation` | `WatermarkAnimation?` | `nil` | Optional animation; `nil` renders a static watermark | #### ImageWatermarkConfig Properties Use `ImageWatermarkConfig` to display remote image overlays such as instructor avatars or company branding. | Property | Type | Default | Description | | :--- | :--- | :--- | :--- | | `imageUrl` | `String` | — | HTTPS URL of the watermark image (required, PNG recommended) | | `width` | `Double` | `48` | Width in points (clamped to `>= 0`) | | `height` | `Double` | `48` | Height in points (clamped to `>= 0`) | | `x` | `Int64` | `92` | Horizontal position percentage (`0`–`100`, default places towards bottom-right) | | `y` | `Int64` | `88` | Vertical position percentage (`0`–`100`, default places towards bottom-right) | | `opacity` | `Double` | `1.0` | Opacity from `0.0` (transparent) to `1.0` (opaque) | --- ### WatermarkAnimation / WatermarkAnimationType `WatermarkAnimation` is supported on `TextWatermarkConfig` and accepts `type` (`WatermarkAnimationType`) and `duration` in milliseconds (default `10000`, minimum `100`). Supported animation types: - **`pingPong`** (`.pingPong`): Moves the watermark horizontally from the left edge to the right edge and back, taking the configured duration per leg. Animated watermarks **ignore the initial x coordinate**; their y position is honored. - **`random`** (`.random`): Repositions the watermark to random coordinates across the active player view every `duration` milliseconds. Both `x` and `y` initial coordinates are randomized. --- ### Behavior & Features - **Asynchronous Image Loading & Caching:** Remote images in `ImageWatermarkConfig` are fetched asynchronously and cached for smooth rendering. - **Controls Auto-Hide:** Image watermark overlays automatically fade out when player controls are visible and smoothly fade back in when controls are dismissed. - **Safe Positioning & Boundary Clamping:** Watermarks are kept fully visible inside the player view with a fixed inset, and automatically reposition on screen rotation, fullscreen transitions, and view resizing. Out-of-range `x`/`y` (`0`–`100`) and `opacity` (`0.0`–`1.0`) values are clamped to the nearest bound. - **Playback Sync:** Animated text watermarks pause while playback is not active (paused, buffering, ended) and resume smoothly from the paused position when playback resumes. - **Lifecycle Cleanup:** Overlays and running animation timers are cleanly torn down when the player view controller is deinitialized. --- ## Changelog(React-native-sdk) import GitHubDoc from '@site/src/components/GitHubDoc'; --- ## Downloads(React-native-sdk) The React Native TPStreams SDK provides comprehensive download functionality for offline video playback. This includes initiating downloads, managing ongoing tasks, and tracking progress through events. ### Initiating a Download Use the `startDownload` function to initiate a video download for offline playback. #### `startDownload` ```typescript import { startDownload } from 'react-native-tpstreams'; await startDownload( videoId, // string: Required accessToken, // string: Required resolution, // string | null: Optional (e.g., '360p', '720p') metadata // object | null: Optional custom metadata ); ``` | Parameter | Type | Description | | :--- | :--- | :--- | | `videoId` | `string` | Unique identifier for the video. | | `accessToken` | `string` | Valid access token for the video. | | `resolution` | `string` | (Optional) Desired resolution. Defaults to best available if `null`. | | `metadata` | `object` | (Optional) Any custom key-value pairs you want to attach to the download. | ### Managing Downloads #### Basic Operations - **pauseDownload(videoId: string)**: Pauses an ongoing download. Returns `Promise`. - **resumeDownload(videoId: string)**: Resumes a paused download. Returns `Promise`. - **removeDownload(videoId: string)**: Removes a downloaded video. Returns `Promise`. #### Download Status - **isDownloaded(videoId: string)**: Checks if a video has been downloaded. Returns `Promise`. - **isDownloading(videoId: string)**: Checks if a video is currently downloading. Returns `Promise`. - **isPaused(videoId: string)**: Checks if a video download is paused. Returns `Promise`. - **getDownloadStatus(videoId: string)**: Gets the download status of a video as a descriptive string. Returns `Promise`. - **getAllDownloads()**: Gets all downloaded videos. Returns `Promise`. ### Download Events To receive updates about download progress and state changes, you must first initialize the progress listener and then subscribe to specific events. #### Initialization You should call this once (e.g., in `useEffect` or at app launch) to enable background progress tracking. ```typescript import { addDownloadProgressListener, removeDownloadProgressListener } from 'react-native-tpstreams'; await addDownloadProgressListener(); ``` #### Event Listeners All listeners return an `EmitterSubscription`. Always call `.remove()` on the subscription when cleaning up your component. ##### Progress Updates Triggered periodically with the status of all current downloads. ```typescript import { onDownloadProgressChanged } from 'react-native-tpstreams'; const subscription = onDownloadProgressChanged((downloads: DownloadItem[]) => { downloads.forEach(item => { console.log(`${item.title}: ${item.progressPercentage}%`); }); }); ``` ##### State Change Events These events are triggered when an individual download changes state. :::caution Deprecation Notice `onDownloadStateChanged` will be deprecated starting from version **v1.1.11**. We recommend using dedicated events like `onDownloadStarted`, `onDownloadCompleted`, etc., for more precise control. ::: | Event | Payload | Description | | :--- | :--- | :--- | | `onDownloadStarted` | `(item: DownloadItem)` | Download has successfully started. | | `onDownloadPaused` | `(item: DownloadItem)` | Download has been paused. | | `onDownloadResumed` | `(item: DownloadItem)` | Download has resumed. | | `onDownloadCompleted` | `(item: DownloadItem)` | Download finished successfully. | | `onDownloadFailed` | `(item, error)` | Download failed. Includes `DownloadError`. | | `onDownloadStateChanged` | `(item, error?)` | (Deprecated) General state change listener. | | `onDownloadDeleted` | `(videoId: string)` | Triggered when a download is removed. | ### Data Structures #### `DownloadItem` The object returned in most event callbacks and by `getAllDownloads()`. ```typescript interface DownloadItem { videoId: string; title: string; thumbnailUrl?: string; totalBytes: number; downloadedBytes: number; progressPercentage: number; state: 'Downloading' | 'Paused' | 'Completed' | 'Failed' | 'Queued'; metadata: Record; } ``` #### `DownloadError` Returned in `onDownloadFailed`. ```typescript interface DownloadError { message: string; // Human readable error message type: string; // Technical error code/type } ``` ### Usage Example ```typescript import React, { useEffect } from 'react'; import { Alert } from 'react-native'; import { addDownloadProgressListener, removeDownloadProgressListener, onDownloadCompleted, onDownloadFailed } from 'react-native-tpstreams'; const MyComponent = () => { useEffect(() => { // 1. Initialize background tracking addDownloadProgressListener(); // 2. Listen for Completion const completedSub = onDownloadCompleted((item) => { Alert.alert('Success', `${item.title} is ready for offline viewing!`); }); // 3. Listen for Failures const failedSub = onDownloadFailed((item, error) => { console.error(`Download failed: ${error.message}`); }); return () => { // 4. Cleanup background tracking and listeners removeDownloadProgressListener(); completedSub.remove(); failedSub.remove(); }; }, []); return ( // Your UI components ); }; ``` --- ## Getting Started(React-native-sdk) To use our React Native player SDK, add [`react-native-tpstreams`](https://www.npmjs.com/package/react-native-tpstreams) as a dependency in your project. ### Installation ```sh npm install react-native-tpstreams ``` ### Initialize TPStreams First, initialize TPStreams with your organization ID. This should be done **only once** at your app's entry point (e.g., App.js or index.js): ```js import { TPStreams } from "react-native-tpstreams"; TPStreams.initialize('YOUR_ORGANIZATION_ID', { allowFallbackToL3: true }); ``` ### Add the Player Component Then add the player component to your app: ```jsx import { TPStreamsPlayerView } from "react-native-tpstreams"; ``` ### Player Props - `videoId`: (Required) The ID of the video to play. - `accessToken`: (Required) Access token for the video. - `startAt`: (Optional) Position in seconds where playback should start. Default is 0. - `shouldAutoPlay`: (Optional) Whether the video should start playing automatically. Default is true. - `showDefaultCaptions`: (Optional) Whether to show default captions if available. Default is false. - `startInFullscreen`: (Optional) Whether to start the player in fullscreen mode. Default is false. - `enableDownload`: (Optional) Whether to enable download functionality for the video. When set to true, the player will show a download button. Default is false. - `offlineLicenseExpireTime`: (Optional) The expiration time for offline licenses in seconds. If not provided, defaults to 15 days (1,296,000 seconds). - `downloadMetadata`: (Optional) Custom metadata to attach to downloads. Accepts an object with string key-value pairs. This metadata is stored with the download and can be retrieved later. Default is undefined. - `allowFallbackToL3`: (Android only) Allow Widevine L1 to L3 fallback for DRM license acquisition. Default is false. For a practical implementation and usage of react-native-tpstreams, refer to our [Sample React Native App](https://github.com/testpress/sample-rn-player-app). --- ## Player Events(React-native-sdk) You can listen to various events related to the player's state through the TPStreamsPlayerView component. By adding event handlers, you can track changes in the player's properties such as whether the video is playing, loading state, playback speed changes, and more. ### Available Events The TPStreamsPlayerView component provides the following event handlers: - **onPlayerStateChanged(state: number)**: Fires when player state changes. - **onIsPlayingChanged(isPlaying: boolean)**: Fires when playing state changes. - **onPlaybackSpeedChanged(speed: number)**: Fires when playback speed changes. - **onIsLoadingChanged(isLoading: boolean)**: Fires when loading state changes. - **`onError(error: {message: string, code: number, details?: string})`**: Fires when an error occurs. - **onAccessTokenExpired(videoId: string, callback: (newToken: string) => void)**: Fires when the access token expires. Call the callback with a new token to continue playback. - **`onSubtitleStateChanged(enabled: boolean, language?: string)`**: Fires when subtitle state changes (subtitles turned ON/OFF or active subtitle language changed). ### Player State Values The **onPlayerStateChanged** event provides numeric state values that correspond to the following player states: - **0** - IDLE: Player is idle and not ready to play - **1** - BUFFERING: Player is buffering content - **2** - READY: Player is ready to play - **3** - ENDED: Video playback has ended ### Event Handler Usage ```jsx { switch(state) { case 0: console.log('Player is idle'); break; case 1: console.log('Player is buffering'); break; case 2: console.log('Player is ready'); break; case 3: console.log('Video ended'); break; } }} onIsPlayingChanged={(isPlaying) => console.log(`Is playing: ${isPlaying}`)} onPlaybackSpeedChanged={(speed) => console.log(`Speed changed: ${speed}x`)} onIsLoadingChanged={(isLoading) => console.log(`Loading: ${isLoading}`)} onError={(error) => console.error('Player error:', error)} onSubtitleStateChanged={(enabled, language) => console.log(`Subtitles ${enabled ? 'ON' : 'OFF'}${language ? ` (${language})` : ''}`) } onAccessTokenExpired={async (videoId, callback) => { // Fetch a new token from your server const newToken = await getNewTokenForVideo(videoId); callback(newToken); }} /> ``` --- ## Player Methods(React-native-sdk) The TPStreamsPlayerView provides several methods to control video playback and manage player states. Below is the detailed explanation of each method: ### Play ```js play() ``` Starts video playback. Call this method when you want the video to start playing or resume after being paused. ### Pause ```js pause() ``` Pauses video playback. This stops the video while allowing it to be resumed later from the same position. ### Seek ```js seekTo(positionMs: number) ``` Seeks to a specific time in the video. The positionMs parameter specifies the timestamp in milliseconds you want to jump to. **Parameters:** - `positionMs`: The position in milliseconds representing the time position in the video. ### Set Playback Speed ```js setPlaybackSpeed(speed: number) ``` Sets the playback speed of the video. **Parameters:** - `speed`: A number value where 1.0 is normal speed, 0.5 is half-speed, and 2.0 is double-speed. ### Get Current Position ```js getCurrentPosition(): Promise ``` Retrieves the current playback position of the video in milliseconds. ### Get Video Duration ```js getDuration(): Promise ``` Retrieves the total duration of the currently loaded video in milliseconds. ### Check Playing State ```js isPlaying(): Promise ``` Checks if the video is currently playing. ### Get Playback Speed ```js getPlaybackSpeed(): Promise ``` Gets the current playback speed of the video. --- ## Access token An access token is essential for secure video playback . #### Create an Access token To generate the Access token you need to send an HTTP POST request to the API Endpoint, with the [authentication Header](../server-api/authentication.md) and the optional Access token request Body. ```bash https://app.tpstreams.com/api/v1/{{org_code}}/assets/{{asset_id}}/access_tokens/ ``` **Optional Fields** | Name | Type | description | | ----------- | ----------- | ----------- | | time_to_live | integer | By default, the Access token validity is set to infinity. You can create shorter-lived URLs by passing the time_to_live parameter. This value is to be set in seconds | | expires_after_first_usage | boolean | Passing true will make the access token expire immediately after the first usage | | annotations | json | JSON contain all the information about the watermark. Please refer to this [doc](../video-embedding/watermarking.md) for details on watermarking. | For valid requests the API server returns a JSON: ```js { "playback_url":"https://app.tpstreams.com/embed/dcek2m/6cKHaeJ44pp/?access_token=1a60b175-c2e8-4a38-814b-323697f52994", "expires_after_first_usage":false, "code":"1a60b175-c2e8-4a38-814b-323697f52994", "status":"Active","valid_until":null, "annotations":[] } ``` #### View Access token Make get request to the below API with your video id and access token code to get the access token details ```bash https://app.tpstreams.com/api/v1/{{org_code}}/assets/{{asset_id}}/access_tokens/{access_token_code}/ ``` **Response** ```js { "playback_url": "https://app.tpstreams.com/embed/d2ff26b2-f88e-4d6d-a9ce-bb0e3ce858cc/?access_token=e91e2bf4-a3ab-493f-8685-7b88ea943c5a", "expires_after_first_usage": false, "code": "e91e2bf4-a3ab-493f-8685-7b88ea943c5a", "status": "Active", "valid_until": null, "annotations": [ { "text": "moving text", "type": "dynamic", "color": "#FF0000", "opacity": "0.80", "size": 15, "interval": 1000, "skip": 0, "x": 16, "y": 16 } ] } ``` #### Update Access token ```bash https://app.tpstreams.com/api/v1/{{org_code}}/assets/{{asset_id}}/access_tokens/{access_token_code}/ ``` This code below updates the access_token time_to_live. ```js { time_to_live: 300 } ``` **Response** ```js { "playback_url": "https://app.tpstreams.com/embed/d2ff26b2-f88e-4d6d-a9ce-bb0e3ce858cc/?access_token=e91e2bf4-a3ab-493f-8685-7b88ea943c5a", "expires_after_first_usage": false, "code": "e91e2bf4-a3ab-493f-8685-7b88ea943c5a", "status": "Active", "valid_until": "2022-08-30T14:24:23.835382Z", "annotations": [] } ``` --- ## Assets - An asset refers to a media content/video that is processed, stored, and delivered through Streams. This endpoint creates an asset allowing users to ingest media content into the TP Streams system for processing and delivery. ### Upload an video To Upload a asset you need to send an HTTP POST request to the API Endpoint, with the [authentication Header](../server-api/authentication.md). ```bash https://app.tpstreams.com/api/v1//assets/videos/ ``` **Fields** | Name | Type | Description | Required | | ----------- | ----------- | ----------- | ---------- | | content_protection_type | string | To ensure the security of your video content, you can choose from available protection types: 'drm', 'aes' encryption, or indicate 'disable' for no specific protection. Each option offers varying levels of security for your content. | No | | title | string | Specify a text string or identifier which can be used for filtering or searching the asset.| No | | resolutions | array | Required resolutions of the transformed asset in case of HLS or MPEG-DASH delivery format. Can be a comma separated string out of the following values: 240p, 360p, 480p, 540p, 720p, and 1080p. Re-sized rendition will retain the input aspect ratio. | Yes | | inputs | json | URL or web address of a file that TP streams should download to create a new asset. | Yes | | folder | string | The UUID of the folder, if you want to upload the video into that specific folder | No | | generate_subtitle | boolean | Enable automatic generation of subtitles for the video after upload. Defaults to false if not specified. | No | **Pricing** Auto-generated English subtitles cost $0.071 per minute of video content. :::important - Subtitle generation is an asynchronous process that may take several minutes - Only one auto-generated subtitle track per video is allowed - Email notifications are sent upon completion or failure ::: **Sample request body** ```json { "title": "Big Buck Bunny Video", "inputs": [ { "url": "https://static.testpress.in/BigBuckBunny.mp4" } ], "resolutions": ["240p", "360p", "480p", "720p"], "content_protection_type": "drm", "folder": "32seYYHeNxE", "generate_subtitle": true } ``` For valid requests the API server returns a JSON: ```json { "id": "9328558d-e0a5-4093-b3b9-8f15ad1550d8", // asset id "title": "Big Buck Bunny Video", "bytes": null, "type": "video", "video": { "progress": 0, "thumbnails": [], "status": "Completed", "playback_url": "https://d7pdowhru2wq4.cloudfront.net/transcoded/9328558d-e0a5-4093-b3b9-8f15ad1550d8/video.m3u8", "dash_url": "https://d7pdowhru2wq4.cloudfront.net/transcoded/9328558d-e0a5-4093-b3b9-8f15ad1550d8/video.mpd", "preview_thumbnail_url": null, "format": "abr", "resolutions": ["240p", "360p", "480p", "720p"], "video_codec": "h264", "audio_codec": "aac", "content_protection_type": "drm", "tracks": [], "inputs": [ { "url": "https://static.testpress.in/BigBuckBunny.mp4" } ], }, "parent_id": "32seYYHeNxE", } ``` Above response can also be obtained by asset detail API **`/api/v1//assets//`** --- ### Bulk Upload Videos Upload multiple videos in a single request by sending an HTTP POST request to the API Endpoint, with the [authentication Header](../server-api/authentication.md). ```bash https://app.tpstreams.com/api/v1//assets/videos/bulk-create/ ``` Each video object must follow the same structure as described in [Upload a Video](#upload-an-video). **Sample Request Body** An array of video objects, for example: ```json [ { "title": "Big Buck Bunny Video 1", "inputs": [ { "url": "https://static.testpress.in/BigBuckBunny.mp4" } ], "resolutions": ["360p", "720p"], "content_protection_type": "aes", "generate_subtitle": false }, { "title": "Big Buck Bunny Video 2", "inputs": [ { "url": "https://static.testpress.in/BigBuckBunny.mp4" } ], "resolutions": ["480p", "1080p"], "content_protection_type": "drm", "generate_subtitle": true } ] ``` --- :::important * You can upload up to **50 videos** in a single request. * Each video must be **unique**. * If any duplicates are detected or if validation fails for any item: * The API returns a **400 Bad Request** error. * **No videos are created** * Successful requests return all created video assets in the same order as submitted. ::: --- **Understanding Video Uniqueness** The bulk upload API checks for duplicate videos within your request to prevent accidental re-uploads. A video is considered a duplicate if **both** the **title** and the **input URL** match another video in the same request. **Examples:** | Scenario | Video 1 | Video 2 | Allowed? | Reason | |----------|---------|---------|----------|--------| | **Different videos** | Title: `"Introduction"` URL: `video1.mp4` | Title: `"Module"` URL: `video2.mp4` | **Yes** | Both title and URL are different | | **Same title, different URL** | Title: `"Lecture"` URL: `video1.mp4` | Title: `"Lecture"` URL: `video2.mp4` | **Yes** | URLs are different (different source files) | | **Different title, same URL** | Title: `"Version 1"` URL: `video.mp4` | Title: `"Version 2"` URL: `video.mp4` | **Yes** | Titles are different (e.g., different versions) | | **Exact duplicate** | Title: `"Tutorial"` URL: `video.mp4` | Title: `"Tutorial"` URL: `video.mp4` | **No** | Both title and URL match exactly | **Pricing** Auto-generated English subtitles cost $0.071 per minute of video content. :::important - Subtitle generation is an asynchronous process that may take several minutes - Only one auto-generated subtitle track per video is allowed - Email notifications are sent upon completion or failure ::: For valid requests the API server returns a JSON Response: ```json [ { "title": "Big Buck Bunny Video 1", "bytes": null, "type": "video", "video": { "progress": 0, "thumbnails": null, "status": "Not Started", "playback_url": "https://dlbdnoa93s0gw.cloudfront.net/transcoded/ATnJxKqcrHY/video.m3u8", "dash_url": "https://dlbdnoa93s0gw.cloudfront.net/transcoded/ATnJxKqcrHY/video.mpd", "preview_thumbnail_url": null, "cover_thumbnail_url": null, "format": "abr", "resolutions": [ "240p", "360p", "480p", "720p" ], "video_codec": "h264", "audio_codec": "aac", "enable_drm": true, "inputs": [ { "url": "https://static.testpress.in/BigBuckBunny.mp4" } ], "transmux_only": null, "duration": null, "content_protection_type": "drm", "generate_subtitle": false, "video_codecs": [ "h264" ], "output_urls": { "h264": { "hls_url": "https://dlbdnoa93s0gw.cloudfront.net/transcoded/ATnJxKqcrHY/video.m3u8", "dash_url": "https://dlbdnoa93s0gw.cloudfront.net/transcoded/ATnJxKqcrHY/video.mpd" } } }, "id": "ATnJxKqcrHY", "live_stream": null, "parent": { "title": "API test", "uuid": "78ADBZx9s8r" }, "parent_id": "78ADBZx9s8r" }, { "title": "Big Buck Bunny Video 2", "bytes": null, "type": "video", "video": { "progress": 0, "thumbnails": null, "status": "Not Started", "playback_url": "https://dlbdnoa93s0gw.cloudfront.net/transcoded/6RbRTBCzjkK/video.m3u8", "dash_url": "https://dlbdnoa93s0gw.cloudfront.net/transcoded/6RbRTBCzjkK/video.mpd", "preview_thumbnail_url": null, "cover_thumbnail_url": null, "format": "abr", "resolutions": [ "240p", "360p", "480p", "720p" ], "video_codec": "h264", "audio_codec": "aac", "enable_drm": true, "inputs": [ { "url": "https://static.testpress.in/BigBuckBunny.mp4" } ], "transmux_only": null, "duration": null, "content_protection_type": "drm", "generate_subtitle": false, "video_codecs": [ "h264" ], "output_urls": { "h264": { "hls_url": "https://dlbdnoa93s0gw.cloudfront.net/transcoded/6RbRTBCzjkK/video.m3u8", "dash_url": "https://dlbdnoa93s0gw.cloudfront.net/transcoded/6RbRTBCzjkK/video.mpd" } } }, "id": "6RbRTBCzjkK", "live_stream": null, "parent": { "title": "API test", "uuid": "78ADBZx9s8r" }, "parent_id": "78ADBZx9s8r" } ] ``` - Video processing time varies based on video duration, file size, and selected resolutions - Use the [Get Individual Asset Details](#get-individual-asset-details) endpoint to monitor each video: ```bash GET https://app.tpstreams.com/api/v1//assets// ``` --- **Troubleshooting** ##### 1. Invalid Request Body Format ```json { "detail": "Request body must be a list of objects." } ``` **Cause:** Request body is not an array. **Fix:** Ensure your request body is a JSON array of video objects. --- ##### 2. Exceeds Upload Limit ```json { "detail": "The maximum number of assets you can upload in a single request is 50. You submitted 75." } ``` **Cause:** Request contains more than 50 videos. **Fix:** Split your videos into multiple requests, each containing 50 or fewer videos. --- ##### 3. Duplicate Videos in Request ```json { "detail": "Duplicate video asset found in the request body.", "duplicate_key": "('Big Buck Bunny Video', 'https://static.testpress.in/BigBuckBunny.mp4')", "first_occurrence_index": 0, "current_occurrence_index": 3, "message": "Item at index 3 is a duplicate of the item at index 0. Bulk requests must contain only unique video assets.", "item_index": 3 } ``` **Cause:** Multiple videos in the request have the same title and input URL combination. **Fix:** Ensure each video has a unique combination of `title` and `inputs[0].url`. Either change the title or use a different source URL. --- ##### 4. Validation Error in Video Object ```json { "resolutions": [ "This field is required." ], "inputs": [ "This field is required." ], "item_index": 2 } ``` **Cause:** One or more videos are missing required fields or contain invalid values. **Fix:** Check the video at the specified `item_index` (zero-based) and ensure all required fields are present and valid. Refer to [Upload a Video](#upload-an-video) for field requirements. --- ##### 5. Malformed Input Data ```json { "error_type": "IndexError", "item_index": 1 } ``` **Cause:** The video object at the specified index has malformed or missing `inputs` array. **Fix:** Ensure each video object has an `inputs` array with at least one object containing a `url` field: ```json { "inputs": [ { "url": "https://example.com/video.mp4" } ] } ``` --- **Best Practices** 1. **Optimize request batch sizes** - While 50 videos is the maximum, smaller batches (10-20 videos) are more manageable --- ### Get all the assets that belong to the organization To get all assets in the organization, you need to send an HTTP GET request to the API Endpoint, with the [authentication Header](../server-api/authentication.md). **Endpoint** ```bash https://app.tpstreams.com/api/v1//assets/ ``` **Query Parameters** | Name | Type | Description | Required | | --- | --- | --- | --- | | `parent` | string | UUID of the folder whose assets you want to retrieve. | No | | `has_parent` | boolean | Set to `false` to retrieve assets directly under the root directory. | No |
Examples ```bash GET https://app.tpstreams.com/api/v1//assets/?parent=4qA6HUN3F7Z GET https://app.tpstreams.com/api/v1//assets/?has_parent=false ```
**Response** ```json { "count": 2, "next": "https://app.tpstreams.com/api/v1/dcek2m/assets/?limit=50&offset=50", "previous": null, "results": [ { "title": "Big Buck Bunny Video", "bytes": 450881324, "type": "video", "video": { "progress": 0, "thumbnails": [ "https://d28qihy7z761lk.cloudfront.net/transcoded/yXrprYum2TS/thumbnails/thumbnail_4.png", "https://d28qihy7z761lk.cloudfront.net/transcoded/yXrprYum2TS/thumbnails/thumbnail_6.png", "https://d28qihy7z761lk.cloudfront.net/transcoded/yXrprYum2TS/thumbnails/thumbnail_5.png", "https://d28qihy7z761lk.cloudfront.net/transcoded/yXrprYum2TS/thumbnails/thumbnail_2.png", "https://d28qihy7z761lk.cloudfront.net/transcoded/yXrprYum2TS/thumbnails/thumbnail_1.png", "https://d28qihy7z761lk.cloudfront.net/transcoded/yXrprYum2TS/thumbnails/thumbnail_3.png" ], "status": "Completed", "playback_url": "https://d28qihy7z761lk.cloudfront.net/transcoded/yXrprYum2TS/video.m3u8", "dash_url": "https://d28qihy7z761lk.cloudfront.net/transcoded/yXrprYum2TS/video.mpd", "preview_thumbnail_url": null, "cover_thumbnail_url": "https://d28qihy7z761lk.cloudfront.net/transcoded/yXrprYum2TS/thumbnails/thumbnail_4.png", "format": "abr", "resolutions": [ "240p", "360p", "480p", "720p" ], "video_codec": "h264", "audio_codec": "aac", "enable_drm": true, "tracks": [ { "id": 4094, "type": "Preview Thumbnail", "preview_thumbnail": { "url": "https://d28qihy7z761lk.cloudfront.net/transcoded/996NXydJQDU/sprite/sprite_image.png", "interval": 2, "width": 160, "height": 90, "rows": 10, "columns": 10 } } ], "inputs": [ { "url": "private/yXrprYum2TS.mp4" } ], "transmux_only": null, "duration": 597, "content_protection_type": "drm" }, "id": "yXrprYum2TS", "live_stream": null, "parent": null, "parent_id": null, }, { "title": "Data science Live class", "bytes": null, "type": "livestream", "video": null, "id": "AAbxGpp8DUm", "live_stream": { "rtmp_url": "rtmp://13.235.45.255/live", "stream_key": "org-dcek2m-live-AAbxGpp8DUm-H4xB", "status": "Not Started", "hls_url": "https://d28qihy7z761lk.cloudfront.net/live/dcek2m/AAbxGpp8DUm/video.m3u8", "start": "2023-12-06 16:37:56", "transcode_recorded_video": true, "enable_drm_for_recording": true, "chat_embed_url": "https://app.tpstreams.com/live-chat/dcek2m/AAbxGpp8DUm/", "resolutions": [ "240p", "480p", "720p" ], "enable_drm": true }, "parent": null, "parent_id": null, } ] } ``` ### Get Individual Asset Details To get a individual asset in the organization, you need to send an HTTP GET request to the API Endpoint, with the [authentication Header](../server-api/authentication.md). **Endpoint** ```bash https://app.tpstreams.com/api/v1//assets// ``` **Fields** | Name | Type | Description | Required | |--------|--------|-----------------------------------------------------------------------------|----------| | expiry | string | The duration (in seconds) for the playback URL to remain valid. For non-encrypted videos, the URL is valid for a lifetime by default. For AES-encrypted videos, defaults to 120 seconds if not specified. | No | **Sample request body** ```json { "expiry": 300 } ``` **Response** ```json { "title": "Big Buck Bunny Video", "bytes": 450881324, "type": "video", "video": { "progress": 0, "thumbnails": [ "https://d28qihy7z761lk.cloudfront.net/transcoded/yXrprYum2TS/thumbnails/thumbnail_4.png", "https://d28qihy7z761lk.cloudfront.net/transcoded/yXrprYum2TS/thumbnails/thumbnail_6.png", "https://d28qihy7z761lk.cloudfront.net/transcoded/yXrprYum2TS/thumbnails/thumbnail_5.png", "https://d28qihy7z761lk.cloudfront.net/transcoded/yXrprYum2TS/thumbnails/thumbnail_2.png", "https://d28qihy7z761lk.cloudfront.net/transcoded/yXrprYum2TS/thumbnails/thumbnail_1.png", "https://d28qihy7z761lk.cloudfront.net/transcoded/yXrprYum2TS/thumbnails/thumbnail_3.png" ], "status": "Completed", "playback_url": "https://d28qihy7z761lk.cloudfront.net/transcoded/yXrprYum2TS/video.m3u8Expires=1736006095&Signature=jDr8etkNBN0NWajFNNpiqwQxSyDzW497cz~tAodGK~49deNHWya4pvCy2sRyteyJPU455uDkE3we8MvXOkVenx4m8SR6IB-BsdIFJ0ZraQnMOQqVdsTBn8wBHgXERL28AF71Vkn5yH0-eDWUttzP2jc4o42WO~6SMd1YKjmKdqgyxU9K1TZBXr3tAXPdEJQlzipoRp6j7W~3QgAOz-zcOBRACoXj9P0Xi4yOjMaKSTrvGx~BvF4SBMAbQPGV2i-P-21-tpVCrPl921FRWlbLArt~IMbrfqAZJUXOWGB3NTpSUAMvM8HnQs7JCrySVwQaWGsLhgZk7x-6Ls2olKNb3Q__&Key-Pair-Id=K2XWKDWM065EGO", "dash_url": "https://d28qihy7z761lk.cloudfront.net/transcoded/yXrprYum2TS/video.mpd", "preview_thumbnail_url": null, "cover_thumbnail_url": "https://d28qihy7z761lk.cloudfront.net/transcoded/yXrprYum2TS/thumbnails/thumbnail_4.png", "format": "abr", "resolutions": [ "240p", "360p", "480p", "720p" ], "video_codec": "h264", "audio_codec": "aac", "enable_drm": true, "tracks": [ { "id": 4094, "type": "Preview Thumbnail", "preview_thumbnail": { "url": "https://d28qihy7z761lk.cloudfront.net/transcoded/996NXydJQDU/sprite/sprite_image.png", "interval": 2, "width": 160, "height": 90, "rows": 10, "columns": 10 } } ], "inputs": [ { "url": "private/yXrprYum2TS.mp4" } ], "transmux_only": null, "duration": 597, "content_protection_type": "drm" }, "id": "yXrprYum2TS", "live_stream": null, "parent": null, "parent_id": null, "views_count": 404, "average_watched_time": 443, "total_watch_time": 179192, "unique_viewers_count": 312, "download_url": "https://d28qihy7z761lk.cloudfront.net/private/yXrprYum2TS.mp4?response-content-disposition=attachment%3B+filename%3DBig+Buck+Bunny+Video.mp4&Expires=1708718514&Signature=wzuk7MhZsjKE9MwG0yaM1cMMFurc3ZIhCmrR0~fx2vgSwVd1d0B68GG~KwE6upj8XJMn~5zrBcadlf8TWeFuRyoRbIw6vipEDbWYLdPQhLwZcHp7mwz7ERNpikvBZJUO7KB5Z~h6BSGvcDBnVVc9pNZ8W2Zz95Ix28dnNhr~J9fqEgHtd0KaOqmX~LVjbHq56u6NiYrm4SZm3hmnWsfuaShWVJzkEBGrgnx8EnYtYe4JkHEBSvnskJvQPuCz82gwlK4vxNSdJ~0g08xkcwkJQG1mLqi39gbumkalS-8jp-pAKoyHMpXsHO6m9FKpwHHjnHp2wwPlSOykUPk1dcrt8Q__&Key-Pair-Id=K2XWKDWM065EGO" } ``` ### Delete Individual Asset To delete a individual asset in the organization, you need to send an HTTP DELETE request to the API Endpoint, with the [authentication Header](../server-api/authentication.md). **Endpoint** ```bash https://app.tpstreams.com/api/v1//assets// ``` If the specified asset is a folder, it will remove all its child assets. you need to send an HTTP DELETE request to the API Endpoint, with the [authentication Header](../server-api/authentication.md). This will delete the specified asset from your organization ### Add Video Resolutions To selectively add one or more transcoded resolutions to an existing completed video asset, send an HTTP POST request to the API endpoint along with the [authentication Header](../server-api/authentication.md). **Endpoint** ```bash https://app.tpstreams.com/api/v1//assets//add_resolutions/ ``` **Fields** | Name | Type | Description | Required | |-------------|-------|-------------------------------------------------------------------------------------------------------------------------------------------------------|----------| | resolutions | array | Array of resolutions to add (e.g., `[1080, "4k"]` or `["720p", "1080p"]`). Supported values: `240p`, `360p`, `480p`, `720p`, `1080p`, `4k` (or heights `240`, `360`, `480`, `720`, `1080`, `2160`). | Yes | **Sample request body** ```json { "resolutions": [1080, "4k"] } ``` **Sample Response** For **valid requests**, the API server immediately queues the transcoding task in the background and returns an **HTTP status code 202 Accepted** ```json { "uuid": "4jjgG7ma3XE", "job_id": "8fa1b93f-c689-4fa2-bc42-f8510dc41372", "resolutions": [1080, 2160] } ``` :::important - Resolutions can only be added to completed videos and completed livestreams. - Adding a resolution that already exists on the video will return an error (`400 Bad Request`). - If an incremental resolution addition task is already in progress for the asset, new requests will be rejected until the active task completes. ::: ### Delete Video Resolutions To selectively delete one or more transcoded resolutions from a video asset, send an HTTP POST request to the API endpoint along with the [authentication Header](../server-api/authentication.md). **Endpoint** ```bash https://app.tpstreams.com/api/v1//assets//delete_resolutions/ ``` **Fields** | Name | Type | Description | Required | |-------------|-------|-------------------------------------------------------------------------------------------------|----------| | resolutions | array | Array of resolutions to delete (e.g., `[240, 360]`). Note: At least one resolution must remain; deleting all resolutions of a video is not allowed. | Yes | **Sample request body** ```json { "resolutions": [240, 360] } ``` **Sample Response** For **valid requests**, the API server immediately queues the task and returns an **HTTP status code 202 Accepted** ```json { "uuid": "4jjgG7ma3XE", "resolutions": [ { "resolution": 240, "status": "queued", "detail": "Deletion task queued. Final status will be sent via webhook." }, { "resolution": 360, "status": "not_found", "detail": "Resolution does not exist on this video." } ] } ``` :::important - Resolution deletion is only supported for DRM and NON DRM videos currently and is not supported for AES-protected videos. - This operation deletes the corresponding HLS playlists (.m3u8), segments (.ts), and static MP4 renditions from cloud storage, updates the master playlist, and invalidates CDN caches. ::: ### Move Individual Asset To move an asset from one folder to another or to the root directory, you need to send an HTTP POST request to the API Endpoint, with the [authentication Header](../server-api/authentication.md) . **Endpoint** ```bash https://app.tpstreams.com/api/v1//assets//move/ ``` **Fields** | Name | Type | Description | Required | | ----------- | ----------- | ----------- | ---------- | | parent | string | UUID of the destination folder | No | **Sample request body** ```json { "parent": "7hCCRZtXNmq" } ``` **Response** For valid requests the API server returns a JSON: ```json { "detail": "Asset moved successfully." } ``` :::important To move an asset to the root directory , send an HTTP POST request with an empty request body to the designated API endpoint. ::: ### Generate Subtitle for an Asset To generate subtitles for a video asset, you need to send an HTTP POST request to the API Endpoint, with the [authentication Header](../server-api/authentication.md). **Endpoint** ```bash https://app.tpstreams.com/api/v1//assets//generate_subtitle/ ``` **Description** This endpoint triggers automatic subtitle generation for a video asset using speech-to-text technology. The system will generate English subtitles automatically and save them as a WebVTT (.vtt) file. **Request Body** No request body is required for this endpoint. **Response** For valid requests the API server returns the complete asset data in JSON format with status code 201: ```json { "title": "Big Buck Bunny Video", "bytes": 26990804, "type": "video", "video": { "progress": 0, "thumbnails": [ ], "status": "Completed", "playback_url": "https://d28qihy7z761lk.cloudfront.net/transcoded/7cFHfFSfjna/video.m3u8", "dash_url": "https://d28qihy7z761lk.cloudfront.net/transcoded/7cFHfFSfjna/video.mpd", "preview_thumbnail_url": "https://d28qihy7z761lk.cloudfront.net/transcoded/7cFHfFSfjna/thumbnails/thumbnail_4.png", "cover_thumbnail_url": "https://d28qihy7z761lk.cloudfront.net/transcoded/7cFHfFSfjna/thumbnails/thumbnail_4.png", "format": "abr", "resolutions": [ "240p", "360p", "480p", "720p" ], "video_codec": "h264", "audio_codec": "aac", "enable_drm": true, "tracks": [], "inputs": [ { "url": "private/677155207a6847b5b5a8d70cfaf4a8a1.mp4" } ], "transmux_only": null, "duration": 19, "content_protection_type": "drm", }, "id": "7cFHfFSfjna", "live_stream": null, "parent_id": "BmN3MXSq5z6" } ``` **Pricing** Auto-generated English subtitles cost $0.071 per minute of video content. :::important - Subtitle generation is an asynchronous process that may take several minutes - Only one auto-generated subtitle track per video is allowed - Email notifications are sent upon completion or failure ::: ### Upload Subtitles to an Asset To upload subtitles to an asset , you need to send an HTTP POST request to the API Endpoint, with the [authentication Header](../server-api/authentication.md) . **Endpoint** ```bash https://app.tpstreams.com/api/v1//assets//upload_subtitle/ ``` **Fields** | Name | Type | Description | Required | | ----------- | ----------- | ----------- | ---------- | | subtitle | .vtt file | File Containing Subtitles | Yes | | name | string | Name of the subtitles | No | | language | string | Language code of the subtitles | No | Send the subtitle file using form-data in the request body. To know language code please check [Language-codes](../language-codes) **Sample Postman request body (Form-data only) ** ![OBS settings](/img/upload_subtitle_req_body.png) **Response** For valid requests the API server returns a JSON: ```json { "detail": "Subtitle uploaded successfully" } ``` :::important For subtitle upload, use form-data in the request body. Select your .vtt file with the "subtitle" key . ::: ### Upload Thumbnail to an Asset To upload Thumbnail to an asset , you need to send an HTTP POST request to the API Endpoint, with the [authentication Header](../server-api/authentication.md) . **Endpoint** ```bash https://app.tpstreams.com/api/v1//assets//upload_thumbnail/ ``` **Fields** | Name | Type | Description | Required | | ----------- | ----------- | ----------- | ---------- | | thumbnail | .png, .jpeg, .jpg image | Thumbnail image | Yes | Send the thumbnail Image using form-data in the request body. **Sample Postman request body (Form-data only) ** ![OBS settings](/img/upload_thumbnail_req_body.png) **Response** For valid requests the API server returns a JSON: ```json { "detail": "Thumbnail uploaded successfully" } ``` :::important For Thumbnail upload, use form-data in the request body. select an image file in .png, .jpeg, or .jpg format that is less than 2 MB in size . ::: ### Sprite Preview Thumbnails Sprite preview thumbnails (storyboard/scrubbing thumbnails) provide a single composite image grid containing video frame snapshots captured at fixed intervals across the duration of a video. The sprite thumbnail data is available in the [Get Individual Asset Details](#get-individual-asset-details) response inside the `tracks` array (`video.tracks`) for the track where `type` is `"Preview Thumbnail"`. **Fields** | Name | Type | Description | | --- | --- | --- | | url | string | The CDN URL to the sprite image file. | | interval | integer | Time gap (in seconds) between consecutive thumbnail snapshots (e.g., 2 means a frame every 2 seconds). | | width | integer | Width of an individual thumbnail tile in pixels. | | height | integer | Height of an individual thumbnail tile in pixels. | | rows | integer | Number of rows in the sprite image grid. | | columns | integer | Number of columns in the sprite image grid. | **Sample Response** ```json { "id": "", "title": "Sample Video", "type": "video", "video": { "status": "Completed", "playback_url": "https:///transcoded//video.m3u8", "tracks": [ { "id": 102, "type": "Preview Thumbnail", "name": "Preview Thumbnail", "preview_thumbnail": { "url": "https:///transcoded//sprite/sprite_image.png", "interval": 2, "width": 160, "height": 90, "rows": 10, "columns": 10 } } ] } } ``` :::important - Generated automatically during video transcoding for both standard and DRM-protected videos. - All preview tiles are packed into a single image sheet to minimize network requests. ::: ### Trim Video Asset To trim a video asset, send an HTTP POST request to the API endpoint with either start_time or end_time (or both) in the request body along with the [authentication Header](../server-api/authentication.md). **Endpoint** ```bash https://app.tpstreams.com/api/v1//assets//trim/ ``` **Fields** | Name | Type | Description | Required | | ----------- | ----------- | ----------- | ---------- | | start_time | number | Start time of the trimmed video (in seconds) | No* | | end_time | number | End time of the trimmed video (in seconds) | No* | *At least one of start_time or end_time is required. **Sample Request Body** ```json { "start_time": 0, "end_time": 30 } ``` **Response** For valid requests, the API server returns a JSON: ```json { "message": "Video trim job started successfully", "trim_job_id": 58, "status": "Pending" } ``` ### Check Trim Job Status To check the status of an ongoing or completed trim job, send an HTTP GET request to the status endpoint with the [authentication Header](../server-api/authentication.md). **Endpoint** ```bash https://app.tpstreams.com/api/v1//assets//trim/status/ ``` **Response** For valid requests, the API server returns a JSON: ```json { "id": 58, "start_time": 0, "end_time": 30, "status": 1, "status_display": "Pending", "background_task_id": "abe9d132-ca1b-4cb2-a145-b3c19f7cda85", "created": "2025-06-12T19:41:48.001170+05:30", "modified": "2025-06-12T19:41:48.071262+05:30" } ``` ### Revert Trimmed Video To revert a previously trimmed video back to its original state, send an HTTP POST request to the API endpoint along with the [authentication Header](../server-api/authentication.md). This will initiate a background task to restore the full-length video. **Endpoint** ```bash https://app.tpstreams.com/api/v1//assets//trim/revert/ ``` **Request Body** No request body is required for this endpoint. **Response** For valid requests, the API server returns a JSON: ```json { "message": "Video revert job started successfully", "task_id": "b84b229e-19fb-45c2-be36-dc942a809e87" } ``` --- ## Authentication import Tabs from '@theme/Tabs'; import TabItem from '@theme/TabItem'; You need authentication token to access Streams data and resources through the API ### Generate authentication token **Best Practices for Auth Token Management** * **Reuse Existing Tokens:** Before generating a new token, check if you have an existing, valid token that can be reused. * **Minimize New Token Generation:** Creating an excessive number of tokens adds unnecessary overhead and can negatively impact the performance of authentication services. * **Generate Only When Necessary:** Create a new token only when an existing one has expired or is invalid. Following these practices ensures optimal system performance and reliability for all services. --- :::important A **maximum of 20 authentication tokens** can be created per organization. ::: Make Post request to the below link with the credentials to generate an authentication token. **POST https://app.tpstreams.com/api/auth/login/ ** | Name | Type | Description | | ----------- | ----------- |----------- | | username | string | Email address of the user | | password | string | Password of the user | | organization_id | string | Organization id | #### Sample code **Python** ```py import requests url = "https://app.tpstreams.com/api/auth/login/" payload = "{\n \"username\": \"hari@example.com\",\n \"password\": \"welcome\",\n \"organization_id\": \"auhf2k\"}" headers = { 'content-type': "application/json", 'cache-control': "no-cache", } response = requests.request("POST", url, data=payload, headers=headers) print(response.text) ``` **Ruby** ```rb re 'uri' require 'net/http' url = URI("https://app.tpstreams.com/api/auth/login/") http = Net::HTTP.new(url.host, url.port) http.use_ssl = true http.verify_mode = OpenSSL::SSL::VERIFY_NONE request = Net::HTTP::Post.new(url) request["content-type"] = 'application/json' request["cache-control"] = 'no-cache' request.body = "{\n \"username\": \"hari@example.com\",\n \"password\": \"welcome\",\n \"organization_id\": \"auhf2k\"}" response = http.request(request) puts response.read_body ``` **php** ```php 'https://app.tpstreams.com/api/auth/login/', CURLOPT_CUSTOMREQUEST => 'POST', CURLOPT_POSTFIELDS =>'{ "username": "", "password": "", "organization_id": "" }', CURLOPT_HTTPHEADER => array( 'Content-Type: application/json' ), )); $response = curl_exec($curl); curl_close($curl); echo $response; ``` #### Response The response will return an token which should be prefixed with Token and included in all API requests to the server in a header that looks like the following: ```bash Authorization: Token auth-token-string ``` --- ### Delete Authentication Token Use this API to revoke an existing authentication token. This operation permanently deletes the token and prevents it from being used in future API requests. **Best Practices for Token Revocation** - **Revoke tokens when no longer needed:** Always invalidate tokens when they are no longer required. - **Revoke compromised tokens immediately:** If you suspect a token has been compromised, revoke it immediately. - **Tokens cannot be recovered:** Once revoked, a token cannot be reused or recovered. - **Explicit revocation required:** You must explicitly call the token deletion API to invalidate tokens. Following these practices improves security and prevents unauthorized access. --- :::important The delete operation **permanently deletes the authentication token supplied in the `Authorization` request header**. Once revoked, this token cannot be used for any future API requests, and all requests made using it will be rejected. ::: Make a **POST** request to the following endpoint to revoke an authentication token. **POST https://app.tpstreams.com/api/auth/logout/** #### Request Headers | Name | Type | Description | |-----------------|--------|-------------| | Authorization | string | Authentication token prefixed with `Token` | **Example Header** ```bash Authorization: Token auth-token-string ``` #### Sample code **Python** ```py import requests url = "https://app.tpstreams.com/api/auth/logout/" headers = { "Authorization": "Token auth-token-string", } response = requests.post(url, headers=headers) print(response.status_code) ``` **Ruby** ```rb require 'uri' require 'net/http' url = URI("https://app.tpstreams.com/api/auth/logout/") http = Net::HTTP.new(url.host, url.port) http.use_ssl = true request = Net::HTTP::Post.new(url) request["Authorization"] = "Token auth-token-string" response = http.request(request) puts response.code ``` **PHP** ```php 'https://app.tpstreams.com/api/auth/logout/', CURLOPT_POST => true, CURLOPT_RETURNTRANSFER => true, CURLOPT_HTTPHEADER => array( 'Authorization: Token auth-token-string' ), )); $response = curl_exec($curl); $http_code = curl_getinfo($curl, CURLINFO_HTTP_CODE); curl_close($curl); echo $http_code; ``` #### Response On successful token revocation, the API returns: ```http 204 No Content ``` --- ## Chapters import Tabs from '@theme/Tabs'; import TabItem from '@theme/TabItem'; Manage video chapters to enable navigation within your video content. ### Add Video Chapters To create chapters for an existing video asset, send an HTTP **POST** request to the API endpoint with the [authentication header](./authentication.md). #### Endpoint ``` https://app.tpstreams.com/api/v1//assets//chapters/ ``` #### Request Fields | Field | Type | Description | Required | | ---------- | ---------------------- | --------------------------- | -------- | | `chapters` | `array` | List of chapter definitions | Yes | ##### ChapterObject Schema | Field | Type | Description | Required | | ------------ | ------ | ---------------------------------------------- | -------- | | `title` | string | Title of the chapter | Yes | | `start_time` | string | `HH:MM:SS` timestamp within the video duration | Yes | #### Examples **cURL** ```bash curl -X POST \ "https://app.tpstreams.com/api/v1//assets//chapters/" \ -H "Authorization: token " \ -H "Content-Type: application/json" \ -d '{ "chapters": [ {"title": "Intro", "start_time": "00:00:02"}, {"title": "Overview", "start_time": "00:01:30"} ] }' ``` **Python** ```python import requests url = "https://app.tpstreams.com/api/v1//assets//chapters/" headers = {"Authorization": "token "} data = { "chapters": [ {"title": "Intro", "start_time": "00:00:02"}, {"title": "Overview", "start_time": "00:01:30"} ] } response = requests.post(url, json=data, headers=headers) print(response.json()) ``` #### Sample Response ```json { "count": 2, "next": null, "previous": null, "results": [ {"id": 6427, "title": "Intro", "start_time": "00:00:02"}, {"id": 6428, "title": "Overview", "start_time": "00:01:30"} ] } ``` --- ### View Video Chapters To retrieve chapters for a specific video asset, send an HTTP **GET** request to the API endpoint with the [authentication header](./authentication.md). #### Endpoint ``` https://app.tpstreams.com/api/v1//assets//chapters/ ``` #### Examples **cURL** ```bash curl -X GET \ "https://app.tpstreams.com/api/v1//assets//chapters/" \ -H "Authorization: token " ``` **Python** ```python import requests url = "https://app.tpstreams.com/api/v1//assets//chapters/" headers = {"Authorization": "token "} response = requests.get(url, headers=headers) print(response.json()) ``` #### Sample Response ```json { "count": 2, "next": null, "previous": null, "results": [ {"id": 6427, "title": "Intro", "start_time": "00:00:02"}, {"id": 6428, "title": "Overview", "start_time": "00:01:30"} ] } ``` --- ### Delete a Video Chapter To delete a specific chapter from a video asset, send an HTTP **DELETE** request to the API endpoint with the [authentication header](./authentication.md). #### Endpoint ``` https://app.tpstreams.com/api/v1//assets//chapters// ``` #### Examples **cURL** ```bash curl -X DELETE \ "https://app.tpstreams.com/api/v1//assets//chapters//" \ -H "Authorization: token " ``` **Python** ```python import requests url = "https://app.tpstreams.com/api/v1//assets//chapters//" headers = {"Authorization": "token "} response = requests.delete(url, headers=headers) print(response.status_code) # Should print 204 ``` #### Success Response ``` Status: 204 No Content ``` --- ### Status Codes | Status Code | Description | | --------------------------- | --------------------------------- | | `200 OK` | Chapters retrieved successfully | | `201 Created` | Chapters created successfully | | `204 No Content` | Chapter deleted successfully | | `400 Bad Request` | Invalid data or timestamp format | | `401 Unauthorized` | Missing or invalid authentication | | `404 Not Found` | Asset or chapter does not exist | | `500 Internal Server Error` | Unexpected server issue | --- ## Direct Video Upload import Tabs from '@theme/Tabs'; import TabItem from '@theme/TabItem'; - An upload session provides a secure, direct-to-storage mechanism for uploading video files from your server to TP Streams. This method allows you to generate a temporary upload link and credentials to securely upload your videos. ### 1. Create an Upload Session To create an upload session, send an HTTP POST request to the API Endpoint, with the [authentication Header](../server-api/authentication.md). ```bash https://app.tpstreams.com/api/v1//assets/upload-sessions/ ``` **Fields** | Name | Type | Description | Required | | ----------- | ----------- | ----------- | ---------- | | content_protection_type | string | To ensure the security of your video content, you can choose from available protection types: 'drm', 'aes' encryption, or indicate 'disable' for no specific protection. Each option offers varying levels of security for your content. | No | | title | string | Specify a text string or identifier which can be used for filtering or searching the asset.| Yes | | resolutions | array | Required resolutions of the transformed asset in case of HLS or MPEG-DASH delivery format. Must be an array of strings containing any of the following values: 240p, 360p, 480p, 540p, 720p, and 1080p. Re-sized rendition will retain the input aspect ratio. | Yes | | folder | string | The UUID of the folder, if you want to upload the video into that specific folder | No | | generate_subtitle | boolean | Enable automatic generation of subtitles for the video after upload. Defaults to false if not specified. | No | **Sample request body** ```json { "title": "Big Buck Bunny Video", "resolutions": ["240p", "360p", "480p", "720p"], "content_protection_type": "drm", "folder": "32seYYHeNxE", "generate_subtitle": true } ``` For valid requests the API server returns a JSON response containing the asset information, session details, and a `client_payload` object: ```json { "asset": { "id": "9328558d-e0a5-4093-b3b9-8f15ad1550d8", "title": "Big Buck Bunny Video", "bytes": null, "type": "video", "parent_id": "32seYYHeNxE", "video": { "status": "Not Started" } }, "upload_session": { "uuid": "e98df89a-1122-4a01-9876-1234abcd5678", "max_file_size_bytes": 5368709120, "expires_at": "2026-07-21T18:03:16.000000Z", "status": "Created" }, "client_payload": { "upload_link": "https://s3.amazonaws.com/tpstreams-bucket", "key": "private/server-uploads/9328558d-e0a5-4093-b3b9-8f15ad1550d8", "x-amz-algorithm": "AWS4-HMAC-SHA256", "x-amz-credential": "AKIAIOSFODNN7EXAMPLE/20260721/us-east-1/s3/aws4_request", "x-amz-date": "20260721T000000Z", "policy": "eyJleHBpcmF0aW9uIjoiMjAy...", "x-amz-signature": "vSdt2134k..." } } ``` ### 2. Upload the Video File Using the `client_payload` from the previous step, upload your video via a **multipart form-data** POST request to the `upload_link`. Include all `client_payload` fields in your request, and ensure the actual video `file` is added **last**. :::important The `file` parameter **must** be the last field in your multipart request. ::: **Complete Example:** **cURL** ```bash # 1. Create the Upload Session curl -X POST https://app.tpstreams.com/api/v1//assets/upload-sessions/ \ -H "Authorization: token " \ -H "Content-Type: application/json" \ -d '{"title": "Big Buck Bunny Video", "resolutions": ["240p", "720p"]}' # 2. Extract the payload from the response above and upload the file curl -X POST https://s3.amazonaws.com/tpstreams-bucket \ -F "key=private/server-uploads/9328558d-e0a5-4093-b3b9-8f15ad1550d8" \ -F "x-amz-algorithm=AWS4-HMAC-SHA256" \ -F "x-amz-credential=AKIAIOSFODNN7EXAMPLE/20260721/us-east-1/s3/aws4_request" \ -F "x-amz-date=20260721T000000Z" \ -F "policy=eyJleHBpcmF0aW9uIjoiMjAy..." \ -F "x-amz-signature=vSdt2134k..." \ -F "file=@/path/to/your/video.mp4" ``` **Python** ```py import requests # 1. Create the Upload Session session_url = "https://app.tpstreams.com/api/v1//assets/upload-sessions/" headers = { "Authorization": "token ", "Content-Type": "application/json" } data = { "title": "Big Buck Bunny Video", "resolutions": ["240p", "720p"] } response = requests.post(session_url, headers=headers, json=data) response.raise_for_status() client_payload = response.json()["client_payload"] # 2. Upload the Video File upload_url = client_payload.pop("upload_link") with open("/path/to/your/video.mp4", "rb") as video_file: files = {"file": video_file} upload_response = requests.post(upload_url, data=client_payload, files=files) upload_response.raise_for_status() print("Upload successful!") ``` **Ruby** ```rb require 'uri' require 'net/http' require 'json' require 'net/http/post/multipart' # 1. Create the Upload Session session_url = URI("https://app.tpstreams.com/api/v1//assets/upload-sessions/") http = Net::HTTP.new(session_url.host, session_url.port) http.use_ssl = true req = Net::HTTP::Post.new(session_url) req["Authorization"] = "token " req["Content-Type"] = "application/json" req.body = { title: "Big Buck Bunny Video", resolutions: ["240p", "720p"] }.to_json response = http.request(req) client_payload = JSON.parse(response.read_body)["client_payload"] # 2. Upload the Video File upload_url = URI(client_payload.delete("upload_link")) File.open("/path/to/your/video.mp4") do |video_file| client_payload["file"] = UploadIO.new(video_file, "video/mp4", "video.mp4") multipart_req = Net::HTTP::Post::Multipart.new(upload_url.request_uri, client_payload) res = Net::HTTP.start(upload_url.host, upload_url.port, use_ssl: upload_url.scheme == "https") do |multipart_http| multipart_http.request(multipart_req) end puts "Upload status: #{res.code}" end ``` **C#** ```cs using System; using System.Net.Http; using System.Net.Http.Headers; using System.IO; using System.Threading.Tasks; using System.Text.Json; class Program { static async Task Main() { using var client = new HttpClient(); // 1. Create the Upload Session client.DefaultRequestHeaders.Authorization = new AuthenticationHeaderValue("token", ""); var requestBody = new StringContent( "{\"title\": \"Big Buck Bunny Video\", \"resolutions\": [\"240p\", \"720p\"]}", System.Text.Encoding.UTF8, "application/json" ); var response = await client.PostAsync("https://app.tpstreams.com/api/v1//assets/upload-sessions/", requestBody); var responseString = await response.Content.ReadAsStringAsync(); using var jsonDoc = JsonDocument.Parse(responseString); var clientPayload = jsonDoc.RootElement.GetProperty("client_payload"); string uploadLink = clientPayload.GetProperty("upload_link").GetString(); // 2. Upload the Video File using var content = new MultipartFormDataContent(); foreach (var property in clientPayload.EnumerateObject()) { if (property.Name != "upload_link") { content.Add(new StringContent(property.Value.GetString()), property.Name); } } var fileContent = new StreamContent(File.OpenRead("/path/to/your/video.mp4")); content.Add(fileContent, "file", "video.mp4"); var uploadResponse = await client.PostAsync(uploadLink, content); Console.WriteLine($"Upload Status: {uploadResponse.StatusCode}"); } } ``` --- ## DRM License To play DRM protected videos, your player should request DRM licence from our URL. This API requires [access_token](../video-embedding/authentication.md) in query param for authentication. ```bash POST: https://app.tpstreams.com/api/v1//assets//drm_license/?access_token={{access_token}}&drm_type={{drm_type}} ``` **Query Parameters** | Name | Type | Description | Default | | ---------- | ------ | ------------------------------------------------- | ---------- | | `drm_type` | string | The type of DRM. Options: `widevine`, `fairplay`. | `widevine` | **Request Body** | Name | Type | Description | Required | | -------------------------- | ------- | --------------------------------------------------------------------------------------------------------------------------------------------------------------------------------- | -------- | | `player_payload` | string | For **Widevine**, this is the key message. For **FairPlay**, this is the SPC message. This **must be encoded in base64**. | Yes | | `rental_duration_seconds` | integer | Total validity period (in seconds) of a stored license on the device. Used only for persistent (offline) licenses. Defines how long the license remains usable before it expires. | No | | `license_duration_seconds` | integer | (Widevine only) Duration (in seconds) for which playback is allowed. This defines the active viewing window once playback begins. | No | | `lease_duration_seconds` | integer | (FairPlay only) Duration (in seconds) for which playback is allowed. This defines the active viewing window once playback begins. | No | | `is_persistent` | boolean | Set to true to allow the license to be stored on the device for offline playback. | No | | `widevine` | object | Additional configurations for Widevine. See the Widevine table below. | No | **Widevine Configuration Fields** +---------------------------------------------------+------------------------------------------------------+ | **Name** | **Description** | +---------------------------------------------------+------------------------------------------------------+ | content_key_specs.track_type | A track type definition, Options are | | | - AUDIO - audio tracks | | | - SD - 576p or less | | | - HD - 720p, 1080p | | | - UHD1 - 4K | | | - UHD2 - 8K | +---------------------------------------------------+------------------------------------------------------+ | content_key_specs.security_level | Security level for content key specs, Default = 1. | | | | | | - 1 - Software-based whitebox crypto is | | | required. (SW_SECURE_CRYPTO). | | | - 2 - Software crypto and an obfuscated | | | decoder is required. (SW_SECURE_DECODE). | | | - 3 - Key material and crypto operations | | | must be performed within a hardware- | | | backed trusted execution environment. | | | (HW_SECURE_CRYPTO). | | | - 4 - Crypto and decoding of content | | | must be performed within a hardware- | | | backed trusted execution environment. | | | (HW_SECURE_DECODE). | | | - 5 - Crypto, decoding, and all handling | | | of media (compressed and uncompressed) | | | must be handled within a hardware- | | | backed trusted execution environment. | | | (HW_SECURE_ALL) | +---------------------------------------------------+------------------------------------------------------+ | content_key_specs.required_output_protection.hdcp | Output protection options for HDCP | | | Options: | | | - HDCP_NONE | | | - HDCP_V1 | | | - HDCP_V2 | | | - HDCP_V2_1 | | | - HDCP_V2_2 | | | - HDCP_V2_3 | | | - HDCP_NO_DIGITAL_OUTPUT | +---------------------------------------------------+------------------------------------------------------+ **Sample Payloads**
Widevine Sample ```json { "player_payload": "", "license_duration_seconds": 3600, "rental_duration_seconds": 7200, "is_persistent": false, "widevine": { "content_key_specs": [ { "track_type": "SD", "security_level": 1, "required_output_protection": { "hdcp": "HDCP_V1" } }, { "track_type": "HD", "security_level": 1, "required_output_protection": { "hdcp": "HDCP_V1" } }, { "track_type": "UHD1", "security_level": 1, "required_output_protection": { "hdcp": "HDCP_V1" } }, { "track_type": "UHD2", "security_level": 1, "required_output_protection": { "hdcp": "HDCP_V1" } }, { "track_type": "AUDIO", "security_level": 1, "required_output_protection": { "hdcp": "HDCP_V1" } } ] } } ```
FairPlay Sample ```json { "player_payload": "", "lease_duration_seconds": 3600, "rental_duration_seconds": 7200, "is_persistent": true } ```
--- #### Response The API returns the raw binary license which should be passed directly to the browser's CDM or the player SDK. - **Status Code**: `200 OK` - **Content-Type**: `application/octet-stream` - **Body**: Raw binary data (Widevine License or FairPlay Content Key Context). --- **Security Considerations:** The recommendation is to invoke the DRM license endpoint on the server, rather than on the client. This precaution is taken because passing the License configuration and calling it from the client could expose configurations to users. --- ## Folders ### Create a folder To create a folder, you need to send an HTTP POST request to the API Endpoint, along with the [authentication Header](../server-api/authentication.md). ```bash https://app.tpstreams.com/api/v1//assets/folders/ ``` **Fields** | Name | Type | Description | Required | | ----------- | ----------- | ----------- | ---------- | | title | string | The name of the folder | Yes | | parent | string | The UUID of the parent folder, if you want to create the folder as a child | No | **Sample request body** ```json { "title": "CAT videos", "parent": "32seYYHeNxE" } ``` For valid requests the API server returns a JSON: ```json { "title": "CAT videos", "uuid": "46seZZHAnWE", // folder id } ``` ### Get all the Folders that belong to the organization To get all folders in the organization, you need to send an HTTP GET request to the API Endpoint, with the [authentication Header](../server-api/authentication.md). ```bash https://app.tpstreams.com/api/v1//assets/folders/ ``` You can get all folders that match your search query using the `q` parameter: ```bash GET https://app.tpstreams.com/api/v1//assets/folders/?q=test ``` For valid requests the API server returns a JSON: ```json { "count": 3, "next": null, "previous": null, "results": [ { "title": "Testing videos", "uuid": "6bBcXxu5cAM" }, { "title": "OnBorading test", "uuid": "BmN3MXSq5z6" }, { "title": "test", "uuid": "nD8K9nJ3Bsm" }, ] } ``` --- ## Introduction - A live stream is a real-time video broadcast delivered through a streaming platform. You can create live streams, allowing users to ingest media content into the TP Streams system for processing and delivery. - With the TP Streams system, you have the ability to create live streams in two distinct ways: 1. [Create a live stream instantly](create_live_stream_instantly) 2. [Schedule live streams and start them later](./live-stream/schedule-a-live-stream) --- ## Chat SDK This SDK enables you to integrate live chat to your website ### Adding dependency - Open the HTML file for the page where you want the live chat to appear. - Inside the `` section, add a new line with this code: ```html ``` ### Create a Container Element Within the `` section of your HTML, add a `
` element with a unique ID (e.g., id="app"). This element will serve as the container for the live chat widget. The chat widget will be displayed within this `
` element on your webpage. ```html
``` ### Initializing Chat SDK  After the script tag including the JavaScript file, add another ` ``` **Fields** | Field | Description | |----------|-------------------------------------------------| | username | The username of the user interacting with chat | | roomId | The ID of the chat room | | title | The title displayed for the chat interface | :::important **Note:** You can obtain the `roomId` after creating a live stream. It will be available on the live stream detail page or through the API. ::: #### Sample HTML Code Below is a sample HTML code demonstrating how to integrate the live chat widget into your webpage: ```html
``` --- ## Create a live stream instantly To Create a live stream instantly you need to send an HTTP POST request to the API Endpoint, with the [authentication Header](../authentication.md). ```bash https://app.tpstreams.com/api/v1//assets/live_streams/ ``` **Fields** | Name | Type | Description | Required | | ----------- | ----------- | ----------- | ---------- | | title | string | Specify a text string or identifier which can be used for filtering or searching the live stream.| Yes | | enable_drm_for_recording | boolean | A boolean value to enable or disable DRM for live stream recording.| No | | latency | string | Selects the desired latency for the live stream (Options: Low Latency, Normal Latency).| No | **Sample request body** ```json { "title": "Data science Live class", "enable_drm_for_recording": true, "latency": "Low Latency" } ``` For valid requests the API server returns a JSON: ```json { "title": "Data science Live class", "bytes": null, "type": "livestream", "video": null, "id": "5h6EpZQC6sh", "live_stream": { "rtmp_url": "", "stream_key": null, "status": "Not Started", "hls_url": "https://d28qihy7z761lk.cloudfront.net/live/gcdem4/5h6EpZQC6sh/video.m3u8", "start": "2024-04-23 16:56:48", "transcode_recorded_video": true, "enable_drm_for_recording": true, "chat_embed_url": null, "resolutions": [ "240p", "480p", "720p" ], "enable_drm": true, "enable_llhls": false, "latency": "Low Latency" }, "parent": null, "parent_id": null } ``` :::important - The live stream server typically takes around 20-30 seconds to start. - Once it's up and running, both the "rtmp_url" and "stream_key" will become accessible. ::: To automatically receive rtmp_url and stream key as soon as the server is established,[WebHook Response](webhook-response). After successfully registering the webhook, you will receive an rtmp_url and stream_key as a response paste it in the obs stream settings **Settings > Stream** ![OBS settings](/img/obs.png) --- ## Delete Live Stream API To delete an individual live stream in the organization, send an HTTP DELETE request to the API Endpoint , with the [authentication Header](../authentication.md). This API supports the deletion of both live and scheduled live streams. ```bash https://app.tpstreams.com/api/v1//assets// ``` For a successful request, status 204 is returned. :::important If the streaming live stream or a live stream with an active server is deleted, it will result in stopping the server. ::: --- ## List Live Streams API To retrieve a list of live streams in the organization, send an HTTP GET request to the API Endpoint, with the [authentication Header](../authentication.md). This API supports to list live streams, scheduled live streams ```http https://app.tpstreams.com/api/v1//assets/live_streams/ ``` **Sample webhook response is as follows** ```json { "count": 2, "next": null, "previous": null, "results": [ { "title": "Data Science Live Class", "bytes": null, "type": "livestream", "video": null, "id": "8DH94uXQgrA", "live_stream": { "rtmp_url": "rtmp://52.66.213.19/live", "stream_key": "org-89b2cy-live-8DH94uXQgrA-7XkI", "status": "Completed", "hls_url": "https://d3cydmgt9q030i.cloudfront.net/live/89b2cy/8DH94uXQgrA/video.m3u8", "start": "2023-12-07 13:02:16", "transcode_recorded_video": true, "enable_drm_for_recording": true, "chat_embed_url": null, "resolutions": [ "240p", "480p", "720p" ] }, "parent": null, "parent_id": null }, { "title": "GO LIVE NOW", "bytes": null, "type": "livestream", "video": null, "id": "9QgXR3pPj49", "live_stream": { "rtmp_url": "", "stream_key": null, "status": "Completed", "hls_url": "https://d3cydmgt9q030i.cloudfront.net/live/89b2cy/9QgXR3pPj49/video.m3u8", "start": "2023-12-07 12:34:42", "transcode_recorded_video": true, "enable_drm_for_recording": true, "chat_embed_url": null, "resolutions": [ "240p", "480p", "720p" ] }, "parent": null, "parent_id": null } ] } ``` --- ## Schedule a live stream #### Schedule a live stream To Schedule a live stream you need to send an HTTP POST request to the API Endpoint, with the [authentication Header](/server-api/authentication.md). ```bash https://app.tpstreams.com/api/v1//assets/live_streams/ ``` **Fields** | Name | Type | Description | Required | | ----------- | ----------- | ----------- | ---------- | | title | string | Specify a text string or identifier which can be used for filtering or searching the live stream.| Yes | | start | string | Specify the date and time (in the format: "YYYY-MM-DD HH:MM:SS") when the live stream should be scheduled.| Yes | | enable_drm_for_recording | boolean | A boolean value to enable or disable DRM for live stream recording.| No | **Sample request body** ```json { "title": "Data science Live class", "start": "2024-10-05 15:30:00", "enable_drm_for_recording": false } ``` For valid requests the API server returns a JSON: ```json { "title": "Data science Live class", "bytes": null, "type": "livestream", "video": null, "id": "AuC9yX2EtBr", "live_stream": { "rtmp_url": "", "stream_key": null, "status": "Not Started", "hls_url": "https://d28qihy7z761lk.cloudfront.net/live/gnarys/AuC9yX2EtBr/video.m3u8", "start": "2024-10-05 15:30:00", "transcode_recorded_video": true, "enable_drm_for_recording": false, "chat_embed_url": null, "resolutions": [ "240p", "480p", "720p" ] }, "parent": null, "parent_id": null } ``` Live stream is created with the scheduled time for you to start the server later. Above response has the details of the live stream scheduled which can also be obtained by API **`/api/v1//assets//`** :::important - Scheduled live streams will not automatically start at the specified time; they must be manually initiated. - RTMP URL and stream key will be available once you start the stream ::: --- ## Start the scheduled live stream To Start a server for the scheduled live stream you need to send an HTTP POST request to the API Endpoint, with the [authentication Header](/server-api/authentication.md). ```bash https://app.tpstreams.com/api/v1//assets//start_server/ ``` For valid requests the API server returns a JSON: ```json { "title": "Data science Live class", "bytes": null, "type": "livestream", "video": null, "id": "8XGEEj6ptnB", "live_stream": { "rtmp_url": "", "stream_key": null, "status": "Not Started", "hls_url": "https://d3cydmgt9q030i.cloudfront.net/live/edee9b/8XGEEj6ptnB/video.m3u8", "start": "2024-10-05 15:30:00", "transcode_recorded_video": true, "enable_drm_for_recording": false, "chat_embed_url": "https://app.tpstreams.com/live-chat/edee9b/8XGEEj6ptnB/", "resolutions": [ "240p", "480p", "720p" ] }, "parent": null, "parent_id": null } ``` This will start the server for specified live stream Above response has the details of the live stream started which can also be obtained by API **`/api/v1//assets//`** :::important - The live stream server typically takes around 20-30 seconds to start. - Once it's up and running, both the "rtmp_url" and "stream_key" will become accessible. ::: To automatically receive rtmp_url and stream key as soon as the server is established,[Create a Web Hook](/server-api/webhooks.md). After successfully registering the webhook, you will receive an updated webhook response. --- ## Live Stream Events & Status This document explains the workflow and status of your live stream, describing the progression of events from scheduling to final video availability. This guide will help you understand the real-time status updates and webhook events you receive. *** ### Live Stream Statuses Live stream statuses reflect the overall state of your live stream. These are visible on the asset details page. | **Status** | **Meaning** | | :--- | :--- | | **`NOT_STARTED`** | The live stream has been scheduled, and the server is being provisioned. Your stream is not yet ready to accept a broadcast. | | **`STREAMING`** | The server is ready and actively receiving a live video feed. This means your broadcast is live and viewable by your audience. | | **`RECORDING`** | The stream is actively being recorded. The content is being captured and stored for later use, even if the live broadcast itself ends. | | **`DISCONNECTED`** | The connection between your broadcasting software (OBS) and the streaming server has been lost. This could be due to a network issue, a power failure, or a temporary disconnection. The server remains active for a short period, allowing you to reconnect and resume the stream without creating a new one. | | **`STOPPED`** | The live stream has been manually ended by the user or has timed out after a disconnection. The server has been terminated, and the live stream is no longer active. To stream again, you must create a new live stream. | | **`COMPLETED`** | The live stream has finished, and the recorded video is now fully processed and available. This status is typically seen after a stream has ended and the recording has been transcoded and stored. | | **`ERROR`** | An unexpected error has occurred, preventing the live stream from continuing. | *** ### Live Stream Events Events are the specific, immediate actions (like starting or stopping) that change the stream's Status. These messages appear in your detailed logs and are sent directly to your system via webhooks. | **Event Type** | **Meaning** | | :--- | :--- | | **`CREATED`** | The initial event, triggered when a live stream is created. This event signals that a server instance is being spun up to handle the broadcast. This corresponds to the **`NOT_STARTED`** status. | | **`ON_PUBLISH`** | The event that indicates a successful connection from the broadcasting software (OBS). The stream is now live. This corresponds to the **`STREAMING`** status. | | **`ON_PUBLISH_DONE`** | The event that indicates a temporary disconnection from the broadcasting software. This could be due to a user stopping the stream, a network interruption, or another issue. The server is still running for a short time, giving you a chance to reconnect. This corresponds to the **`DISCONNECTED`** status. | | **`STOPPED`** | The final event, triggered when a live stream is permanently ended. The server has been terminated, and the stream cannot be resumed. This corresponds to the **`STOPPED`** status. | | **`RECORDING`** | An event indicating that the stream is being recorded. This is separate from the `ON_PUBLISH` event and focuses on the recording process. This corresponds to the **`RECORDING`** status. | | **`COMPLETED`** | An event signaling that the live stream recording has been fully processed, and the final video file is ready. This corresponds to the **`COMPLETED`** status. | | **`ERROR`** | An event indicating that an error has occurred during the live stream. This corresponds to the **`ERROR`** status. | *** ### Example Live Stream Workflow Sample API response ```json { "id": "9JGyz9njKnj", "title": "Test session", "type": "livestream", "live_stream": { ... "activities": [ { "status": "On Publish", "timestamp": "September 22, 2025, 05:59 PM" }, { "status": "On Publish Done", "timestamp": "September 22, 2025, 06:06 PM" }, { "status": "Stopped", "timestamp": "September 22, 2025, 06:17 PM" } ] } } ``` 1. A live stream is scheduled. - **Action:** The server is initiated, and an RTMP key and ID are generated. - **Status:** `NOT_STARTED` - **Event:** `CREATED` 2. The broadcaster starts streaming from their broadcasting software (e.g., OBS). - **Action:** The live stream is now active and viewable. - **Status:** `STREAMING` - **Event:** `ON_PUBLISH` 3. The broadcaster's network temporarily disconnects. - **Action:** The stream is temporarily paused, but the server is still running, awaiting a reconnection. - **Status:** `DISCONNECTED` - **Event:** `ON_PUBLISH_DONE` 4. The broadcaster fails to reconnect, or the stream is manually stopped. - **Action:** The server is terminated, and the live stream has officially ended. - **Status:** `STOPPED` - **Event:** `STOPPED` --- ## Stop a live stream To Stop a live stream you need to send an HTTP POST request to the API Endpoint, with the [authentication Header](../authentication.md). ```bash https://app.tpstreams.com/api/v1//assets//stop_live_stream/ ``` This will stop the specified live stream For valid requests the API server returns a JSON: ```json { "message": "Live stream stopped successfully", "trim_scheduled": false } ``` ### Schedule Trim After Live Stream You can optionally add trim parameters to the stop API request body to schedule a trim operation that will be executed after the live stream recording is completed and transcoded. This allows you to trim the recorded video directly when stopping the live stream. **Fields for Trim Scheduling** | Name | Type | Description | Required | | ----------- | ----------- | ----------- | ---------- | | start_time | integer | Start time for trim. Can be either relative seconds from the beginning of the recording or epoch timestamp | Yes (for trim) | | end_time | integer | End time for trim. Can be either relative seconds from the beginning of the recording or epoch timestamp | Yes (for trim) | **Timestamp Formats** You can specify trim times using either of the following formats: 1. **Relative Seconds**: Time in seconds from the beginning of the recording 2. **Epoch Timestamps**: Unix timestamps :::important - Both `start_time` and `end_time` must use the same format (either relative seconds or epoch timestamps). - Mixing formats in a single request is not allowed ::: **Sample request body with relative seconds** ```json { "start_time": 30, "end_time": 120 } ``` **Sample request body with epoch timestamps** ```json { "start_time": 1736754600, "end_time": 1736754900 } ``` :::important When scheduling a trim: - Both `start_time` and `end_time` are required - Both must be non-negative integers - `start_time` must be less than `end_time` - `end_time` cannot exceed the total duration of the live stream recording - The trim operation will be executed automatically after transcoding completes ::: **Response with trim scheduled** ```json { "message": "Live stream stopped successfully", "trim_scheduled": true } ``` :::important If the value of the parameter "transcode_recorded_video" is set to true, you will receive the video object in the webhook response. ::: **Sample webhook response is as follows** ```json { "title": "Data science Live class", "bytes": null, "type": "livestream", "video": { "progress": 0, "thumbnails": [], "status": "Completed", "playback_url": "https://d7pdowhru2wq4.cloudfront.net/transcoded/9328558d-e0a5-4093-b3b9-8f15ad1550d8/video.m3u8", "dash_url": "https://d7pdowhru2wq4.cloudfront.net/transcoded/9328558d-e0a5-4093-b3b9-8f15ad1550d8/video.mpd", "preview_thumbnail_url": null, "format": "abr", "resolutions": ["240p", "360p", "480p", "720p"], "video_codec": "h264", "audio_codec": "aac", "enable_drm_for_recording": true, "tracks": [], "inputs": [ { "url": "https://static.testpress.in/Data_science_Live_class.mp4" } ], }, "id": "4PtERT9d9uK", "live_stream": { "rtmp_url": "rtmp://23.427.127.24/live", "stream_key": "org-4xu8ay-live-4PtERT9d9uK-jKP4", "status": "Completed", "hls_url": "https://d28qihy7z761lk.cloudfront.net/live/4xu8ay/4PtERT9d9uK/video.m3u8", "start": null, "transcode_recorded_video": true, "chat_embed_url":"https://app.tpstreams.com/live-chat/4PtERT9d9uK/" }, "parent_id": null } ``` --- ## WebHook To notify your application about things that happen asynchronously , [Create a Web Hook](../webhooks.md). After successfully registering the webhook, whenever the status of live stream changes, response will be sent to the webhook. **Sample webhook response for livestream is as follows** ```json { "title": "Data science Live class", "bytes": null, "type": "livestream", "video": null, "id": "4PtERT9d9uK", "live_stream": { "rtmp_url": "rtmp://23.427.127.24/live", "stream_key": "org-4xu8ay-live-4PtERT9d9uK-jKP4", "status": "Streaming", "hls_url": "https://d28qihy7z761lk.cloudfront.net/live/4xu8ay/4PtERT9d9uK/video.m3u8", "start": null, "transcode_recorded_video": true, "chat_embed_url":"https://app.tpstreams.com/live-chat/4PtERT9d9uK/" }, "parent_id": null } ``` ##### Streaming Status Table | Status | Description | |--------------|-------------| | Not Started | Live stream server not created or started. | | Streaming | The live stream is active, typically streamed via OBS. | | Recording | After stopping the live stream, it enters recording state, initiating transcoding. | | Disconnected | Live streaming is stopped in OBS, either manually or due to network issues. | | Error | Error encountered while starting the live stream. | | Completed | Transcoding is completed, transitioning the status to "Completed." | :::important When the status of TPStreams changes: - If the status of the live stream changes to **Disconnected**, initiate a direct reconnection using OBS. - If the status changes to **Error**, create a new live stream. --- ## Organization import Tabs from '@theme/Tabs'; import TabItem from '@theme/TabItem'; ### Get all the organizations that belong to the user you need to send an HTTP GET request to the API Endpoint, with the [authentication Header](../server-api/authentication.md), to list all the organizations belonging to the user. ```bash https://app.tpstreams.com/api/v1/organizations/ ``` **cURL** ```bash curl --request GET \ --url https://app.tpstreams.com/api/v1/organizations/ \ --header 'authorization: token 378ad87dc80534b75dcb674da1e7a0145b27461c936c4091c17546fdca6baac1' \ --header 'cache-control: no-cache' ``` **Ruby** ``` rb require 'uri' require 'net/http' url = URI("https://app.tpstreams.com/api/v1/organizations/") http = Net::HTTP.new(url.host, url.port) request = Net::HTTP::Get.new(url) request["authorization"] = 'token 378ad87dc80534b75dcb674da1e7a0145b27461c936c4091c17546fdca6baac1' request["cache-control"] = 'no-cache' response = http.request(request) puts response.read_body ``` **Python** ```py import requests url = "https://app.tpstreams.com/api/v1/organizations/" headers = { 'authorization': "token 378ad87dc80534b75dcb674da1e7a0145b27461c936c4091c17546fdca6baac1", 'cache-control': "no-cache" } response = requests.request("GET", url, headers=headers) print(response.text) ``` **C#** ```c var client = new RestClient("https://app.tpstreams.com/api/v1/organizations/"); var request = new RestRequest(Method.GET); request.AddHeader("cache-control", "no-cache"); request.AddHeader("authorization", "token 378ad87dc80534b75dcb674da1e7a0145b27461c936c4091c17546fdca6baac1"); IRestResponse response = client.Execute(request); ``` #### Response ```json { "count": 2, "next": null, "previous": null, "results": [ { "name": "Testpress", "uuid": "6dnpyx", "drm_aes_signing_iv": "52B545d56c6G8da12dee470fb656413c", "drm_aes_signing_key": "4569d18e02b9e8ebf5ef145693454e729e0b95e6bb8a345db88cfe15d7904785" }, { "name": "Streams", "uuid": "7coqzy", "drm_aes_signing_iv": "90a541d5cc608da12dee470fb654413c", "drm_aes_signing_key": "1239d18e02b9e8ebf5ef131a9f564e729e0b95e6bb8a78ddb88cfe15d7904723" } ] } ``` --- ## Subtitles Manage subtitles for your video assets. You can generate English subtitles automatically, upload your own subtitle files in WebVTT (.vtt) format, list existing subtitles, and delete them. ### Generate Subtitle for an Asset To generate subtitles for a video asset, you need to send an HTTP POST request to the API Endpoint, with the [authentication Header](../server-api/authentication.md). **Endpoint** ```bash https://app.tpstreams.com/api/v1//assets//generate_subtitle/ ``` **Description** This endpoint triggers automatic subtitle generation for a video asset using speech-to-text technology. The system will generate English subtitles automatically and save them as a WebVTT (.vtt) file. **Request Body** No request body is required for this endpoint. **Response** For valid requests the API server returns the complete asset data in JSON format with status code 201: ```json { "title": "Big Buck Bunny Video", "bytes": 26990804, "type": "video", "video": { "progress": 0, "thumbnails": [ ], "status": "Completed", "playback_url": "https://d28qihy7z761lk.cloudfront.net/transcoded/7cFHfFSfjna/video.m3u8", "dash_url": "https://d28qihy7z761lk.cloudfront.net/transcoded/7cFHfFSfjna/video.mpd", "preview_thumbnail_url": "https://d28qihy7z761lk.cloudfront.net/transcoded/7cFHfFSfjna/thumbnails/thumbnail_4.png", "cover_thumbnail_url": "https://d28qihy7z761lk.cloudfront.net/transcoded/7cFHfFSfjna/thumbnails/thumbnail_4.png", "format": "abr", "resolutions": [ "240p", "360p", "480p", "720p" ], "video_codec": "h264", "audio_codec": "aac", "enable_drm": true, "tracks": [], "inputs": [ { "url": "private/677155207a6847b5b5a8d70cfaf4a8a1.mp4" } ], "transmux_only": null, "duration": 19, "content_protection_type": "drm" }, "id": "7cFHfFSfjna", "live_stream": null, "parent_id": "BmN3MXSq5z6" } ``` **Pricing** Auto-generated English subtitles cost $0.071 per minute of video content. :::important - Subtitle generation is an asynchronous process that may take several minutes - Only one auto-generated subtitle track per video is allowed - Email notifications are sent upon completion or failure ::: ### Upload Subtitles to an Asset To upload subtitles to an asset, you need to send an HTTP POST request to the API Endpoint, with the [authentication Header](../server-api/authentication.md). **Endpoint** ```bash https://app.tpstreams.com/api/v1//assets//upload_subtitle/ ``` **Fields** | Name | Type | Description | Required | | ----------- | ----------- | ----------- | -------- | | subtitle | .vtt file | File Containing Subtitles | Yes | | name | string | Name of the subtitles | No | | language | string | Language code of the subtitles | No | Send the subtitle file using form-data in the request body. To know language code please check [Language-codes](../language-codes) **Sample Postman request body (Form-data only)** ![OBS settings](/img/upload_subtitle_req_body.png) **Response** For valid requests the API server returns a JSON: ```json { "detail": "Subtitle uploaded successfully" } ``` :::important For subtitle upload, use form-data in the request body. Select your .vtt file with the "subtitle" key. ::: ### List Subtitles for an Asset To retrieve a list of all subtitles associated with a video asset, you need to send an HTTP GET request to the API Endpoint, with the [authentication Header](../server-api/authentication.md). **Endpoint** ```bash https://app.tpstreams.com/api/v1//assets//subtitles/ ``` **Response** For valid requests the API server returns a JSON list of subtitle tracks: ```json [ { "id": 12, "type": "Subtitle", "name": "English", "url": "https://d28qihy7z761lk.cloudfront.net/transcoded/7cFHfFSfjna/subtitles/en.vtt", "bytes": 1024, "subtitle_type": "Auto Generated" }, { "id": 15, "type": "Subtitle", "name": "Spanish", "url": "https://d28qihy7z761lk.cloudfront.net/transcoded/7cFHfFSfjna/subtitles/es.vtt", "bytes": 2048, "subtitle_type": "Uploaded" } ] ``` ### Delete a Subtitle To delete a specific subtitle track, send an HTTP DELETE request to the API Endpoint, with the [authentication Header](../server-api/authentication.md). **Endpoint** ```bash https://app.tpstreams.com/api/v1//subtitles// ``` Alternatively, you can delete a subtitle using the asset context: ```bash https://app.tpstreams.com/api/v1//assets//subtitles// ``` **Response** For successful deletion, the API server returns a 204 No Content status code with an empty body. :::important You cannot directly delete an auto-generated subtitle track. Attempting to do so will return a 403 Forbidden response. ::: --- ## Usages The Usage API helps you get your organization usage's. ### Get Your Organization's Usage To retrieve your organization's data usage, send an HTTP GET request to the API Endpoint, with the [authentication Header](../server-api/authentication.md). **Endpoint** ```bash https://app.tpstreams.com/api/v1//assets_usage/ ``` **Query Parameter ** The Usage API provides various options to filter data using query parameters: | Parameter | Description | Type | |-------------|-------------------------|-----------------| | month | Filter by month | Integer | | year | Filter by year | Integer | | day | Filter by day | Integer | | time_frame | Filter by timeframe | String ("daily" or "monthly") | | start | Start date | Date (YYYY-MM-DD) | | end | End date | Date (YYYY-MM-DD) | | ordering | Order results | "date" (asc) or "-date" (desc) | **Response** ```json { "count": 3, "next": null, "previous": null, "results": [ { "id": 5385, "date": "2023-04-01", "bandwidth_used": 245540965, "subtitle_generation_cost": 0, "live_stream_usage": 0, "active_storage_bytes": 1198712474, "deleted_storage_bytes": 41007799, "total_storage_bytes": 1239720273 }, { "id": 5253, "date": "2023-05-01", "bandwidth_used": 2484764822, "subtitle_generation_cost": 0, "live_stream_usage": 0, "active_storage_bytes": 10651243573, "deleted_storage_bytes": 1043743829, "total_storage_bytes": 11694987402 }, { "id": 5178, "date": "2023-06-01", "bandwidth_used": 27907667, "subtitle_generation_cost": 0, "live_stream_usage": 0, "active_storage_bytes": 10891400407, "deleted_storage_bytes": 1043973205, "total_storage_bytes": 11935373612 } ] } ``` --- ## Web Hooks Streams uses webhooks to notify your application about things that happen asynchronously, apart from the API request-response cycle. For example, you may want to update something on your end when a video asset status changes from queued to ready or errored. When these events happen, Streams will make a POST request to the address you give us and you can do whatever you need with it on your end. ### Configure Webhook Webhooks can be configured using a webhook endpoint URL and a secret token to ensure authenticity. Once the webhook is configured for a video source or different video sources, a notification will be sent for each event for the sources. Here, the parameter Secret Token is used to ensure in your code that the Webhook is coming from Streams. ### Create a Webhook To Create a webhook you need to send an HTTP POST request to the API Endpoint, with the [Authentication Header](../server-api/authentication.md). ```bash https://app.tpstreams.com/api/v1//webhooks/ ``` **Fields** | Name | Type | Description | Required | | ----------- | ----------- | ----------- | ---------- | | url | string | URL to which asset data to be sent. | True | | secret_token | string | secret_token will be sent in x-streams-token.| True | **Sample request body** ```json { "url": "https://sample.beeceptor.com", "secret_token": "abcdef", } ``` For valid requests the API server returns a JSON: ```json { "url": "https://sample.beeceptor.com", "secret_token": "abcdef", "id": "c4cf9c5f-0b60-4e5c-9db9-81321ffe31d5" } ``` ### List all webhooks To get all the webhooks, you need to send an HTTP GET request to the API Endpoint, with the [Authentication Header](../server-api/authentication.md). **Endpoint** ```bash https://app.tpstreams.com/api/v1//webhooks/ ``` **Response** ```json { "count": 1, "next": null, "previous": null, "results": [ { "url": "https://sample.beeceptor.com", "secret_token": "abcdef", "id": "c4cf9c5f-0b60-4e5c-9db9-81321ffe31d5" } ] } ``` ### Update a webhook To update a webhook, you need to send an HTTP PUT request to the API Endpoint, with the [Authentication Header](../server-api/authentication.md). **Endpoint** ```bash https://app.tpstreams.com/api/v1//webhooks// ``` **Response** ```json { "url": "https://sample1.beeceptor.com", "secret_token": "abcdef", "id": "c4cf9c5f-0b60-4e5c-9db9-81321ffe31d5" } ``` ### Delete a webhook To delete a webhook, you need to send an HTTP DELETE request to the API Endpoint, with the [Authentication Header](../server-api/authentication.md). **Endpoint** ```bash https://app.tpstreams.com/api/v1//webhooks// ``` ### WebHook Response Whenever the status of asset changes, response will be sent to the webhook. **Sample webhook response is as follows** ```json { "id": "9328558d-e0a5-4093-b3b9-8f15ad1550d8", // asset id "title": "Big Buck Bunny Video", "bytes": null, "type": "video", "video": { "progress": 0, "thumbnails": [], "status": "Completed", "playback_url": "https://d7pdowhru2wq4.cloudfront.net/transcoded/9328558d-e0a5-4093-b3b9-8f15ad1550d8/video.m3u8", "dash_url": "https://d7pdowhru2wq4.cloudfront.net/transcoded/9328558d-e0a5-4093-b3b9-8f15ad1550d8/video.mpd", "preview_thumbnail_url": null, "format": "abr", "resolutions": ["240p", "360p", "480p", "720p"], "video_codec": "h264", "audio_codec": "aac", "enable_drm": true, "tracks": [], "inputs": [ { "url": "https://static.testpress.in/BigBuckBunny.mp4" } ], }, } ``` --- ## Subtitle Service The Subtitle Service API allows you to asynchronously generate subtitles for any valid audio or video URL, independently of an asset. The system will process the media and generate subtitles in WebVTT (.vtt) format. ### Create a Subtitle Job To trigger subtitle generation for a media URL, send an HTTP POST request to the API Endpoint with the [authentication Header](../server-api/authentication.md). **Endpoint** ```bash https://app.tpstreams.com/api/v1//subtitle_jobs/ ``` **Fields** | Name | Type | Description | Required | | --------------- | ------ | ------------------------------------------------------------------------------------------------------- | -------- | | url | string | A publicly accessible URL to the audio or video file. | Yes | | client_metadata | object | A JSON object (up to 10KB) to store any custom metadata you want to associate with this job. | No | **Sample Request Body (JSON)** ```json { "url": "https://example.com/audio.mp3", "client_metadata": { "my_internal_id": "12345" } } ``` **Response** For valid requests, the API server returns a JSON response with status code `201 Created`: ```json { "id": "7cFHfFSfjna", "url": "https://example.com/audio.mp3", "language": "en", "status": "Queued", "subtitle_url": null, "audio_duration": null, "error_code": null, "error_message": null, "client_metadata": { "my_internal_id": "12345" }, "created": "2023-10-27T10:00:00.000000Z" } ``` :::info Subtitle generation is an asynchronous process. The initial status will be `Queued` or `Processing`. You can poll the Retrieve Job API to check when it reaches `Completed`. ::: ### Retrieve a Subtitle Job To get the current status and details of a specific subtitle job, send an HTTP GET request to the API Endpoint. **Endpoint** ```bash https://app.tpstreams.com/api/v1//subtitle_jobs// ``` **Response** For valid requests, the API server returns a JSON response with status code `200 OK`: ```json { "id": "7cFHfFSfjna", "url": "https://example.com/audio.mp3", "language": "en", "status": "Completed", "subtitle_url": "https://d28qihy7z761lk.cloudfront.net/private/subtitle_jobs/7cFHfFSfjna.vtt", "audio_duration": "00:02:00.000000", "error_code": null, "error_message": null, "client_metadata": { "my_internal_id": "12345" }, "created": "2023-10-27T10:00:00.000000Z" } ``` ### List Subtitle Jobs To retrieve a list of all your subtitle jobs, send an HTTP GET request to the API Endpoint. **Endpoint** ```bash https://app.tpstreams.com/api/v1//subtitle_jobs/ ``` **Response** For valid requests, the API server returns a JSON array of subtitle jobs (can be paginated) with status code `200 OK`: ```json [ { "id": "7cFHfFSfjna", "url": "https://example.com/audio.mp3", "language": "en", "status": "Completed", "subtitle_url": "https://d28qihy7z761lk.cloudfront.net/private/subtitle_jobs/7cFHfFSfjna.vtt", "audio_duration": "00:02:00.000000", "error_code": null, "error_message": null, "client_metadata": null, "created": "2023-10-27T10:00:00.000000Z" } ] ``` --- ## Getting Started with TPStorage TPStorage is an **S3-compatible object storage** service. You can access and manage your storage using your **Access Key** and **Secret Key**, similar to Amazon S3. ### Installation Make sure `boto3` is installed: ```bash pip install boto3 ``` ### Configuration Use the following sample code to connect to TPStorage: ```python import boto3 # Initialize the TPStorage client tpstorage = boto3.client( 's3', endpoint_url='https://storage1.tpstreams.com', # TPStorage endpoint aws_access_key_id='YOUR_ACCESS_KEY', # Replace with your Access Key aws_secret_access_key='YOUR_SECRET_KEY', # Replace with your Secret Key region_name='us-east-1', # Required by boto3, ignored by TPStorage config=boto3.session.Config(signature_version='s3v4') ) ``` ### Basic Operations #### Listing Buckets ```python # List all buckets response = tpstorage.list_buckets() for bucket in response.get('Buckets', []): print(bucket['Name']) ``` #### Uploading a File ```python tpstorage.upload_file('local_file.txt', 'my-bucket', 'remote_file.txt') ``` #### Generating a Temporary Download URL ```python url = tpstorage.generate_presigned_url( 'get_object', Params={'Bucket': 'my-bucket', 'Key': 'remote_file.txt'}, ExpiresIn=3600 # Link valid for 1 hour ) print("Download URL:", url) ``` ### Access Details | Setting | Value | |----|----| | **Endpoint URL** | `https://storage1.tpstreams.com` | | **Access Key** | `` | | **Secret Key** | `` | | **Compatibility** | S3 API (boto3, AWS SDKs, rclone, etc.) | | **Region** | `us-east-1` (placeholder, not used by TPStorage) | --- ## Introduction(Tpstorage) TPStorage is an **S3-compatible object storage** service that allows you to store and manage your files using familiar S3 API patterns. This documentation will help you get started with TPStorage and integrate it into your applications. ### What is TPStorage? TPStorage provides: - **S3-compatible API** - Use existing S3 tools and libraries - **Python boto3 support** - Seamless integration with Python applications - **Secure access** - Access Key and Secret Key authentication - **Presigned URLs** - Generate temporary download/upload links - **Bucket management** - Organize your files in buckets ### Quick Start 1. **Install boto3**: `pip install boto3` 2. **Configure your client** with TPStorage endpoint 3. **Start uploading and managing files** ### Getting Started Follow the **[Getting Started](getting-started)** guide to set up TPStorage with Python and boto3. ### Getting Help If you need assistance with TPStorage integration, please refer to the detailed examples in our documentation or contact our support team. --- ## Get Transcoding Job detail To retrieve the details of a transcoding job, make a GET request to the following API endpoint , with the [authentication Header](../server-api/authentication.md). ```base https://app.tpstreams.com/api/v1//transcoding_jobs// ``` Replace `` with your organization's unique identifier and `` with the specific job ID you want to retrieve details for. ##### Sample Response ```json { "id": "5KQfnXCg8Qh", "resolutions": [ "240p", "480p" ], "video_duration": 120, "status": "Completed", "input_url": "https://example.com/input-video.mp4", "output_path": "s3://example-bucket/path/?access_key=E8WPS6H1A4OYD3ZNVMR&secret_key=N1dYpS2cTk5AeH6jWf8TgBh9Ji0MkL1N2O3P", "start_time": "2023-04-20T23:20:06.034924+12:00", "end_time": "2023-04-20T23:40:06.034924+12:00", "error_message": null, "client_metadata": { "client_id": "12345", "project": "marketing_campaign_2024" } } ``` :::important In case of transcoding errors, details will be provided in the "error_message" field of the response. ::: --- ## List all Transcoding Jobs To list all transcoding jobs, make a GET request to the following API endpoint, with the [authentication Header](../server-api/authentication.md). ```base https://app.tpstreams.com/api/v1//transcoding_jobs/ ``` Replace `` with your organization's unique identifier. #### Query Parameters You can filter and order the list of transcoding jobs using the following query parameters: | Parameter | Type | Description | | :--- | :--- | :--- | | `status` | string | Filter jobs by status. You can provide multiple statuses by repeating the parameter. Options: `queued`, `transcoding`, `completed`, `error`. | | `enable_drm` | boolean | Filter jobs by whether DRM is enabled (`true`) or disabled (`false`). | | `created_from` | string | Filter jobs created on or after this date and time (ISO 8601 format). | | `created_to` | string | Filter jobs created on or before this date and time (ISO 8601 format). | | `ordering` | string | Order the jobs by creation time. Options: `-created` (Latest first), `created` (Oldest first). | ##### Example request with filters `https://app.tpstreams.com/api/v1//transcoding_jobs/?status=completed&enable_drm=true&created_from=2023-04-20T00:00:00Z&ordering=-created` #### Sample Response The response is paginated and contains a list of transcoding jobs. ```json { "count": 42, "next": "https://app.tpstreams.com/api/v1//transcoding_jobs/?page=2", "previous": null, "results": [ { "id": "5KQfnXCg8Qh", "resolutions": [ "240p", "480p" ], "video_duration": 120, "status": "completed", "input_url": "https://example.com/input-video.mp4", "output_path": "s3://example-bucket/path/?access_key=&secret_key=®ion=", "start_time": "2023-04-20T23:20:06.034924+12:00", "end_time": "2023-04-20T23:40:06.034924+12:00", "error_message": null, "enable_drm": true }, { "id": "7XkLp9mN2O", "resolutions": [ "720p" ], "video_duration": 300, "status": "queued", "input_url": "https://example.com/another-video.mp4", "output_path": "s3://example-bucket/another-path/?access_key=&secret_key=®ion=", "start_time": null, "end_time": null, "error_message": null, "enable_drm": false } ] } ``` --- ## Trancode a video To transcode a video, you need to make a POST request to the following API endpoint, with the [authentication Header](../server-api/authentication.md). ```bash https://app.tpstreams.com/api/v1//transcoding_jobs/ ``` Replace `` with your organization's unique identifier. ##### Sample payload: You have the flexibility to choose the method that best fits your workflow. Whether you prefer using an external video URL or a direct S3 bucket path, both options are available to you: **1. External Video URL:** ```json { "input_url": "https://example.com/input-video.mp4", "output_path": "s3://example-bucket/path/?access_key=&secret_key=®ion=", "resolutions": ["240p", "480p"], "enable_drm": true, "client_metadata": { "client_id": "12345", "project": "marketing_campaign_2024" } } ``` **2. Direct S3 Bucket Path:** ```json { "input_path": "s3://example-bucket/video.mp4/?access_key=&secret_key=®ion=", "output_path": "s3://example-bucket/path/?access_key=&secret_key=®ion=", "resolutions": ["240p", "480p"], "enable_drm": true, "client_metadata": { "client_id": "12345", "project": "marketing_campaign_2024" } } ``` Here's a breakdown of the fields in the payload: | **Name** | **Description** | | ----------------- | ----------------------------------------------------------------------------------------------------------------------- | | input_url | The URL of the input video file you want to transcode. **OR** The S3 bucket path of the input video file. If using the S3 path, ensure the access_key , secret_key and region match the bucket's credentials. | | output_path | The S3 bucket path where the transcoded video files will be stored (e.g., `s3://bucket/path/`). Credentials (`access_key`, `secret_key`, `region`) may be included as query parameters, or omitted if storage is configured for your account. See the note below for more details. | | resolutions | An array of resolutions for transcoding the video. Specify multiple resolutions as needed. Options include 240p, 360p, 480p, 720p, and 1080p. | | enable_drm | (Optional) This flag allows you to enable Digital Rights Management (DRM) for your video. When set to `true`, your content will be encrypted using Widevine and Fairplay, and a `drm_content_id` will be returned in the response. This ID is required to generate playback licenses. Defaults to `false`. | | client_metadata | (Optional) A JSON object containing custom metadata for your reference. This metadata will be returned in the job response and webhook notifications. Maximum size: 10 KB. | :::important - **output_path** : Storage credentials (`access_key`, `secret_key`, and `region`) are optional. You may omit them if storage is configured for your account. If storage is not configured, please contact **TPStreams Support** to enable it before omitting these fields. - **client_metadata** : This field is optional and can be used to store custom data for your internal purposes (e.g., tracking client IDs, project names, or reference information). The server does not modify or interpret this data—it stores and returns it exactly as provided in API responses and webhook notifications. ::: ##### Response Upon a successful request, you will receive a response like below with information about the transcoding job, including a unique job ID. You can use this job ID to monitor the progress and check the status of your transcoding job. ```json { "id": "5KQfnXCg8Qh", "resolutions": [ "240p", "480p" ], "video_duration": null, "status": "Queued", "enable_drm": true, "drm_content_id": "8216dcdb90c34a4f8abf1671630a8817", "input_url": "https://example.com/input-video.mp4", "output_path": "s3://example-bucket/path/?access_key=&secret_key=®ion=", "start_time": null, "end_time": null, "error_message": null, "client_metadata": { "client_id": "12345", "project": "marketing_campaign_2024" } } ``` :::important In case of transcoding errors, details will be provided in the "error_message" field of the response. ::: #### Get notified on status change We offer webhook integration to keep you informed about the status and progress of your transcoding jobs in real-time. With webhook integration, you can receive notifications as soon as your job status changes, making it easier to track and manage your video transcoding tasks. To register a webhook for your organization, Please check webhook [documentation](../server-api/webhooks.md). Upon registering a webhook, you will receive a status change along with information about your transcoding job. Here is an example of the response you might receive: ```json { "id": "5KQfnXCg8Qh", "resolutions": [ "240p", "480p" ], "video_duration": null, "status": "transcoding", "enable_drm": true, "drm_content_id": "8216dcdb90c34a4f8abf1671630a8817", "input_url": "https://example.com/input-video.mp4", "output_path": "s3://example-bucket/path/?access_key=&secret_key=®ion=", "start_time": "2023-11-22T12:30:00Z", "end_time": null, "error_message": null, "client_metadata": { "client_id": "12345", "project": "marketing_campaign_2024" } } ``` :::important The `drm_content_id` is required to generate playback licenses. ::: #### Playing DRM Protected Content If you enabled DRM, the response includes a `drm_content_id`. You will need to use this ID as the `content_id` when generating a signed license token for playback. Learn how to generate the license and URL in the [Get license (Widevine)](../drm-service/widevine-configuration) or [FairPlay Configuration](../drm-service/fairplay-configuration) guides. --- ## Cancel Transcoding Job To cancel a transcoding job, you need to send an HTTP DELETE request to the API Endpoint , with the [authentication Header](../server-api/authentication.md). **Endpoint** ```bash https://app.tpstreams.com/api/v1//transcoding_jobs// ``` **Response** Upon a successful cancellation request, the API will respond with a message confirming the cancellation. Here is an example of the response you might receive: ```json { "message": "Job cancelled successfully." } ``` In case the job has already been completed, the API will respond with a message indicating that the job is already done: ```json { "message": "Job is already completed." } ``` :::important You can only cancel transcoding jobs that are not in a completed status. ::: --- ## Introduction(Transcoding-service) Welcome to the Transcoding as a Service documentation! This guide is your gateway to mastering our transcoding service, simplifying the process of converting videos into different resolutions. Transcoding is the key to ensuring your videos play smoothly on various devices and streaming platforms. Refer the documentation below for more information. - [Transcode a Video](transcode-a-video) - [List all Transcoding Jobs](list-all-transcoding-jobs) - [Get Transcoding Job Details](get-transcoding-job-details) - [Cancel Transcoding Job](transcoding-cancelation) --- ## AES Encryption Advanced Encryption Standard (AES) is a widely used symmetric encryption algorithm designed to secure data. It employs a block cipher method, transforming data in fixed-size blocks, typically 128 bits. AES operates through a series of rounds involving substitution, permutation, and mixing of data elements, making it highly resistant to attacks. It offers key lengths of 128, 192, or 256 bits for varying levels of security. AES encryption is widely adopted for its efficiency and robust protection, used in securing sensitive data during transmission and storage ### Upload AES Encrypted video To Upload a asset with AES Encryption you need to send an HTTP POST request to the API [Endpoint](../server-api/assets.md#upload-an-video), with the "content_protection_type" as "aes". **Sample request body** ```json { "title": "Big Buck Bunny Video", "inputs": [ { "url": "https://static.testpress.in/BigBuckBunny.mp4" } ], "resolutions": ["240p", "360p", "480p", "720p"], "content_protection_type": "aes", "folder": "32seYYHeNxE" } ``` ### How to play AES Encrypted video #### Generate a Signed Playback URL To successfully access and play AES encrypted videos, it's essential to generate a signed playback URL specifically designed for each video. To obtain it send an HTTP GET request to the API [Endpoint](../server-api/assets.md#get-individual-asset-details), with the the query parameter 'expiry,' indicating the duration in seconds until the URL expires. **Endpoint** ```bash https://app.tpstreams.com/api/v1//assets//?expiry=100 ``` The playback_url provided in the API response is the signed URL that you can use for secure video playback. **Response** ```json { "title": "sample.mp4", "bytes": null, "type": "video", "video": { .... .... "playback_url": "https://d384padtbeqfgy.cloudfront.net/transcoded_private/B66mmRm2TPF/video.m3u8?Expires=1692398327&Signature=OXqiVfCVAFrNoMq0hrpJ05YYY0XeyzA1H8kD6lv~~71v5PCdpf-9h1Qe~A0RFYoJuOq22j70juEFVJNjEr-WvVPvCvSRoYbRG6xEx5sr-541G~UkBXrcNXRHpb1988hQdG8NAh2pCV6o7bFOKsk3BBk8t6FRo-ZYs6xl46vFN8qH3FCNMhQLFmWqNpNo1vSPjmSSZlNrAplBkNq7MWxoNPxEFrzBgKusqrFZWLqOoXdzR8f9kb9VKkEQAPZL2tk71D6aN8toxwPV70esr8df78hkmAl3d4lChKZlrbWKd0tzew3RDPYZxicxfD1ZBx0th5PQfCltukkitQ0zPbE3TQ__&Key-Pair-Id=K2XWKDWM065EGO", }, } ``` #### Handle AES-encrypted key request The player sends a request to our endpoint, as indicated within the m3u8 file, to obtain the AES decryption key needed for video playback. However, the API endpoint mandates an access token for authorization. To handle this, it's important to ensure that the access token is included in the request as a query parameter initiated by the player. To generate access tokens send an HTTP POST request to the API [Endpoint](../server-api/access-token.md#create-an-access-token) **Sample video.js code** ```html Video.js HLS Example ``` Replace `"PLAYBACK_SIGNED_URL.m3u8"` with the actual playback_url of your encrypted video and `"YOUR_ACCESS_TOKEN_HERE"` with the provided access token. --- ## Playback Authentication Access token generated using Streams API which is required to authorize video playback. If the user has your video embed code he can embed your video onto any page on the internet if you don't have domain restrictions. even if you have, users can view the video by embedding your video on your home page or any other page that doesn't restrict users. You can prevent the above scenario by generating an access token using API with time-to-live or set to expire after one usage on the back-end server and then sent to the website front-end and use generate access_token as part of the video embed code. Access token CRUD operation APIs are documented [here](../server-api/access-token.md) --- ## Getting started(Video-embedding) For any video that you host with Streams, if you want you use it somewhere else, you have to embed it. This means that when you have generated the embed code for your video, you will be able to add the video to your website, blog, articles, or other website you’re looking forward to. In order to allow embedding for a certain video, you will first need to follow the below steps which will guide you through the whole Video Embedding process ### Generate an embed code Construct iframe source URL: ```bash https://app.tpstreams.com/embed/{{asset_id}}/?access_token={{access_token}}/ ``` ** Sample format ** ```html
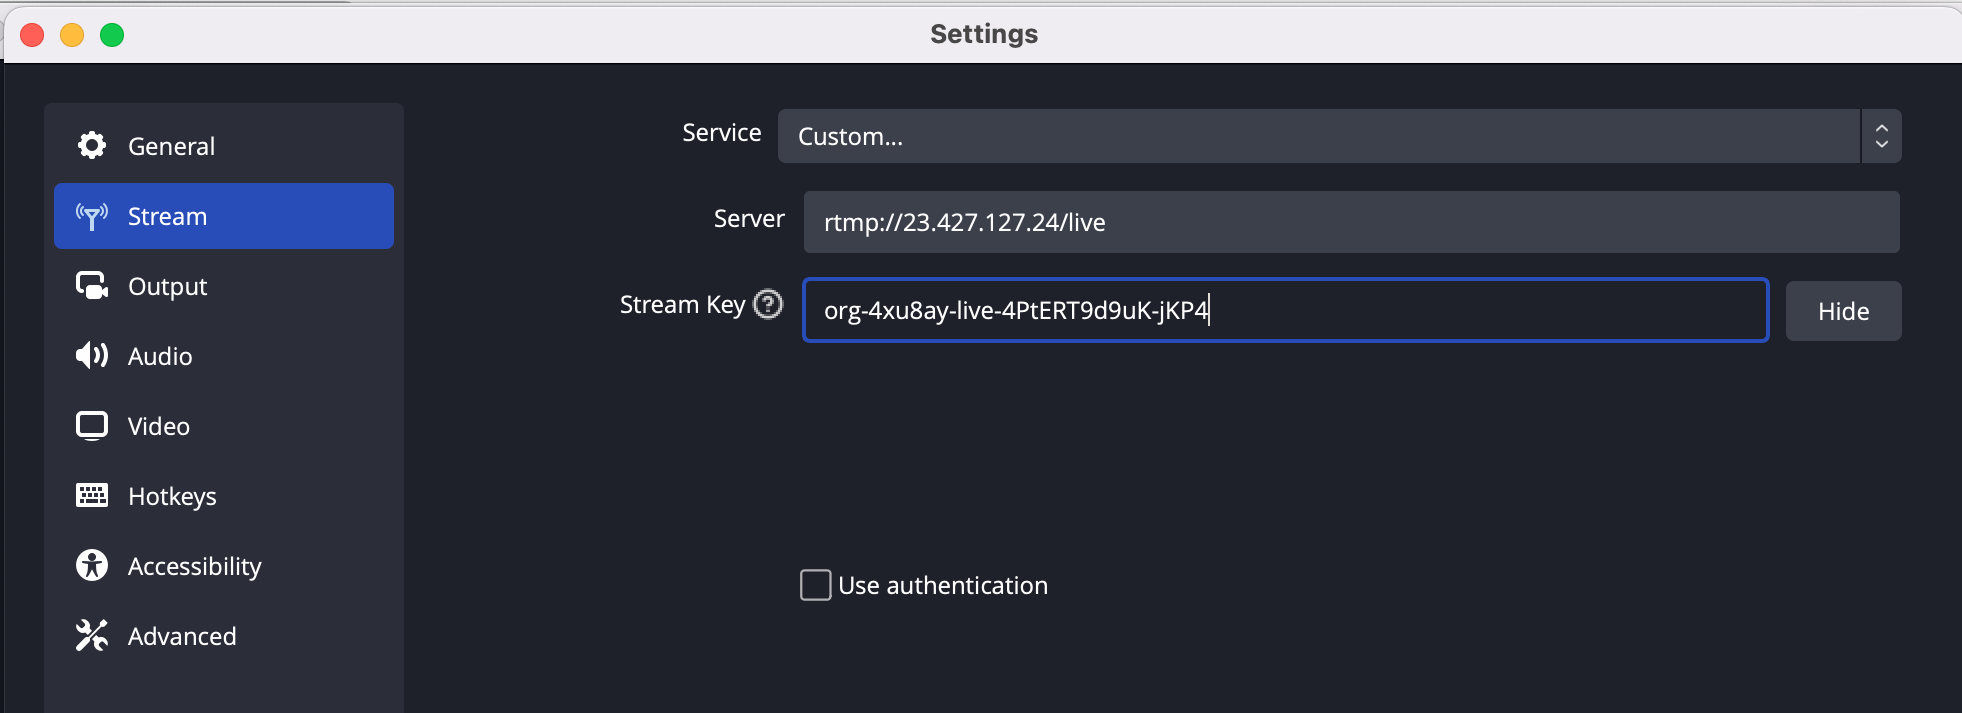
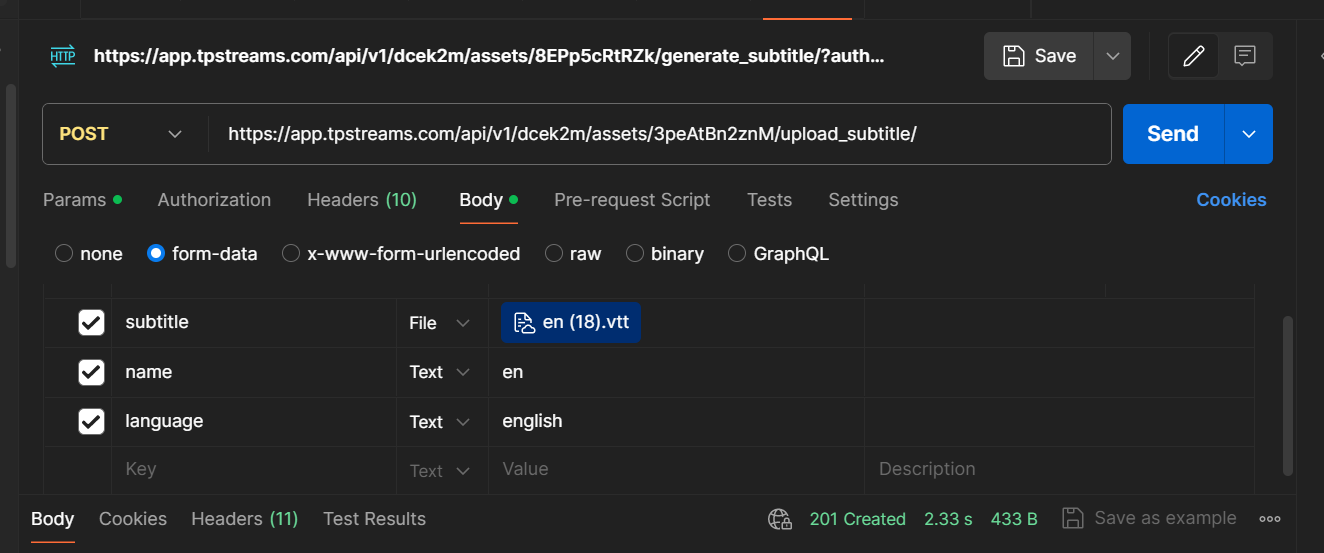
``` ### Embed on your site Now you use constructed iframe code in your code to embed the video. ** Example ** ```html live showLineNumbers
``` ### Live Viewer Count TPStreams displays the number of viewers currently watching a live stream. The viewer count is shown above the player on the live stream page. ![Live viewer count above the player](./img/live_viewer_count.png) By default the player identifies a viewer with a cookie it sets on the embed page, so the count measures devices rather than people. | Situation | Counted as | | ----------- | ----------- | | Two tabs in the same browser | 1 | | Two different browsers on one device | 2 | | The same person on a phone and a laptop | 2 | Counting devices means nobody can inflate the number by opening more tabs, but it reads higher than your real audience when people watch on more than one device. To count people instead, add the `viewer_id` parameter to the embed URL. ```bash https://app.tpstreams.com/embed/{{asset_id}}/?access_token={{access_token}}&viewer_id={{your_user_id}} ``` **Fields** | Name | Type | Description | Required | | ----------- | ----------- | ----------- | ---------- | | viewer_id | string | The identifier your own system uses for the signed-in user. The same person is then counted once across every device they watch on | No | :::important - Use the identifier your own system already has for that user, so it stays the same across sessions and devices. A value that changes per session counts one person many times. - Use an opaque ID rather than an email address or a name. The value travels in the embed URL, and URLs end up in browser history, referrer headers and server logs. - The value is hashed and scoped to your organization before it is used for counting, so Streams does not hold the raw ID and the same ID in two organizations is never confused. ::: This parameter affects only the live viewer count. It has no effect on recorded videos, playback or authorization. --- ## Custom Overlays The Custom Overlay feature allows you to display interactive HTML content over the video player at specific times or on demand. Typical use cases include: - Quizzes - Polls / Voting - Feedback forms - Call-to-action buttons - Announcements / Informational content Overlays can appear automatically at a timestamp or be triggered programmatically via `player.showOverlay()`. #### Overlay Configuration | Property | Type | Required | Description | |----------|------|----------|-------------| | `id` | string | Yes | Unique identifier for the overlay | | `contentHtml` | string | No | HTML content to display in the overlay | | `showAt` | number | No | Video timestamp (seconds) to show overlay | | `hideAt` | number | No | Video timestamp (seconds) to hide overlay | | `className` | string | No | CSS class name for custom styling | | `verticalAlign` | 'top' \| 'center' \| 'bottom' | No | Vertical position (default: 'center') | | `horizontalAlign` | 'left' \| 'center' \| 'right' | No | Horizontal position (default: 'center') | **Default behavior** - If `showAt` is not set, the overlay appears immediately. - If `hideAt` is not set, it stays until user interaction. - If `className` is not set, default styling is applied. - Alignment defaults to center. #### Methods **showOverlay** Displays an overlay over the video player. ```js player.showOverlay({ id: 'quiz-overlay', contentHtml: '
Content here
', showAt: 30, hideAt: 60, className: 'custom-overlay' }); ```` #### Events **onOverlayShow** Triggered when an overlay becomes visible. ```js player.on('onOverlayShow', id => { console.log('Overlay shown:', id); }); ``` **onOverlayHide** Triggered when an overlay is hidden or dismissed. ```js player.on('onOverlayHide', id => { console.log('Overlay hidden:', id); }); ``` **overlayAction** Triggered when a user interacts with elements inside an overlay (buttons, form submissions, etc.). ```js player.on('overlayAction', data => { console.log('Button clicked:', data.value, 'in overlay:', data.id); }); ``` **Event Data** ```js { type: 'overlayAction', id: overlayId, value: buttonValue } ``` #### Styling Default overlays cover the full video and center the content. You can customize appearance using `className`. ```css .quiz-overlay { background: rgba(0,0,0,0.8); color: white; padding: 20px; border-radius: 10px; } .cta-overlay button { background: #007bff; color: white; padding: 10px 20px; border-radius: 5px; cursor: pointer; margin: 5px; } .poll-overlay label { display: flex; align-items: center; padding: 10px 15px; margin-bottom: 10px; background: #f0f0f0; border-radius: 6px; cursor: pointer; transition: background 0.2s; } ``` 1. Use unique overlay IDs to prevent conflicts. 2. Use `data-value` attributes on buttons for easy event handling. 3. Test timing (`showAt` / `hideAt`) to ensure good UX. 4. Keep content concise and mobile-friendly. 5. Ensure accessibility: proper contrast, keyboard navigation. For detailed examples of quizzes, polls, feedback forms, and announcements with custom styling, check: [Player Overlay Examples](https://github.com/testpress/player-overlay-examples) --- ## About player SDK Our player SDK enables you to interact with embedded Streams players through the code on your web page. You can modify the default behavior of the player for features like looping, execute custom functions on particular playback events, and even set basic properties like the volume, and playback rate of the player. The SDK, as a JavaScript library, is completely separate from the API. You connect to it differently, and it gives you a different range of options. --- ## Player Events(Javascript-sdk) ### About Player events You can listen for events in the player by attaching a callback using .on() ```js player.on('ended', function() { // Executes when the video is ended }); ``` The events are equivalent to the HTML5 video events. To remove a listener, call .off() with the callback function. If you pass an event name only, you remove all listeners for that event. ```js var onPlay = function() { }; player.on('ended', onPlay); // If later you decide that you don't need to listen for `ended` player.off('ended', onPlay); // Alternatively, call `off` with just the event name to remove all listeners player.off('ended'); ``` ### Events for playback controls - ended - error - loaded - pause - play - progress - seeked - timeupdate - volumechange - ratechange #### ended This event fires when playback reaches the end of a video. :::info When the player's loop behavior is enabled, the ended event doesn't fire. ::: #### loaded This event fires when a new video is loaded in the player. #### volume This event fires when the volume in the player changes. #### timeupdate This event fires when the playback position of the video changes, generally every 250 ms during playback, but the interval can vary depending on the browser. #### seeked This event fires when the player seeks a specific time. A simultaneous timeupdate event also fires. #### progress This event fires while the video is loading. The event data indicates the amount of the video that has been buffered. #### play This event fires when the video plays. #### pause This event fires when the video is paused. #### error This event fires when the player experiences some sort of error. If a method call generated the error, the name of the method appears in the event data, along with the name of the error. #### ratechange This event fires when the playback rate of the video in the player changes. --- ## Player Methods(Javascript-sdk) #### About player methods You can call player methods by calling the corresponding function on the Player object. All player method executes only after the iframe is loaded, so no need to wait for the player to loaded to call the methods. ``` js player.play(); ``` All methods, except for on() and off(), return a Promise — a special JavaScript object that stands for the result of the operation, whether success or failure. Promises for methods that return information resolve with the value of the property in question. ```js player.getLoop().then(function(loop) { // Whether the player is set to loop }); ``` #### Get the playback position of a video This method gets the current playback position of a video, measured in seconds. **Function** ```js getCurrentTime() ``` **Returns** ```bash Promise ``` **Example** ``` bash player.getCurrentTime().then(function(seconds) { // `seconds` indicates the current playback position of the video }); ``` ​ #### Get the loop state of a player This method gets the loop state of a player, where true indicates that the video restarts once it reaches the end of playback. **Function** ```js getLoop() ``` **Returns** ```bash Promise ``` **Example** ```js player.getLoop().then(function(loop) { // `loop` indicates whether the loop behavior is active }); ``` ​ #### Get the pause state of a player This method gets the pause state of the current player, where true indicates that playback is paused. **Function** ```js getPaused() ``` **Returns** ```bash Promise ``` **Example** ```js player.getPaused().then(function(paused) { // `paused` indicates whether the player is paused }); ``` ​ #### Get the ended state of a video This method gets the ended state of the video, where true indicates that the video has ended. The video has ended if its current playback position is exactly equal to its duration. **Function** ```bash getEnded() ``` **Returns** ```bash Promise ``` **Example** ```js player.getEnded().then(function(ended) { // `ended` indicates whether the video has ended }); ``` #### Get the playback rate of a player This method gets the playback rate of a player on a scale from 0.5 to 2, where 0.5 is half speed and 2 is double speed. **Function** ```js getCurrentPlaybackRate() ``` **Returns** ```bash Promise ``` **Example** ```js player.getCurrentPlaybackRate().then(function(playbackRate) { // `playbackRate` indicates the numeric value of the current playback rate }); ``` #### Get the volume level of a player This method gets the volume level of a player on a scale of 0 to 1. :::info Most mobile devices don't support a volume level independent of the system volume. In these cases, this method always returns 1. ::: **Function** ```js getVolume() ``` **Returns** ```bash Promise ``` **Example** ```js player.getVolume().then(function(volume) { // `volume` indicates the volume level of the player }); ``` #### Get the video duration This method gets the current video duration in seconds. **Function** ```js getDuration() ``` **Returns** ```bash Promise ``` **Example** ```js player.getDuration().then(function(duration) { // duration 596.4630000000002 }); ``` #### Get user watched time ranges This methods returns the list of time ranges that user watched in a video. **Function** ```js played() ``` **Returns** ```bash Promise ``` **Example** ```js player.played().then(function(ranges) { // ranges => [[0, 120.084666], [155.292928, 161.054032], ...] }); ``` #### Pause a video This method pauses the playback of a video. **Function** ```js pause() ``` **Returns** ```bash Promise ``` **Example** ```js player.pause().then(function() { // The video is paused }).catch(function(error) { // Some other error occurred }); ``` #### Play a video This method plays the playback of a video. **Function** ```js play() ``` **Returns** ```bash Promise ``` **Example** ```js player.play().then(function() { // The video is paused }).catch(function(error) { // Some other error occurred }); ``` ​ #### Set the playback position of a video This method sets the current playback position in seconds. The player attempts to seek to as close to the specified time as possible. The exact time comes back as the fulfilled value of the promise. **If playback hasn't started yet**, using this method starts playback. **If playback has already started**, using this method doesn't affect the play state. :::info If the player is paused, it remains paused. If the player is playing, it buffers the video from the new position and then resumes playing. ::: **Function** ```js setCurrentTime(seconds) ``` **Parameters** |Parameter| Data type | Required? | Description | |---------| ----------|-----------|-------------| | seconds | Number | Yes | The playback position in seconds.| **Returns** ```bash Promise ``` **Errors** | Error | Description | | ------ | ----------- | | RangeError | The time is less than 0 or greater than the video's duration.| | Error | Some other error occurred. | **Example** ```js player.setCurrentTime(30.456).then(function(seconds) { // `seconds` indicates the actual time that the player seeks to }).catch(function(error) { switch (error.name) { case 'RangeError': // The time is less than 0 or greater than the video's duration break; default: // Some other error occurred break; } }); ``` ​ #### Set the autoplay state of a player or browser This method enables or disables autoplay in a player or browser, where true indicates that autoplay is enabled. Under autopause, whenever a new video loads in the browser window, the video begins in a played state. By default autoplay was disabled. :::info The autopause feature has no effect if you've disabled cookies in your browser, either through browser settings or with an extension or plugin. ::: **Function** ```js setAutoPlay({autoplay}) ``` **Parameters** | Parameter | Data type | Required? | Description | | --------- | --------- | --------- | ----------- | | autopause | Boolean | Yes | The autopause state to set.| **Returns** ```bash Promise ``` **Errors** | Error | Description | | --------- | --------- | | UnsupportedError | Autopause isn't supported by the current player or browser. | | Error | Some other error occurred. | **Example** ```js player.setAutoPlay(false).then(function(autopause) { // Autoplay is disabled }).catch(function(error) { // Handle errors }); ``` #### Set the loop state of a player This method sets the loop state of the player. When the loop state is true, playback resumes at the beginning of the video immediately after the video ends. **Function** ```js setLoop(loop) ``` **Parameters** | Parameter | Data type | Required? | Description | | --------- | --------- | --------- | ----------- | | loop | Boolean | Yes | Whether the player loops video playback. | **Returns** ```bash Promise ``` **Example** ```js player.setLoop(true).then(function(loop) { // The loop behavior is enabled }); ``` #### Set the playback rate of a player This method sets the playback rate of the player on a scale from 0.5 to 2, where 0.5 is half speed and 2 is double speed. When you set the playback rate through the API, the specified value isn't synchronized to other players or stored as the viewer's preference. **Function** ```js setPlaybackRate(playbackRate) ``` **Parameters** | Parameter | Data type | Required? | Description | | --------- | --------- | --------- | ----------- | | playbackRate| Number | Yes| The playback rate of the player from 0.5 to 2.| **Returns** ```bash Promise ** ``` **Errors** | Error | Description | | --------- | --------- | | RangeError | The playback rate is less than 0.5 or greater than 2. | | Error | Some other error occurred.| **Example** ```js player.setPlaybackRate(0.5).then(function(playbackRate) { // The playback rate is set }).catch(function(error) { switch (error.name) { case 'RangeError': // The playback rate is less than 0.5 or greater than 2 break; default: // Some other error occurred break; } }); ``` #### Set the volume level of a player This method sets the volume level of the player on a scale from 0 to 1. When you set the volume through the API, the specified value isn't synchronized to other players or stored as the viewer's preference. **Function** ```js setVolume(volume) ``` **Parameters** | Parameter | Data type | Required? | Description | | --------- | --------- | --------- | ----------- | | volume | Number |Yes | The volume level of the player from 0 to 1. | **Returns** ```bash Promise ``` **Errors** | Error | Description | | --------- | --------- | | RangeError | The volume is less than 0 or greater than 1. | | Error | Some other error occurred. | **Example** ```js player.setVolume(0.5).then(function(volume) { // The volume is set }).catch(function(error) { switch (error.name) { case 'RangeError': // The volume is less than 0 or greater than 1 break; default: // Some other errors occurred break; } }); ``` #### Apply watermark to the video This method applies watermark to the video. Please refer to this [doc](../watermarking.md) for more details on watermarking. **Function** ```js applyWatermark() ``` **Parameters** | Parameter | Data type | Required? | | --------- | --------- | --------- | | annotations | json |Yes | **Returns** ```bash Promise ``` **Example** ```js const annotations = [ { "type":"dynamic", "text":"Dinesh", "opacity":"0.8", "color":"#FF0000", "size":"5", "interval":5000, "skip": 2000 } ] player.applyWatermark(annotations).then(function() { // The watermark is applied }) ``` #### Enable resume video playback Assigning a unique ID to a user automatically enables the resume video playback feature across all devices. The user's progress will be saved periodically, ensuring playback resumes from the last saved point when they return. **Function** ```js setPlayerUserId() ``` **Returns** ```bash Promise ``` **Example** ``` bash player.loaded().then(()=>{ player.setPlayerUserId("shantanu@testpress.in") }); ``` #### Get the watched duration of a video This method retrieves the total watched duration of a video, measured in seconds. ##### **Function** ```js getWatchedTime() ``` ##### **Returns** ```bash Promise ``` ##### **Example** ```js player.getWatchedTime().then(function(duration) { console.log(duration, "user watched duration"); }); ``` This will log the total duration the user has watched the video. #### Set custom error messages This method allows you to customize error messages for specific error types. If a custom message is not provided for an error type, the system's default error message will be used. **Function** ```js setCustomErrorMessage(errorMessages) ``` **Parameters** | Parameter | Data type | Required? | Description | | --------- | --------- | --------- | ----------- | | errorMessages | Object | Yes | An object containing custom error messages for specific error types. | **Supported Error Types** | Error Type | Description | | ------------------------- | ----------- | | BrowserNotSupported | Error when the browser is not supported. | | DRMKeySystemUnsupported | Error when the DRM key system is not supported. | | NetworkNotAvailable | Error when the network is not available. | | DefaultPlaybackError | Default error message for general playback errors. | **Returns** ```bash Promise ``` **Example** ```js player.setCustomErrorMessage({ 'BrowserNotSupported': 'This browser is not supported.', 'DRMKeySystemUnsupported': 'A DRM-related error has occurred', 'NetworkNotAvailable': 'A network error occurred. Please check your internet connection.', 'DefaultPlaybackError': 'An unknown playback error occurred.' }).then(function() { // Custom error messages are set }); ``` :::info Only the four error types listed above can be customized. If you don't provide a custom message for a specific error type, the system's default error message will be used. ::: --- #### Set custom DRM license endpoint This method allows you to configure a custom DRM license endpoint for the player. By default, the embedded player directly calls the platform’s DRM license API. Using this method, API clients can instead route DRM license requests through their own endpoint, which can act as a DRM proxy. This enables clients to: * Inject additional DRM configuration or policies * Customize request payloads before forwarding them * Extend DRM behavior without changing the existing license contract The configured endpoint receives the DRM challenge from the player, processes or enriches the request as needed, forwards it to the platform’s DRM license API, and returns the license response back to the player. **Function** ```js setDRMURL(url) ``` **Returns** ```bash Promise ``` **Example** ```js player.setDRMURL("https://client.example.com/drm-proxy").then(function() { // Custom DRM endpoint is configured }).catch(function(error) { // Handle errors }); ``` --- #### Clear custom error messages This method clears all previously set custom error messages. After calling this method, the player will use the system's default error messages for all error types. **Function** ```js clearCustomErrorMessage() ``` **Returns** ```bash Promise ``` **Example** ```js player.clearCustomErrorMessage().then(function() { // Custom error messages are cleared, system defaults will be used }); ``` #### Request Fullscreen This method requests the player to enter native fullscreen mode. If the browser allows it, the video will expand to fullscreen. **Function** ```js requestFullscreen() ``` **Returns** ```bash Promise ``` **Example** ```js player.requestFullscreen(); ``` #### Exit Fullscreen This method requests the player to exit native fullscreen mode. If the player is currently in fullscreen, it will return to its embedded state. **Function** ```js exitFullscreen() ``` **Returns** ```bash Promise ``` **Example** ```js player.exitFullscreen(); ``` #### Enable Fullscreen Toggle Visibility This method shows the fullscreen toggle button in the player’s control bar. After calling this method, users will be able to enter or exit fullscreen using the player UI. **Function** ```js enableFullscreen() ``` **Returns** ```bash Promise ``` **Example** ```js player.enableFullscreen(); ``` #### Disable Fullscreen Toggle Visibility This method hides the fullscreen toggle button from the player’s control bar. After calling this method, fullscreen can still be controlled programmatically, but not via the player UI. **Function** ```js disableFullscreen() ``` **Returns** ```bash Promise ``` **Example** ```js player.disableFullscreen(); ``` --- ## Player Parameters #### About Player Parameters Player parameters are query parameters that you can append to the `playback_url` to configure the player's behavior. These parameters allow for a customized playback experience by controlling features such as mute, autoplay, looping, and more directly through the URL. #### Parameters Overview The following query parameters can be added to the `playback_url` to control the player's settings: | Parameter | Data Type | Values | Description | |---------------|-----------|--------------------------------|-----------------------------------------------------------------------------| | `background` | String | `'1'` or `'0'` | Enables or disables background mode. `'1'` enables it, `'0'` disables it. | | `muted` | String | `'1'` or `'0'` | Mutes or unmutes the player. `'1'` mutes the player, `'0'` unmutes it. | | `autoplay` | String | `'1'` or `'0'` | Controls autoplay. `'1'` enables autoplay, `'0'` disables it. | | `loop` | String | `'1'` or `'0'` | Enables or disables loop mode. `'1'` enables looping, `'0'` disables it. | | `playRates` | String | Comma-separated values (e.g., `"0.5,1,2,3"`) | Sets available playback speed options. Minimum value: `0.5`, Maximum value: `4`. | #### Usage These parameters are appended to the `playback_url` in the format `key=value`. Multiple parameters can be included by separating them with an ampersand (`&`). ##### Example Usage ```bash https://app.tpstreams.com/embed/dcek2m/BxDe5ZYDyD6/?access_token=72186a33-107a-49b6-b275-a853c907be33&muted=1&autoplay=1&loop=1&playRates=0.5,1,2,3 ``` #### Detailed Description - **`background`**: Controls whether the player operates in background mode, useful for scenarios where the video should continue playing in the background. - **`muted`**: Sets whether the video should start muted. If set to `'1'`, the video will begin without sound, which is especially useful in autoplay scenarios. - **`autoplay`**: Determines whether the video will start playing as soon as the player is ready. Setting this to `'1'` enables autoplay. - **`loop`**: Defines whether the video will automatically restart from the beginning after it finishes. A value of `'1'` enables looping. ** Sample format ** ```html
``` ### Embed on your site Now you use constructed iframe code in your code to embed the video. ** Example ** ```html live showLineNumbers --- ## Markers ### Enable plugin You can enable a plugin by passing query param **plugins** with value "markers to src URL" ### Initialize markers You can intialize markers through [Player SDK](../using-player-sdk.md) method call setMarkers ** Arguments ** | Name | Type | description | | ----------- | ----------- | ----------- | | markerDisplay | Object | The general css styling that would be applied to all the markers created by the plugin. The default is only concerned with width, border-radius, and background-color, but any other css rules would be applied too (think of it as jQuery's css function). | breakOverlay | Object | Options for the break overlays at each marker. Available fields => display, displayTime, style | You can read more about available arguments [here](http://sampingchuang.com/videojs-markers) ** Events ** | Name | description | | ----------- | ----------- | | onMarkerReached | This callback function is triggered whenever playback reaches the time interval from a marker. The interval is specified in the breakOverlay.displayTime . This can be used to trigger certain actions at each marker, depending on your use case. Again, this function is given a marker instance. In 0.6.0, the function also takes in a second parameter index. | | onMarkerClick | This callback function is triggered when clicking on the markers. The default behavior for clicking on the marker is seeking to that point in the video. However, if onMarkerClick returns false, the default behavior will be prevented. | ### Methods **Remove markers** You can remove the particular markers by passing its indices to removeMarkers function. ``` js player.removeMarkers([1,2,4]); ``` **Remove All markers** ``` js player.removeAllMarkers([1,2,4]); ``` ### Sample code ``` html
``` #### Output ![Domain restriction form](../../img/markers_output.png) --- ## Using Player SDK The iframe embed lets you embed your Streams videos and control the player using Javascript. You have access to the essential methods and properties of the players. There are events that you can listen for and execute custom actions in your web application. #### Adding the script Add the following script to the html of your web page. This loads the interface that are used to establish communication with the video player. If this script is loaded on-demand later, make sure to wait for the load to complete before calling subsequent methods on the object. ```js ``` #### Get a reference to the iframe Note: Assuming the API script (above) is already loaded, To begin communicating with the player, get a reference to the iframe element. This can be using DOM APIs such as querySelector(). ```js const iframe = document.querySelector("iframe"); ``` #### Establish communication with the iframe ```html page_title ``` #### What's next It's time to start controlling some videos. We've compiled a comprehensive reference of [methods](./player-methods) and [events](./player-events) to make your dreams of absolute power a reality. If we've confused you going forward, contact us. We tend to get it right the second time. --- ## Shaka Player Integration Guide This guide will walk you through integrating Shaka Player for playing TPStreams Non-DRM & multi-DRM-protected videos on your site. #### Why Use Shaka Player? - Adaptive Streaming: Automatically adjusts video quality based on network conditions. - Multi-DRM Support: Supports major DRM systems like Widevine, and FairPlay. - Cross-Browser Compatibility: Works across all modern browsers. - Open Source: Free to use and backed by Google. #### Setting Up Non-DRM Video Playback **1.1 Set Up the Basic HTML Structure** Create an HTML file, include the Shaka Player library and add a video element to play the video. ``` html ``` ##### 1.2 Initialize the Shaka Player Initialize a new instance of the Shaka Player and then attach it to the video element in your HTML and provide the manifest URL of your non-DRM video to the Shaka Player. ```javascript // You can obtain the M3U8 URL either through our portal or using our Asset Detail API. const manifestUri =''; function initApp() { // Install built-in polyfills to patch browser incompatibilities. shaka.polyfill.installAll(); if (shaka.Player.isBrowserSupported()) { initPlayer(); } else { console.error('Browser not supported!'); } } async function initPlayer() { const video = document.getElementById('video'); const player = new shaka.Player(); await player.attach(video); // Attach player to the window to make it easy to access in the JS console. window.player = player; try { await player.load(manifestUri); console.log('The video has now been loaded!'); } catch (e) { onError(e); } } function onErrorEvent(event) { onError(event.detail); } function onError(error) { console.error('Error code', error.code, 'object', error); } document.addEventListener('DOMContentLoaded', initApp); ``` #### Setting Up Multi-DRM Video Playback Now, let's extend our setup to support DRM-protected content. We will cover both Widevine and FairPlay DRM systems. ##### 2.1 Load Manifest URL Determine browser type using the user agent string to select either HLS (m3u8) for Safari or DASH (mpd) for others, ensuring compatibility with various DRM systems. You can obtain the both M3U8 and MPD file URLs via our Asset Detail API. ##### 2.2 Generate DRM License URLs To obtain DRM license URLs for both Widevine and FairPlay, follow these steps: Generate an access token granting access to the TPStreams License API. Refer to the provided [documentation](./authentication) for instructions. Use the following endpoint to construct the license URLs for both Widevine and FairPlay: ```bash https://app.tpstreams.com/api/v1//assets//drm_license/?access_token=&drm_type= ``` Replace placeholders with actual values: - ``: Your organization's ID - ``: ID of the asset - ``: Access token obtained in above step. - ``: Use "widevine" for Widevine or "fairplay" for FairPlay. Incorporate the generated license URLs into your Shaka Player configuration for Widevine and FairPlay DRM support. ##### 2.3 Implement Widevine DRM Support Specify the license server URL in the DRM configuration to enable Widevine DRM: ```javascript player.configure({ drm: { servers: { 'com.widevine.alpha': WIDEVINE_LICENSE_URL, }, }, }); ``` Register request filters with Shaka Player's networking engine to modify license requests: ```javascript player.getNetworkingEngine().registerRequestFilter(function (type, request) { if (type == shaka.net.NetworkingEngine.RequestType.LICENSE) { // This ensures that the license request contains the appropriate content type, // which is required by our API request.headers['Content-type'] = 'application/octet-stream'; } }); ``` ##### 2.4 Implement FairPlay DRM Support Retrieve the FairPlay DRM certificate from a specified URL before playback. This certificate is essential for decrypting the video content. ```javascript const response = await fetch(CERTIFICATE_PATH); const certificate = await response.arrayBuffer(); ``` Configure Shaka Player to use FairPlay DRM by specifying the license server URL and the fetched certificate in the DRM configuration. ```javascript player.configure({ drm: { servers: { 'com.apple.fps.1_0': FAIRPLAY_LICENSE_URL, }, advanced: { 'com.apple.fps.1_0': { serverCertificate: new Uint8Array(certificate), }, }, }, }); ``` Modify the initialization data for FairPlay by extracting the content ID and adjusting the license URL. This ensures proper handling of the video content by the FairPlay DRM system. ```javascript player.configure('drm.initDataTransform', (initData, type, drmInfo) => { if (type != 'skd') return initData; const contentId = new TextDecoder("utf-16").decode(initData.slice(16)); const cert = player.drmInfo().serverCertificate; return shaka.util.FairPlayUtils.initDataTransform( initData, contentId, cert ); }); ``` Register request filters with Shaka Player's networking engine to modify license requests. For FairPlay, set the appropriate headers and payload for the license request. ```javascript player.getNetworkingEngine().registerRequestFilter(function (type, request) { if (type == shaka.net.NetworkingEngine.RequestType.LICENSE) { request.uris = [FAIRPLAY_LICENSE_URL]; request.method = 'POST'; request.headers['Content-Type'] = 'application/json'; const originalPayload = new Uint8Array(request.body); const base64Payload = shaka.util.Uint8ArrayUtils.toStandardBase64(originalPayload); request.body = JSON.stringify({ spc: base64Payload, }); } }); ``` #### Setting Up Offline Download Support Shaka Player supports offline playback, enabling users to download and play DRM-protected videos without an active internet connection. - Refer to the Shaka Player [documentation](https://shaka-player-demo.appspot.com/docs/api/tutorial-offline.html) for implementing offline support. - When configuring DRM settings for offline download, follow the steps outlined earlier to construct the DRM license URL. Additionally, ensure to include the query parameter download=true to acquire a persistent license suitable for offline use. For complete sample code, refer to our sample [repository](https://github.com/testpress/shaka-player-demo/). --- ## Watermark Videos Videos hosted through Streams cannot be downloaded. There does however remain the risk of piracy from screen capture. Add text to videos with our dynamic watermark feature that effectively prevents users from pirating video content using screen capture, and goes a long way towards helping users protect their premium content. The dynamic watermark can be customized for movement, color, size and transparency. ### Create Watermark Code Here is a sample JSON string that adds a moving (dynamic) watermark and a static watermark. ```js { "annotations":[ { "type":"static", "text":"Testpress", "x":10, "y":10, "opacity":"0.5", "color":"#FFF", "size":6 }, { "type":"dynamic", "text":"hari", "opacity":"0.5", "color":"#FF0000", "size":6, "interval":5000, "skip":2000 } ] } ``` Technically, this is an array of JSON objects, where each object describe a single annotation item. Each of these items will be described by its parameters. Every item requires a **type** parameter which defines the type of watermark by default its value was static. The type of watermark can be either a moving text or a static text. The rest of the parameters depends on the type. Following is a short description of how each parameter affects the display of text. #### Static text The following code will display a static watermark code, placed at 10px distance from the left border of the video and 50px from top border, displaying text **Testpress** . The text color will be white (#fff), opacity is 0.5, and font-size is 6. ```js [{ "type": "static", "text": "Testpress", "x": 10", "y": 10, "opacity": "0.5", "color": "#FFF", "size": "6" }] ``` #### Moving text The following code will display a dynamic watermark code, displaying text **hari**. The text color will be red (#ff0000), opacity is 0.8, and font-size is 6. The watermark is configured to update position every 5 seconds (5000ms). ```js [{ 'type': 'dynamic', 'text': 'hari', 'opacity': '0.8', 'color': '#FF0000', 'size': '6', 'interval': 5000, 'skip': 2000, }] ``` **Type of text** Set type parameter as dynamic for Dynamic watermark and static for Static watermark ``` 'type':'dynamic', ``` **Set the text to be shown** ``` 'text" : 'testpress', ``` **Specify text opacity** This is the opacity of the text. For full opacity keep value 1. ``` 'opacity':'0.8', ``` **Specify text color** This is the hex value of the watermark text color. ``` 'color':'#FF0000', ``` **Specify the font size** This is the font size ``` 'size':6, ``` **Specify the interval over which watermark changes position** The value is the interval in milliseconds when the text changes position ``` 'interval':5000, ``` **Skip feature for watermark** It is possible to have watermark skip for some time between two overlays. Here is a sample code for it – ``` 'skip':2000 ``` ### Apply Watermark Now you just need pass the watermark code that you've created to the player to apply on the video. There are two ways to do that - Pass the code as part of the [Access token Request](../server-api/access-token.md#create-an-access-token). - Pass the code via Player SDK method called [applyWatermark](./javascript-sdk/player-methods#apply-watermark-to-the-video). --- ## Video ## Video Documentation Welcome to the Video documentation section. Select one of the areas below to get started: Video Embedding Learn how to embed our video player on your website or application. This section covers player parameters, customizing playback behavior, event tracking, and integrations with custom players like Shaka Player. Get Started Videos Uploader Learn how to integrate our video uploader. You can choose between the Embedded Uploader widget with built-in UI, or use the Javascript Uploader SDK for a fully customized uploading workflow. Get Started --- ## Embedded Uploader #### Introduction The TPStreams Uploader allows you to embed a powerful video upload tool directly on your website. With this integration, you can upload videos directly to your TPStreams account without needing to navigate away from your site, making the experience smooth and efficient. Whether you're embedding the uploader on a standalone page or in a modal, this guide will walk you through each step to get it up and running. ![Uploader UI](./img/uploader_step_1.png) ### Guide to integrate the uploader This guide will help you integrate the TPStreams video uploader into your website allowing you to upload videos directly to your TPStreams account. #### Step 1: Get the Authentication Token Use the API mentioned [here](../server-api/authentication.md) to obtain a user authentication token. This token is required for the uploader to authenticate uploads. #### Step 2: Import the TPStreams Uploader SDK Include the TPStreams Uploader SDK script in your webpage. Add the following ` ``` #### Step 3: Add the TPStreams Uploader HTML Element Place the following HTML tag where you want the uploader to appear on your webpage, including any modals if needed. Make sure to replace the organization-id attribute with your own TPStreams organization ID. ```html ``` Note: This tag also supports `width` and `height` attributes if you need to customize the dimensions of the uploader UI. #### Step 4: Initialize the Uploader When you are ready to display the uploader, execute the following JavaScript to initialize it with the authentication token: ```html ``` #### Full Example Code The following code will display the TPStreams uploader UI on your webpage, allowing users to upload videos directly to your account. ```html ``` #### Domain Restrictions for Embedding In TPStreams settings, you can restrict the allowed domains that can embed this uploader. Set the allowed domain(s) to ensure only specified sites can use your uploader. If no domain is specified, all domains are permitted by default. ![Domain Restriction](./img/uploader_allowed_domains.png) ### Uploader Events You can listen for events in the uploader by attaching a callback using .on() #### fileUploaded This event fires when a video is successfully uploaded to TpStreams. ```html ``` --- ## Javascript Uploader #### Introduction If you would like to upload videos without using the embedded uploader UI, you can use our javascript SDK that provides methods to upload videos, and track its progress. ### Guide to integrate the uploader This guide will help you integrate the TPStreams video uploader SDK into your website allowing you to upload videos directly to your TPStreams account. #### Step 1: Get the Authentication Token Use the API mentioned [here](../server-api/authentication.md) to obtain a user authentication token. This token is required for the uploader to authenticate uploads. #### Step 2: Import the TPStreams Uploader SDK Include the TPStreams Uploader SDK script in your webpage. Add the following ` ``` #### Step 3: Initialize the uploader instance Make sure to replace the organization id with your own TPStreams organization ID. Click [here](/docs/videos-uploader/javascript-uploader#uploader-configuration-options) to know more about the uploader configuration options. ```html ``` #### Step 4: Select files and start upload After you've created a file input on your webpage, you can pass those files to the uploader instance. You can pass an optional folder id argument to `upload` method if you'd like to upload the videos to a specific folder. ```html ``` #### Full Example Code The following code will display the video upload progress and asset ID on your webpage. ```html Video Upload with JS SDK

Upload Video Using TpStreams Uploader SDK

``` ### Uploader Configuration Options You can pass the following configuration options to the uploader while initializing using the `uploaderConfig` argument. **uploaderConfig** | Parameter | Description | Type | |-------------|-------------------------|-----------------| | generateSubtitle | Auto-generate english subtitles for $0.071 per minute of video. False by default. | Boolean | | contentProtectionType | Choose encryption standard to safeguard your videos. DRM encryption is enabled by default. | String ("drm", "aes" or "disabled") | | resolutions | Choose the resolutions in which you want to transcode the videos. By default they will be transcoded in all available resolutions. | List of string ["240p", "360p", "480p", "720p"] | ### Uploader Events You can listen for events in the uploader by attaching a callback using .on() #### uploadProgress Listen to this event to track video upload progress. ```html ``` #### uploadSuccess This event is fired when a video is successfully uploaded to TpStreams. ```html ``` #### uploadError This event is fired when an error occurs while uploading a video to TpStreams. ```html ```